There is a specific kind of joy found in late-night snacking. It’s that quiet time when the house is still, the TV is on, and you want something delicious without the guilt of a heavy dessert. For years, I searched for a recipe that balanced sweetness, texture, and simplicity. I wanted something that felt like a treat but didn’t require a degree in pastry chemistry. That search ended when I stumbled upon a unique combination: banana, egg, and dark chocolate, topped with a creamy Greek yogurt glaze.
This isn’t just another mug cake recipe. It is a versatile, flourless mini-cake or “bite” that relies on the natural sweetness of ripe bananas and the richness of dark chocolate. The best part? It’s incredibly forgiving. Whether you are a seasoned baker or someone who burns water, this recipe is designed for you. It has a slight banana scent that reminds you of comfort food, a sweet taste that isn’t overpowering, and a fresh yogurt topping that cuts through the richness of the chocolate.

In this guide, I’m going to walk you through everything you need to know to master this recipe. We will talk about ingredient selection, the science behind baking without flour, how to adjust for your specific microwave or air fryer, and why this combination is already delicious enough to become a weekly staple. So, grab a bowl, and let’s get started on making your new favorite snack.
Recipe Details at a Glance
| Recipe Details | Information |
|---|---|
| Cuisine | Fusion / Healthy Dessert |
| Course | Snack, Dessert, Breakfast |
| Difficulty | Easy / Beginner Friendly |
| Servings | 2-3 People (or 4-6 small bites) |
| Prep Time | 10 Minutes |
| Cook Time | 20 Minutes |
| Calories Per Serving | Approx. 220 kcal (varies by chocolate/yogurt brand) |
Why This Recipe Works: The Science of Simplicity
You might look at the ingredient list and wonder, “Where is the flour? Where is the sugar?” That is the beauty of this recipe. It relies on natural binders and sweeteners.
The Banana: When you mash a ripe banana finely, it acts as both the sweetener and the moisture agent. The starches in the banana break down as they cook, providing structure similar to flour.
The Egg: The room temperature egg is the glue. It provides protein and structure, allowing the batter to rise slightly and hold its shape in the oven or air fryer.
The Dark Chocolate: This adds fat and flavor. Because we are using dark chocolate, we avoid the excessive sugar found in milk chocolate, keeping the glycemic index lower while satisfying cravings.
Ingredient Deep Dive: Choosing the Best Components
To make this recipe truly shine, you need to be intentional about your ingredients. Here is what to look for at the grocery store.
1. The Banana
You need one large banana. However, ripeness matters immensely. Do not use a green or bright yellow banana. You want a banana that has brown spots on the peel. These “sugar spots” indicate that the starches have converted to sugar, meaning your cake will be naturally sweeter without needing added syrup. Peel it up and cut it appropriately before mashing. The finer you mash it, the smoother your batter will be.
2. The Egg
Use one room temperature egg. Why room temperature? Cold eggs can shock the melted chocolate, causing it to seize or harden prematurely. Room temperature eggs emulsify better, creating a silky batter. Mix well to ensure the yolk and white are fully incorporated with the banana.
3. The Dark Chocolate (Base)
You will need 80g of dark chocolate for the batter. The prompt mentions, “They say they like to be fast these days,” which implies we want efficiency. Cut the chocolate small. Smaller pieces melt faster and more evenly. I recommend using chocolate with at least 60% cocoa solids. This ensures you get that deep chocolate flavor without the cloying sweetness of candy bars.
4. Greek Yogurt (The Topping)
For the topping, we use Greek Yogurt. The source notes that it is “less hydrating than regular yogurt,” which in culinary terms means it is less watery. Regular yogurt has a high whey content that can make toppings runny. Greek yogurt is strained, making it thick and creamy. This creamy yogurt is good to put on a cake because it holds its shape and provides a tangy contrast to the sweet chocolate.
5. The Chocolate Coating
Finally, you need 30g of dark chocolate for the coating. This can be the same chocolate you used for the batter. This layer hardens in the refrigerator, giving you a satisfying “snap” when you break off a piece.
Step-by-Step Instructions
Let’s walk through the process. I’ve expanded on the original notes to ensure you don’t run into common pitfalls.
Phase 1: The Batter
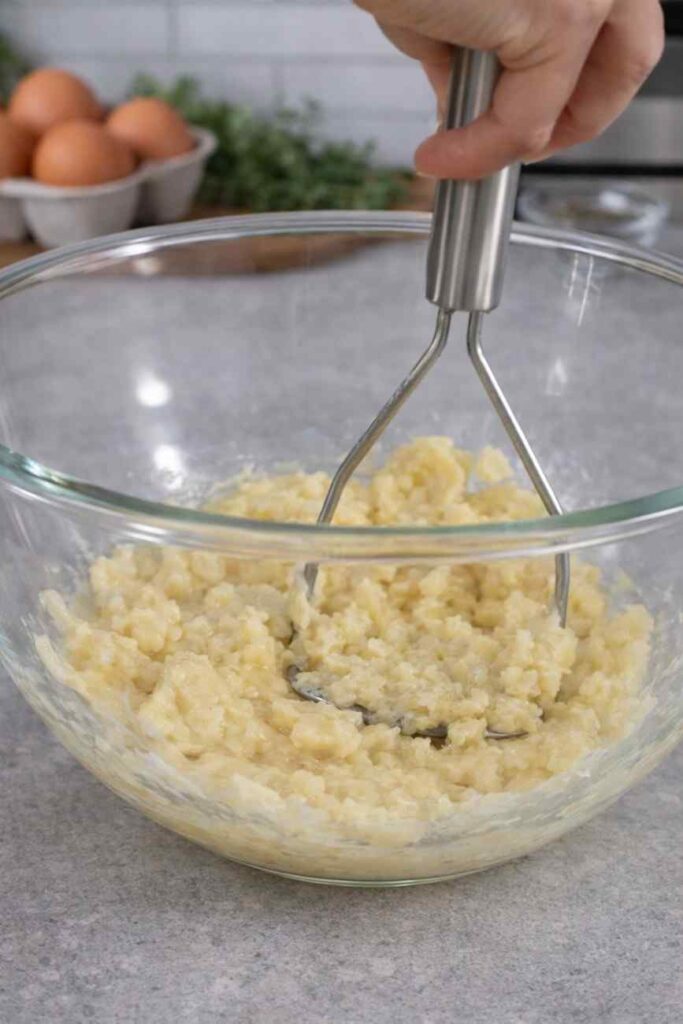
- Prep the Banana: Take your ripe banana, peel it, and place it in a mixing bowl. Using a fork, mash it finely. You want almost a puree consistency with no large chunks.
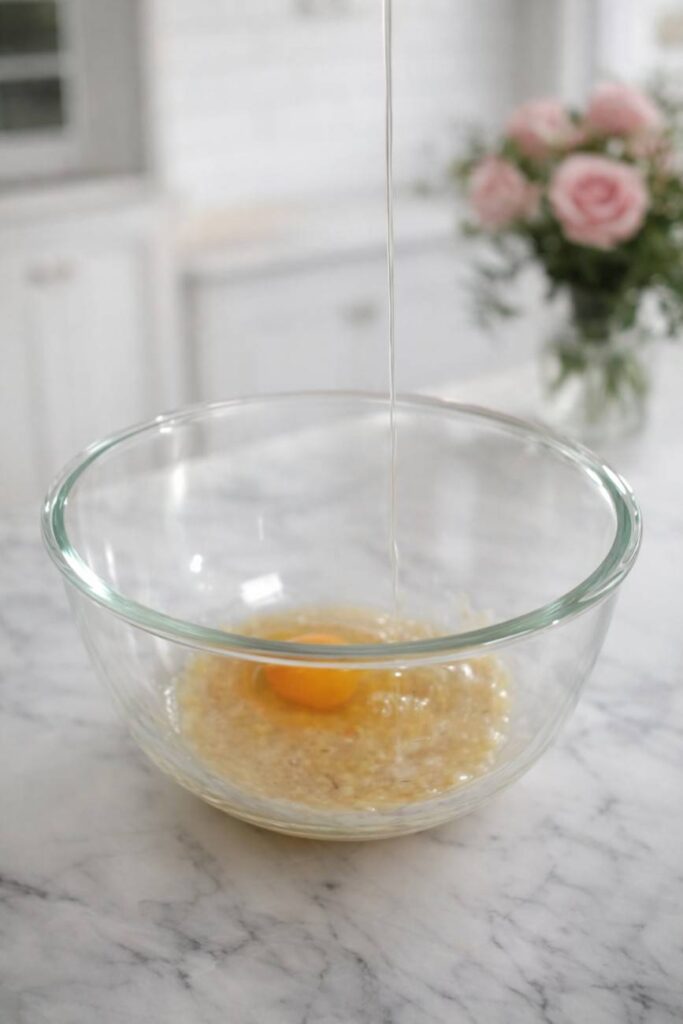
- Add the Egg: Crack your room temperature egg into the mashed banana. Mix well. Whisk vigorously for about a minute until the mixture looks frothy and uniform.
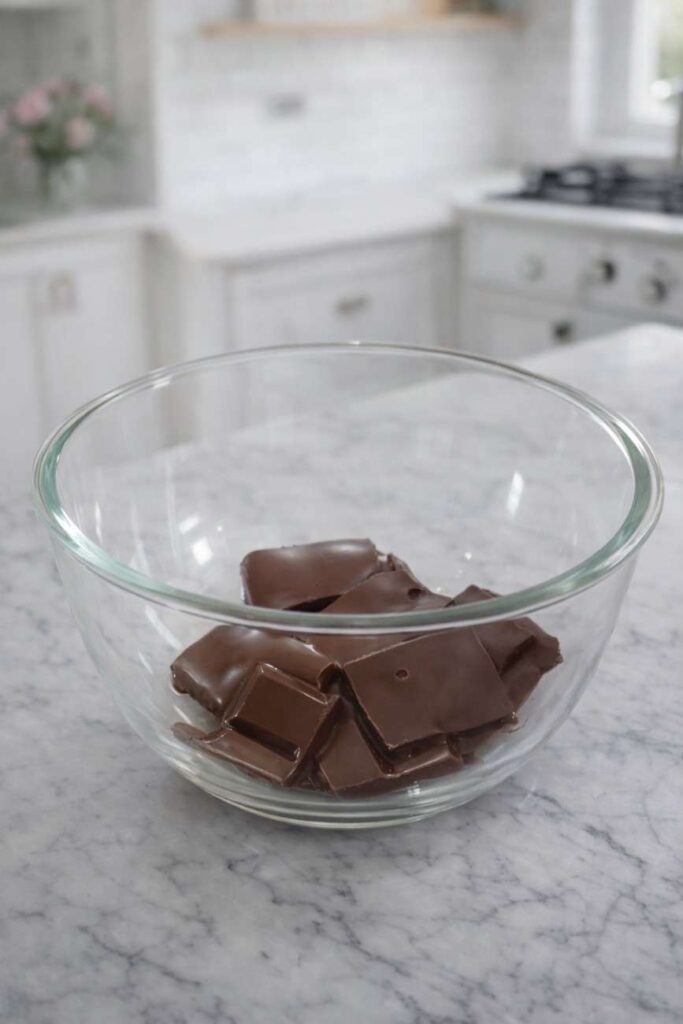
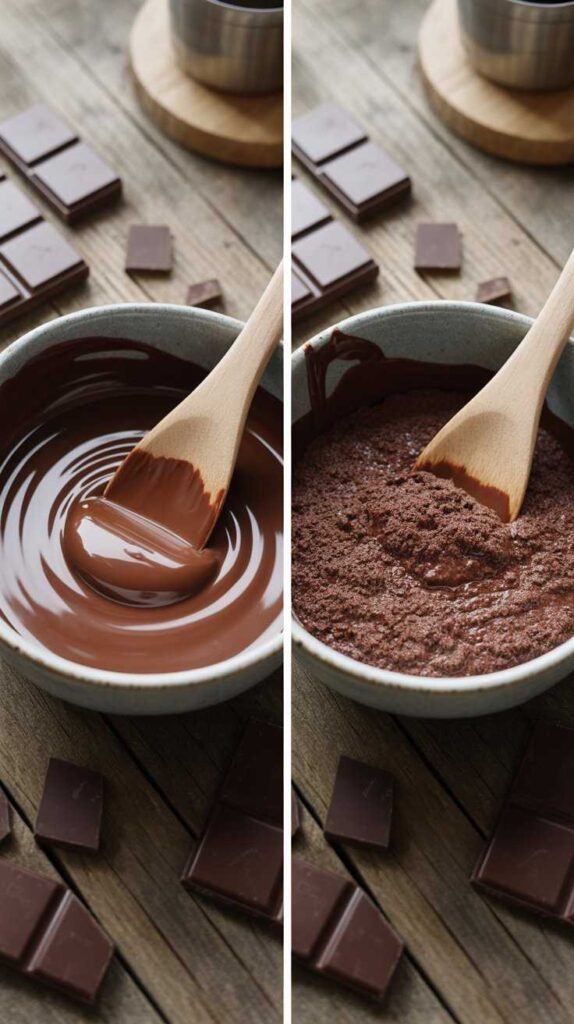
- Melt the Chocolate: Take your 80g of chopped dark chocolate. Place it in a microwave-safe bowl. Microwave for 1 minute. Important Note: The prompt says “varies by house.” This is crucial. Microwaves have different wattages. Start with 30 seconds, stir, then do 15-second intervals. You want it melted well but not burnt.
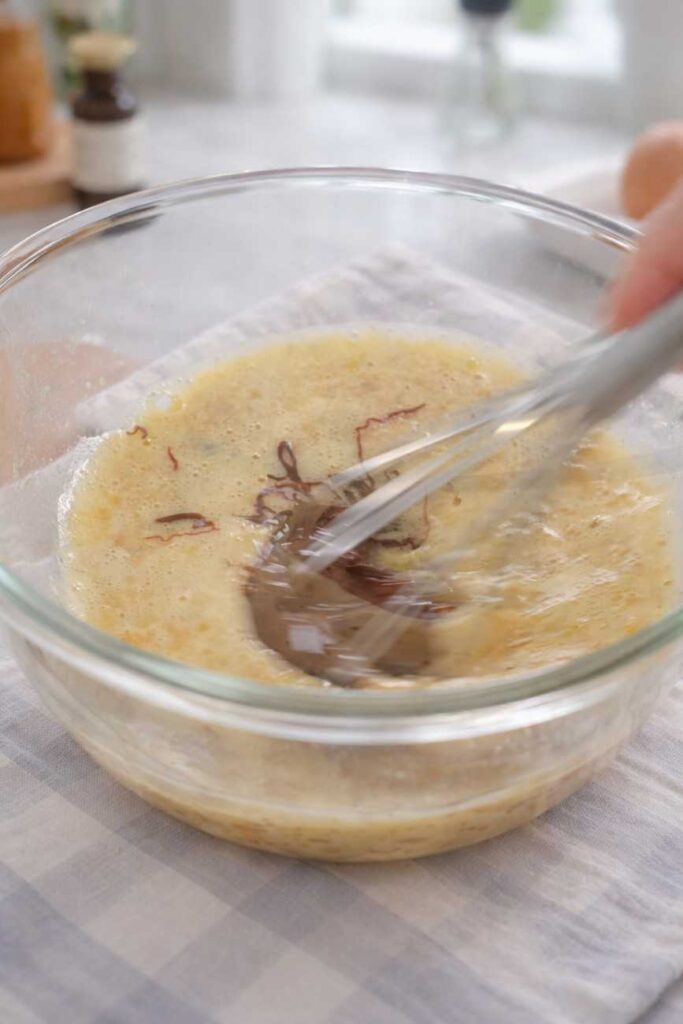
- Combine: Pour the melted chocolate into the egg and banana batter. Mix well. The heat from the chocolate might cook the egg slightly, so stir quickly to create a glossy, brown batter.
- Prepare the Vessel: Pour the mixture into a small baking bowl or a lined baking tray. If you want individual portions, silicone muffin cups work wonders here.
Phase 2: Baking
- Oven Method: Preheat your oven to 180°C (350°F). Place the bowl inside and bake for 20 minutes.
- Air Fryer Method: The prompt notes that an “Airfryer also works.” If using an air fryer, set it to 160°C (320°F) and check it at 15 minutes. Air fryers circulate heat more aggressively, so things cook faster.
- Cool Down: Once the time is up, remove the cake. It should be set but still slightly jiggly in the center (like a brownie). Let it cool down completely. If you try to top it while warm, the yogurt will melt.
Phase 3: The Topping and Finish
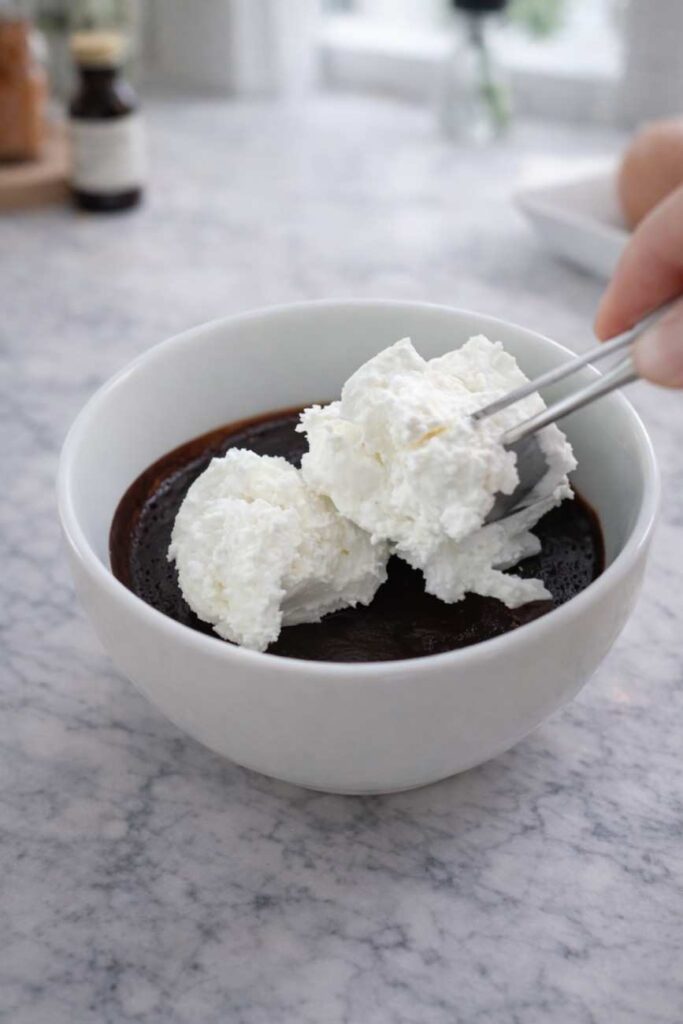
- Yogurt Layer: Once the cake is cool, spread your Greek yogurt over the top. Don’t be shy; a thick layer is delicious.
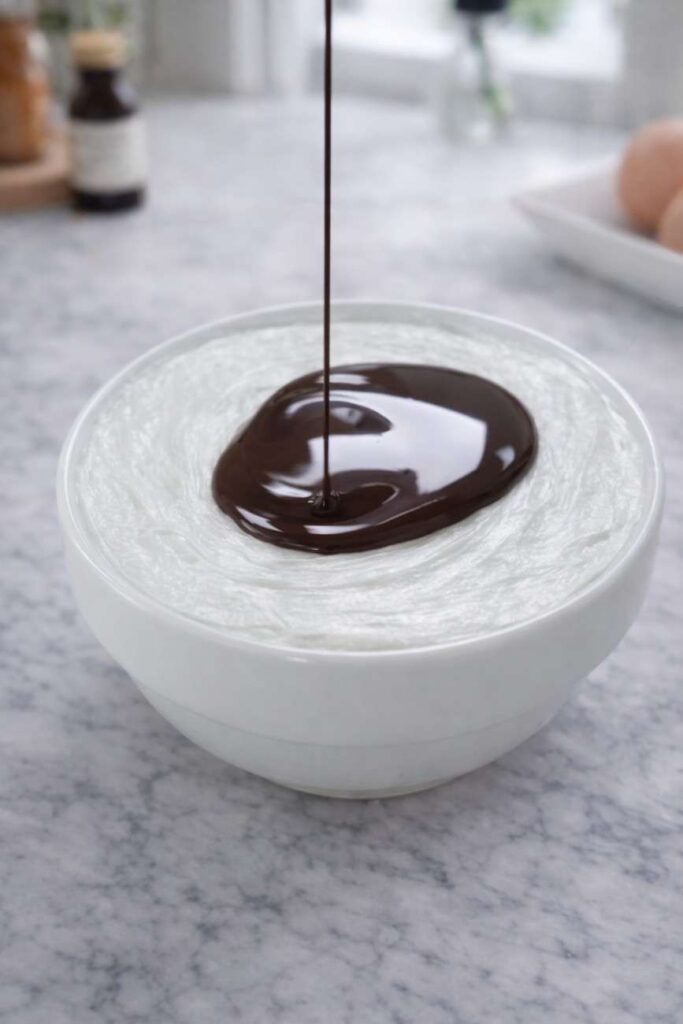
- Chocolate Glaze: Take your remaining 30g of chocolate. Microwave for 40 seconds (again, watch your wattage). Stir until smooth.
- Drizzle: Put the melted chocolate on the yogurt. Spread it thin. You want a decorative layer, not a solid block.
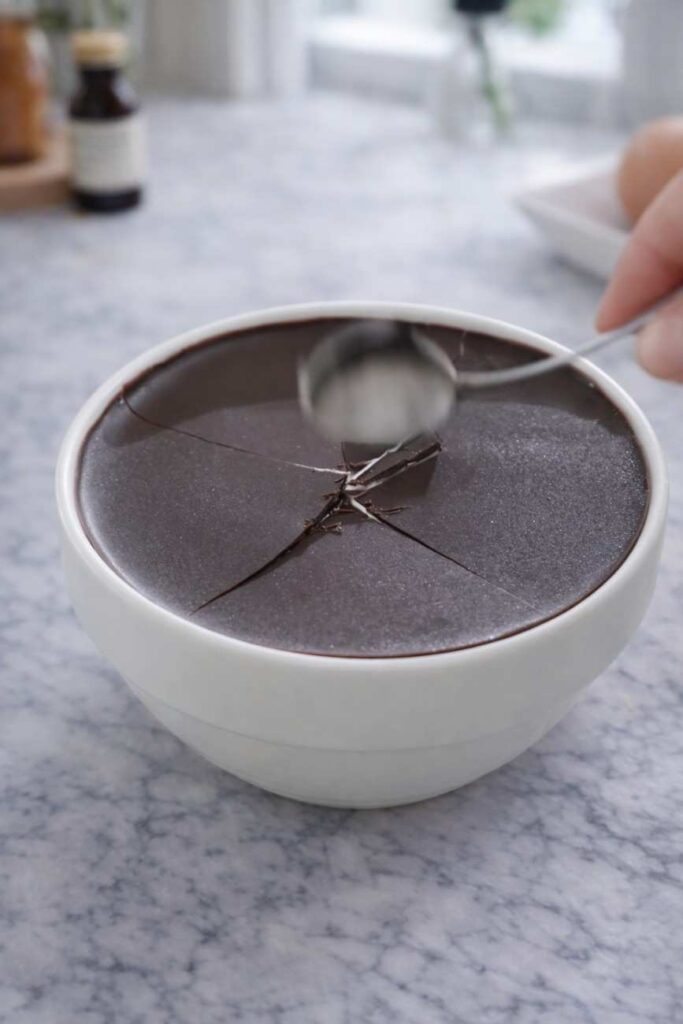
- Chill: Place the entire bowl in the refrigerator. Let it harden. This usually takes about 30 to 45 minutes.
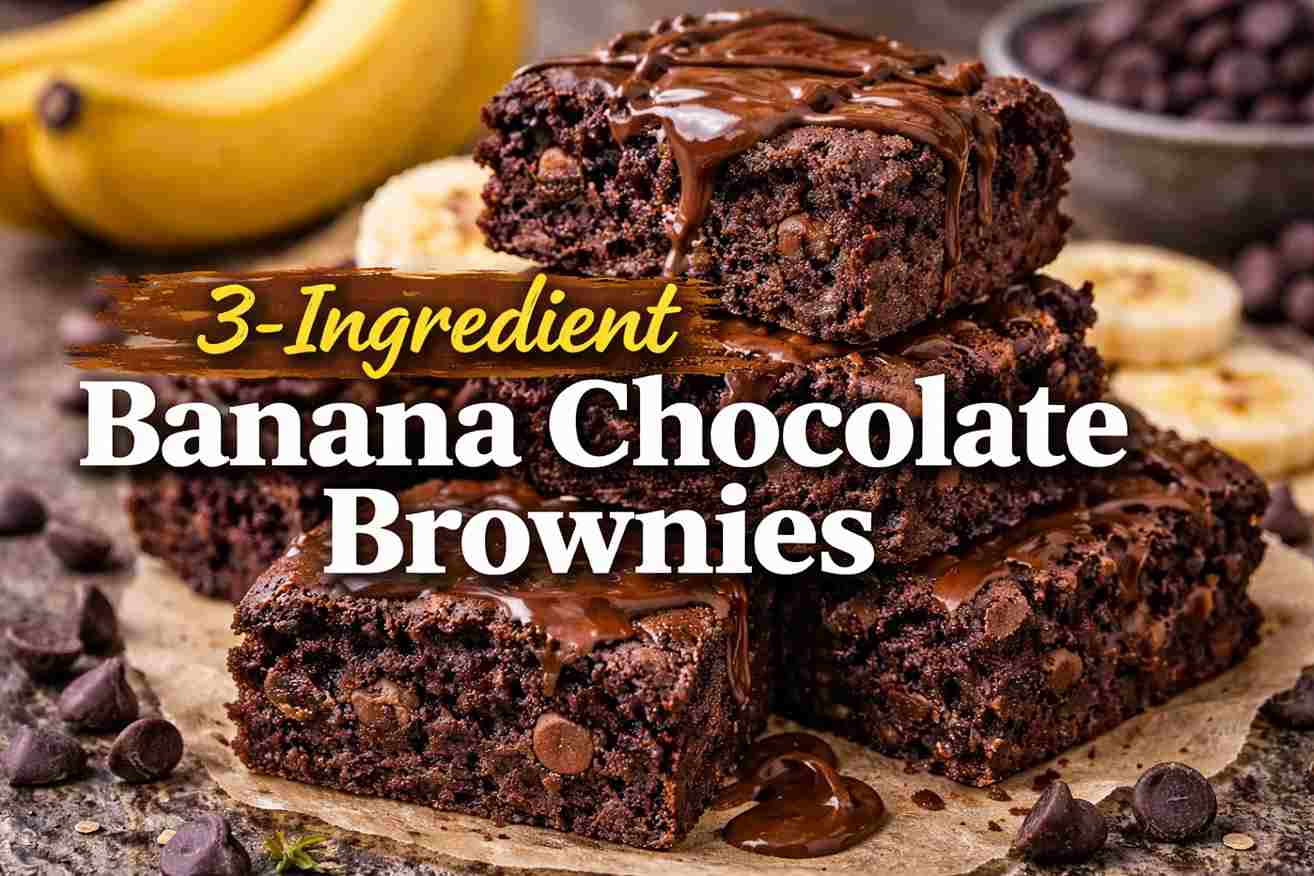
3-Ingredient Banana Chocolate Cake
No flour, no sugar — just banana, egg & dark chocolate with Greek yogurt topping
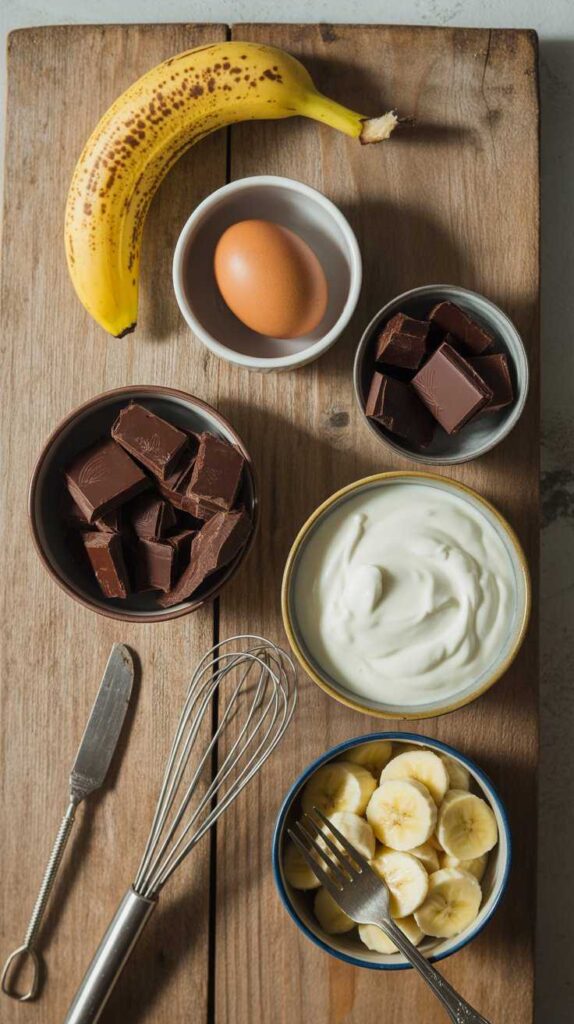
- 1 large ripe banana (with brown spots)*
- 1 egg, room temperature
- 80g dark chocolate (60%+ cocoa)
- Greek yogurt (thick layer)
- 30g dark chocolate (for glaze)
*Brown spots = “sugar spots” — starches converted to natural sugar. Don’t use green/bright yellow bananas.
Mash Banana
Peel ripe banana, place in bowl. Mash finely with fork until almost puree consistency — no large chunks. The finer, the smoother your batter.
Add Egg
Crack room temperature egg into mashed banana. Whisk vigorously for 1 minute until frothy and uniform. Room temp = better emulsion, won’t shock melted chocolate.
Melt Chocolate
Chop 80g dark chocolate small (melts faster). Microwave in 30-sec intervals, stirring between. Don’t burn! Should be melted and smooth.
Combine & Pour
Pour melted chocolate into banana-egg mixture. Stir quickly (heat may cook egg slightly) until glossy brown batter. Transfer to small baking bowl or silicone muffin cups.
Bake
Oven: 180°C (350°F) for 20 min. Air Fryer: 160°C (320°F), check at 15 min (cooks faster). Should be set but slightly jiggly in center like a brownie. Cool completely before topping.
Add Yogurt & Glaze
Once COOL, spread thick layer of Greek yogurt on top. Melt 30g chocolate (40 sec microwave), drizzle over yogurt. Spread thin for decorative layer.
Chill & Serve
Refrigerate 30–45 min until chocolate hardens. You’ll get satisfying “snap” when breaking off pieces. Serve cold!
Serving Suggestions: The “TV Time” Experience
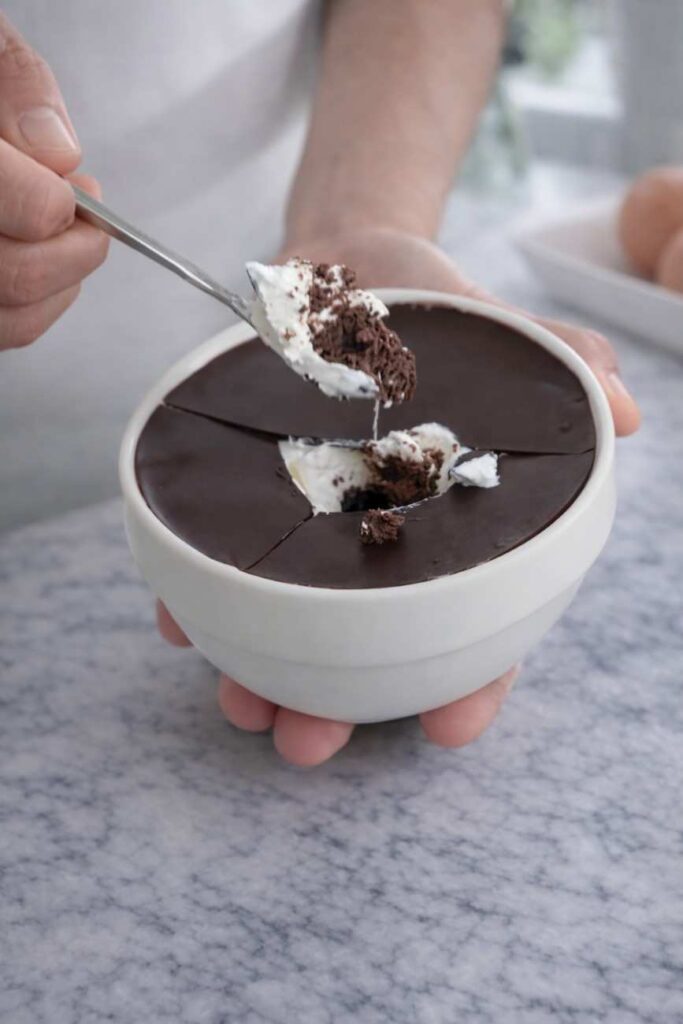
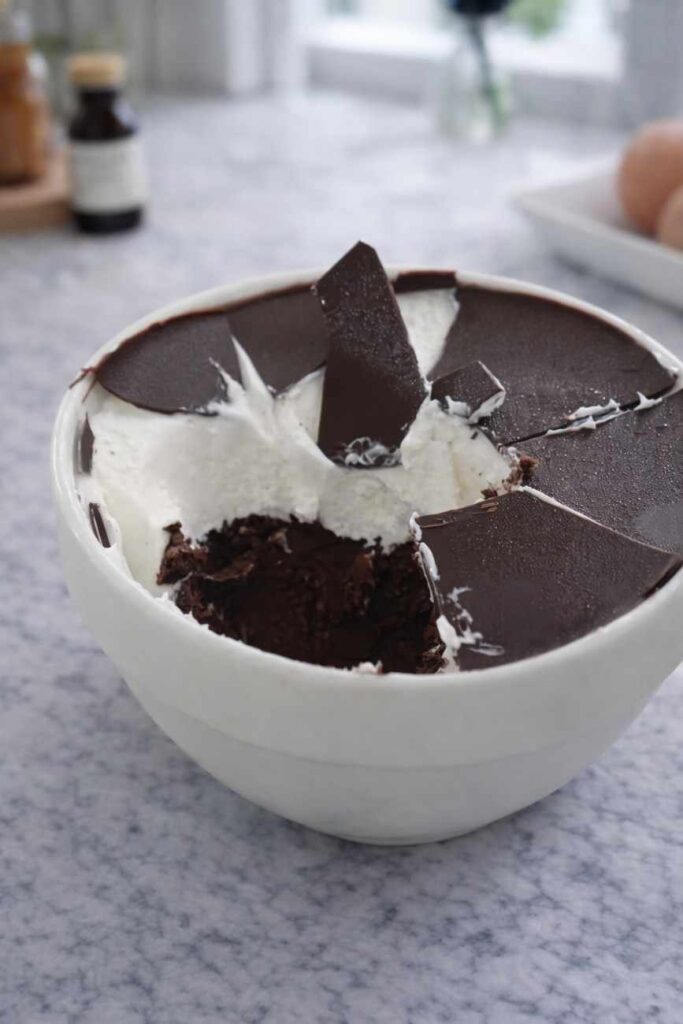
The original notes mention, “I’ve been waiting for this time.” There is a ritual to eating this dessert. Once it has hardened in the refrigerator, take it out.
It’s fun to break it up. Because the chocolate coating hardens and the base is dense, this doesn’t need a fork. You can break it into shards or bites with your hands. This tactile experience makes snacking more engaging.
Flavor Profile: It has a slight banana scent and a sweet taste. However, the best part is that it goes well with the fresh yogurt taste. Best of all, I like that it’s not too sweet. In a world of hyper-sugary desserts, this balance is refreshing.
Pairing:
- Beverage: This pairs beautifully with a black coffee or a cup of unsweetened tea. The bitterness of the drink complements the dark chocolate.
- Occasion: Eat occasionally as a snack. Then I will eat deliciously while watching TV. It is the perfect portion-controlled treat for a movie night.
Troubleshooting and Tips for Success
Even easy recipes can have hiccups. Here is how to ensure your Banana Chocolate Yogurt Bites turn out perfect every time.
My Chocolate Seized
If your chocolate turned into a grainy lump when you added it to the egg, the temperature difference was too high. Next time, let the melted chocolate cool for 2 minutes before mixing it with the egg. Also, ensure no water got into the chocolate bowl, as water causes chocolate to seize.
The Cake is Too Wet
If the center is still liquid after 20 minutes, your bowl might be too deep, preventing heat from reaching the center. Try spreading the batter into a thinner layer next time, or bake for an additional 5 minutes.
The Yogurt is Runny
Ensure you are buying Greek Yogurt or “Skyr.” Regular plain yogurt has too much liquid. If you only have regular yogurt, you can strain it through a cheesecloth for an hour before using it to thicken it up.
Microwave Variations
The prompt repeatedly mentions “varies by house.” This is the most important tip. Know your appliance. If you have a high-wattage microwave (1000W+), reduce the melting time to 20-second bursts. If you have an older, weaker unit, you may need the full minute or more. Never walk away from melting chocolate; it burns easily.
Nutritional Benefits: Is This Healthy?
While this is a dessert, it is far healthier than a standard brownie or slice of cake.
- Potassium: Bananas are famous for potassium, which helps with muscle function and blood pressure regulation.
- Protein: The egg and Greek yogurt provide a decent protein boost, which helps keep you satiated so you don’t overeat.
- Antioxidants: Dark chocolate is rich in flavonoids, which are good for heart health.
- Probiotics: Greek yogurt contains live cultures that are beneficial for gut health.
- No Refined Sugar: By relying on the fruit and dark chocolate, we eliminate the need for white sugar, reducing the spike in blood glucose.
Variations to Try Once You Master the Base
Once you have made this recipe a few times, you might want to experiment. Here are some human-approved variations:
- The Crunch Factor: Add 20g of chopped walnuts or almonds to the batter before baking. This adds texture and healthy fats.
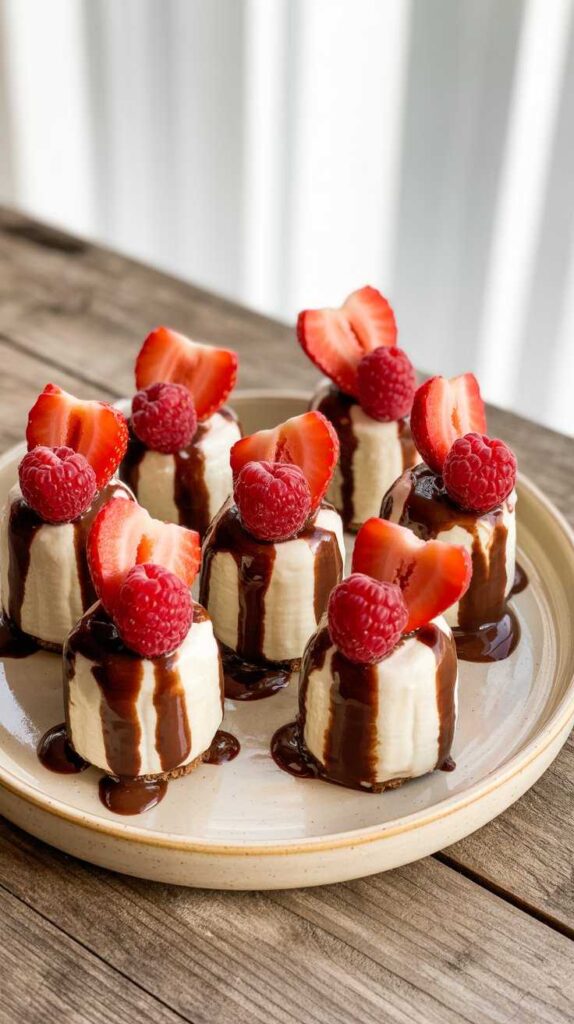
- Berry Blast: Top the yogurt with fresh raspberries or strawberries before adding the chocolate drizzle. The acid in the berries cuts through the richness.
- Peanut Butter Swirl: Before baking, drop a teaspoon of peanut butter into the batter and swirl it with a toothpick.
- Vegan Option: Replace the egg with a “flax egg” (1 tablespoon ground flaxseed meal mixed with 3 tablespoons water, let sit for 5 minutes). Use dairy-free yogurt and vegan dark chocolate.
- Spiced Version: Add a pinch of cinnamon or nutmeg to the batter. Banana and cinnamon are a classic pairing that enhances the warmth of the snack.
Storage and Shelf Life
One of the practical benefits of this recipe is how well it stores.
- Refrigerator: Keep the bites in an airtight container in the fridge. They will last for up to 3 days. The texture might become denser over time, which some people prefer.
- Freezer: You can freeze these! Wrap individual portions in parchment paper and place them in a freezer bag. They will last for up to 2 months. Let them thaw for 10 minutes before eating.
- Room Temperature: Do not leave these out for more than 2 hours, especially because of the egg and yogurt content. Food safety is key.
Final Thoughts: Embrace the Simplicity

In a world of complicated baking shows and recipes with twenty-step instructions, there is something revolutionary about a dish that requires just a few wholesome ingredients. This Banana Chocolate Yogurt Cake is proof that you don’t need a pantry full of flour, sugar, and leavening agents to create something satisfying.
It respects your time. It respects your health goals. But most importantly, it respects your craving for something sweet. The combination of the warm, fudgy base and the cold, creamy yogurt topping creates a sensory experience that is hard to beat.
So, the next time you find yourself scrolling through streaming services, looking for something to watch, remember this recipe. Peel that banana, melt that chocolate, and take 20 minutes for yourself. You’ve been waiting for this time. Enjoy the process, enjoy the smell of chocolate filling your kitchen, and most of all, enjoy eating deliciously while watching TV. It’s not just a snack; it’s a moment of peace in a busy day.
Happy baking, and don’t forget to break it up with your hands for the full experience!
Browse Every Recipe
The Complete Recipe Collection
From comforting weeknight dinners to elegant cocktails — every recipe from Relish the Recipe, all in one place.
- Beef Bourguignon
- Steak au Poivre
- Perfect Filet Mignon
- Grilled Coffee-Cola Skirt Steak
- Grilled Mojo Beef
- Vietnamese Lemongrass Chicken
- Honey Balsamic Pomegranate Glazed Chicken
- Mushroom Stuffed Chicken Breast
- Zesty Herb Marinated Grilled Chicken Thighs
- Baked French Onion Chicken
- One-Pan Tuscan Orzo with Chicken
- Creamy Peri Peri Chicken Pasta
- One-Pan Chicken Chorizo Orzo
- Jamaican Jerk Chicken & Plantain Skillet
- Pan Seared Pork Tenderloin in Peppercorn Gravy
- Citrus Glazed Roasted Pork Ribs
- Smothered Pork Chops with Mushroom Gravy
- Teriyaki Pork Noodles
- One-Pan Chorizo Rice Skillet
- Greek Lemon Roast Lamb & Potatoes
- Greek Lamb with Orzo
- Classic Greek Beef Stifado
- Sausage Ragù
- Italian Sausage & Lamb Ragù
- Sausage & Pepper Bolognese
- Sausage Ragù with Spinach & Ricotta
- Sausage & Zucchini Rigatoni
- 3 Italian-Style Meatloaves
- Brown Butter & Sage Mezzi Rigatoni
- Red Pesto Gnocchi
- Creamy Chicken Meatball Orzo
- Creamy French Onion Orzo Casserole
- Quick Vegan Lasagna
- Vegan Ramen
- Spicy Maple Tofu Rice Bowl
- Oven-Baked Potatoes with Meatballs & Cheese
- Oven-Roasted Crispy Potatoes
- Crispy Potato Tacos
- Korean Sweet & Spicy Beef Meatballs
- Lean Jalapeño Beef Burger
- Vegan Bulgogi Pinwheels
- Vegan Cabbage Rolls
- Creamy Broccoli & Garlic Soup
- New England Creamy Clam Chowder
- Manhattan Clam Chowder
- Split Pea Soup
- Ham & Bean Soup
- Hearty Vegetable Barley Soup
- Creamy Asparagus Soup
- French Cream of Chestnut Soup
- Classic Provençal Fish Soup
- Carnival Squash Soup with Turmeric
- Vegan Chicken & Dumpling Soup
- 30-Minute Creamy Shrimp Alfredo
- Crispy Buffalo Chicken Wonton Cups
- Buffalo Chicken Cauliflower Dip
- Buffalo Chicken Garlic Bread
- Crispy Garlic Parmesan Wings
- Garlic Butter Cheese Bombs
- Quick Ham & Cheese Pinwheels
- Philly Cheesesteak Stuffed Rolls
- Bacon Cheeseburger Dip
- Pepperoni Pizza Dip
- Brown Sugar Bacon-Wrapped Smokies
- Chili Crisp Egg Avocado Toast
- Crispy Rice Cake Benedict
- Savory Chicken Salad Cucumber Rolls
- Cabbage & Lentil Rolls
- Shrimp Bruschetta
- Honey Butter Cornbread
- Spinach & Onion Savory Jam
- Ultimate Big Mac Salad
- Chicken & Potato Croquettes
- High-Protein Lentil Crackers
- Blueberry Tiramisu
- Kunafa Tiramisu
- Lighter Eggnog Tiramisu
- Mirror Glaze Raspberry Mousse Cake
- Ombré Heart Buttercream Cake
- Valentine’s Day Mini Cakes
- Molten Mini Chocolate Lava Cakes
- High-Protein Pumpkin Mousse
- No-Bake Oreo Delight
- No-Bake Pistachio Cheesecake
- No-Bake Banana Pudding
- Samoa Brownies
- Cream Cookie Chunk Fudge
- Thin & Chewy Chocolate Chip Cookies
- Red Velvet Cookies
- Valentine Heart Cookies
- Strawberry Cheesecake Tacos
- Healthy Oatmeal Apple Banana Cake
- Sugar-Free Oat Cakes
- Sugar-Free Banana Oat Brownies
- Coconut Cove Baked Oatmeal
- Blueberry Apple Morning Oats Cake
- Sugar-Free Dates, Banana & Chocolate
- Low-Carb Cottage Cheese Ice Cream
- Keto Schnitzel
- Keto Beef Roulades
- Fluffy Keto Cloud Bread
- Keto Muffins
- Keto German Chocolate Cake
- Keto Yogurt Almond Cake
- Keto Spinach & Feta Omelette
- Keto Bacon Cheeseburger Casserole
- Keto Eggplant Parmesan
- 15-Min Keto Creamy Garlic Chicken
- Low-Carb Tuscan Chicken Bake
- One-Pot Zoodle Alfredo
- Keto Garlic & Herb Breadsticks
- Keto Chocolate Chip Banana Bread
- Keto Tortillas
- 3-Ingredient Carnivore Bun
- Mediterranean Stuffed Roasted Peppers
- Red Lentil Bread
- Classic Whiskey Sour
- Old Fashioned
- Manhattan
- Hot Apple Whisky Lime
- Classic Margarita
- Frozen Strawberry Margarita
- Strawberry Coconut Margarita
- Mango Chilli Margarita
- Paloma
- Aperol Spritz
- Moscow Mule
- Strawberry Basil Mule
- Vodka Cranberry
- 3 Ways: Blueberry Vodka Lemonade
- Homemade Piña Colada
- Mermaid Mimosa
- Passion Fruit Martini
- Honolulu Highball
- Angel Face
- Mandarin Sunrise
- Pomegranate Gimlet
- Southside Gin Cocktail
- Paper Plane
- White Lady
- Almond Joy Cocktail
- Green Tea Shot
- Black Grapes Mojito
- 10 Best Rum Cocktails