This is the ultimate guide to Buffalo Chicken Cauliflower Dip, for anyone who misses the flavor of hot, tangy buffalo chicken dip but wants a healthier, low-carb version. This is your ultimate resource for perfect Buffalo Chicken Cauliflower Dip, every time. I cover everything from nutritional comparisons, troubleshooting your dip, cooking your dip in several ways, and detailed make-ahead tips.
Nutritional Showdown: Traditional vs. Cauliflower Buffalo Dip
Before I jump into the recipe, I just want to show you why I think cauliflower is the best replacement when trying to make a healthier buffalo chicken dip. In this easy-to-read comparison, you can see the drastic change in calories, carbs and vitamins and minerals that you DON’T have to sacrifice flavor for health!
| Feature | Traditional Buffalo Chicken Dip (Per Serving) | Buffalo Chicken Cauliflower Dip (Per Serving) |
| Calories | 350-450 kcal | 180-250 kcal |
| Carbohydrates | 15-25g | 5-10g |
| Protein | 20-30g | 25-35g |
| Fat | 25-35g | 10-18g |
| Fiber | 1-2g | 3-5g |
| Key Nutrient Boost | Minimal | Vitamin C, K, Folate |
Why the Cauliflower Advantage? Making the simple swap of taking a carb-loaded base or heavy cheese and replacing it with cauliflower cuts calories and carbs and bumps up the fiber and vitamins that your body needs. Its a perfect Game changer!
The Perfect Blend: Ingredients You’ll Need
Crafting the ultimate Buffalo Chicken Cauliflower Dip requires a balance of fresh ingredients and pantry staples. Here’s what you’ll gather:

- Cauliflower: 1 large head (about 2-2.5 lbs), cut into florets. This is our low-carb base!
- Cooked Chicken: 2-3 cups shredded or finely diced (rotisserie chicken works great for speed!).
- Cream Cheese: 8 oz block, softened. Full-fat for the best creaminess.
- Greek Yogurt: 1/2 cup plain, full-fat. Adds tang and protein while reducing fat content from mayo.
- Hot Sauce: 1/2 cup (Frank’s RedHot is classic). Adjust to your spice preference.
- Ranch or Blue Cheese Dressing: 1/4 cup (optional, for extra flavor depth).
- Cheddar Cheese: 1 cup shredded, plus more for topping.
- Mozzarella Cheese: 1/2 cup shredded (for stretchiness, optional).
- Garlic Powder: 1 tsp
- Onion Powder: 1 tsp
- Salt & Black Pepper: To taste
- Garnish: Chopped green onions, fresh parsley, extra hot sauce drizzle.
Buffalo Chicken Cauliflower Dip: The Definitive Recipe
This recipe yields a rich, flavorful dip perfect for any occasion.
- Yields: 8-10 servings
- Prep time: 20 minutes
- Cook time: 30-45 minutes (depending on method)
- Calories per serving: ~220-250 kcal
- Cuisine: American
- Course: Appetizer, Side Dish
- Difficulty: Easy to Medium
Step-by-Step Instructions


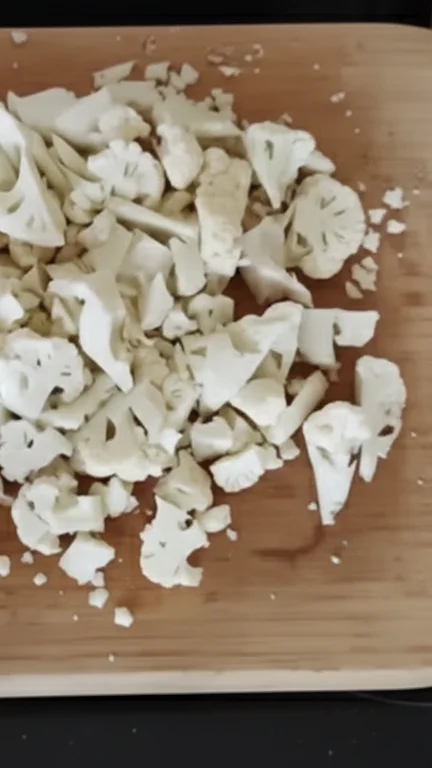
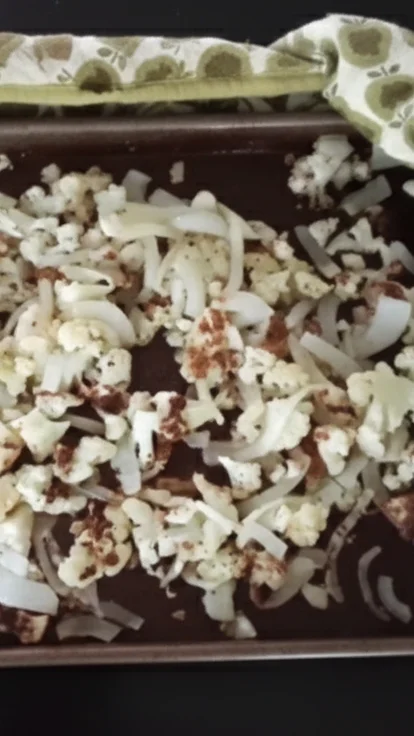
- Prepare the Cauliflower:Steam, boil, or roast cauliflower florets until they are very tender. I want the cauliflower to be fork-tender and easily mashed with a fork.
- Mash the Cauliflower: Drain the cooked cauliflower thoroughly. Using a potato masher, fork, or immersion blender, mash until smooth. For a creamier texture, you can even pulse it in a food processor. Pro Tip: Once the cauliflower is mashed, squeeze it with a clean kitchen towel or cheesecloth to extract as much moisture as possible.
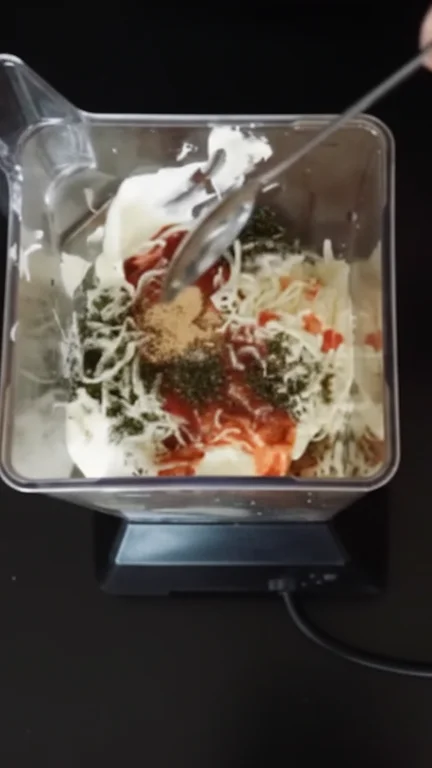
- Combine the Base: This step is important to avoid watery dip! In a large bowl, combine the mashed cauliflower with softened cream cheese, Greek yogurt, hot sauce, ranch/blue cheese dressing (optional), garlic powder, onion powder, salt, and pepper. Stir well until creamy and smooth.
- Add Chicken & Cheese: Add in the shredded chicken, 1 cup of cheddar cheese, and mozzarella (optional)
- Bake or Cook: Transfer the mixture to your chosen cooking vessel. Top with an additional sprinkle of cheddar cheese.
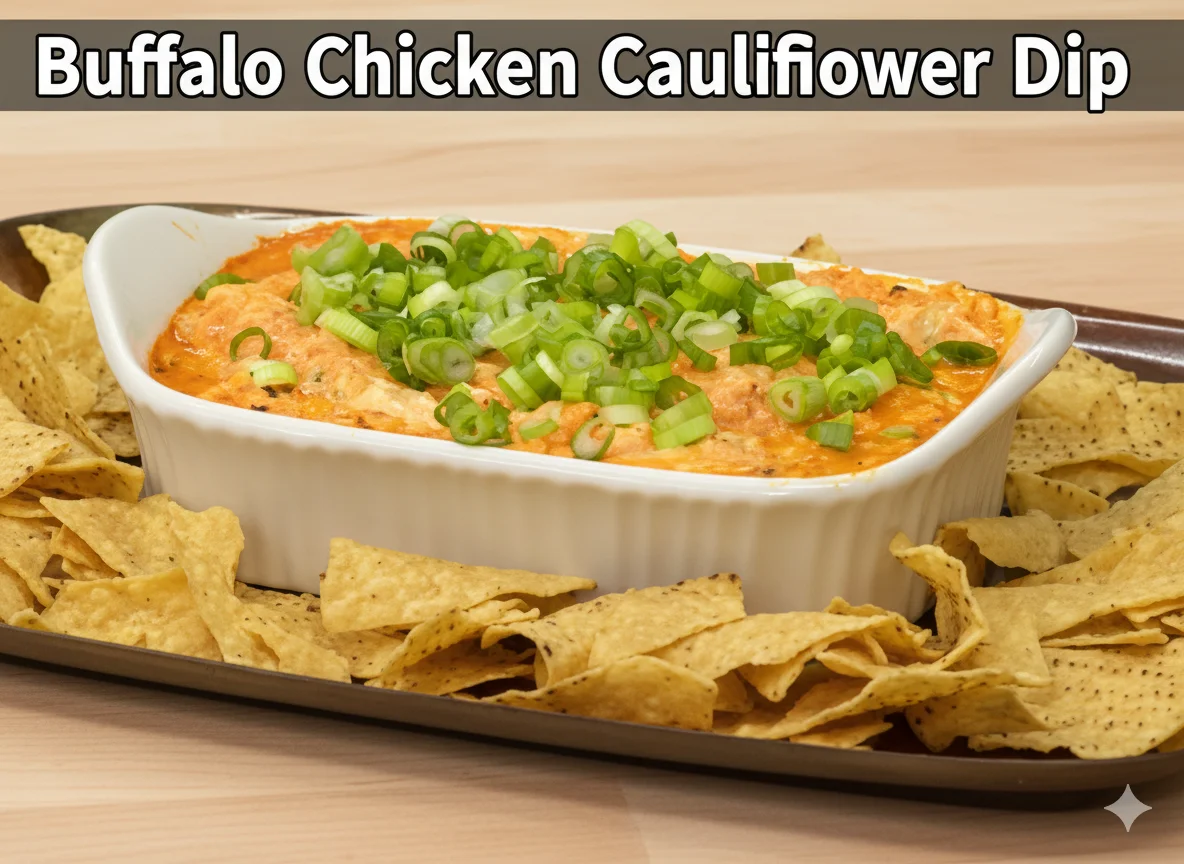
- Garnish & Serve: Once cooked, let it rest for a few minutes. Garnish with chopped green onions or parsley. Serve hot with your favorite dippers!

Buffalo Chicken Cauliflower Dip
This recipe yields a rich, flavorful, and healthier dip perfect for any occasion.
Ingredients
- 1 large head of cauliflower, cut into florets
- 2-3 cups cooked chicken, shredded
- 8 oz block cream cheese, softened
- 1/2 cup plain Greek yogurt
- 1/2 cup hot sauce (e.g., Frank’s RedHot)
- 1/4 cup ranch or blue cheese dressing (optional)
- 1 cup shredded cheddar cheese, plus more for topping
- 1/2 cup shredded mozzarella cheese (optional)
- 1 tsp garlic powder
- 1 tsp onion powder
- Salt and black pepper to taste
- Chopped green onions or parsley for garnish
Instructions
- Prepare the Cauliflower: Steam, boil, or roast cauliflower florets until very tender and easily mashable.
- Mash the Cauliflower: Drain the cooked cauliflower thoroughly. Use a potato masher, fork, or immersion blender to mash it until smooth.
- Combine the Base: In a large mixing bowl, combine the mashed cauliflower, softened cream cheese, Greek yogurt, hot sauce, dressing (if using), garlic powder, onion powder, salt, and pepper. Mix until well combined and creamy.
- Add Chicken & Cheese: Fold in the shredded chicken, 1 cup of cheddar cheese, and mozzarella (if using). Stir until everything is evenly distributed.
- Bake or Cook: Transfer the mixture to your chosen cooking vessel (e.g., a baking dish). Top with an additional sprinkle of cheddar cheese. Follow your preferred cooking method (Oven, Air Fryer, etc.).
- Garnish & Serve: Once cooked, let the dip rest for a few minutes. Garnish with chopped green onions or parsley and serve hot with your favorite dippers!
Pro Tip: Squeeze out any excess moisture from the mashed cauliflower using a clean kitchen towel or cheesecloth. This is the most crucial step to prevent a watery dip!
Troubleshooting Your Buffalo Chicken Cauliflower Dip: Fix Common Faux Pas
Nothing is more disappointing than a dip that’s not quite right. Here’s how to diagnose and fix common issues, ensuring a perfect dip every time.
1. The Watery Dip Disaster
- Problem: If Your dip is runny, thin, and lacks that satisfying creaminess.
- Visual Indicator: you can see that there are pools of liquid visible around the edges or on top of the dip.
- Cause: The cauliflower’s excessive moisture content is the most frequent offender. The water content of cauliflower is very high!
- Solution:
- Prevention is Key: Allow your cauliflower to cool slightly after cooking (steaming is the best method for reducing water absorption). After that, move it to a fresh kitchen towel or many paper towel layers and press out as much liquid as you can. The amount of water that comes out will astonish you! For a thick dip, this stage cannot be compromised.
- Post-Cook Fix: You might try thickening your dip if it’s still runny after baking. Once again, put the dip in a saucepan over low heat and simmer it slowly, stirring frequently, until part of the liquid is cooked out. Or, to assist in absorbing liquid and give body, whisk in a tiny amount of softened cream cheese or a tablespoon of grated Parmesan cheese.
2. The Separated, Oily Mess
- Problem: Your dip appears to be split, with a greasy texture or a film of oil on top.
- Visual Indicator: curds, a fractured emulsion, or an obvious oil sheen.
- Cause: The fats in the cheese and cream cheese may separate as a result of overcooking or excessive heat. Occasionally, using low-fat dairy can also help.
- Solution:
- Gentle Heat: Always reheat and boil your dip slowly. Don’t use excessive heat on it.
- Stir it Back:Try taking it off the stove and giving it a good swirl for a minute or two if separation happens while cooking. The fats will frequently re-emulsify into the dip.
- Add an Emulsifier:It can be brought back together with a little milk or a small amount of additional cream cheese, mixed in gradually.
3. Too Bland or Too Spicy? Finding Flavor Balance
- Problem: The dip lacks zing, or it’s overwhelmingly spicy.
- Visual Indicator: You’re wondering where the flavor went or reaching for water too frequently.
- Cause: either too little seasoning or the wrong ratio of hot sauce.
- Solution:
- Too Bland: Taste as you go and gradually add additional hot sauce. Flavors can be enhanced with a splash of lemon juice or apple cider vinegar. Remember to add salt & pepper! Another way to increase the heat without adding a lot of liquid is to add a pinch of cayenne pepper.
- Too Spicy: To reduce the heat, stir in additional Greek yogurt, cream cheese, or a dollop of sour cream. The spice can also be balanced with a small amount of honey or maple syrup (1/2 tsp at a time).
Multi-Method Cooking Instructions: Oven, Air Fryer, Instant Pot, Slow Cooker
Pick your journey! There are distinct benefits to each way for making this delectable dip.
1. Classic Oven Baked (Most Common)
- Advantages: Even cooking, beautiful browned top.
- Instructions:
- Preheat oven to 375°F (190°C).
- Transfer prepared dip mixture to a 9×13 inch baking dish (or a smaller dish for thicker dip).
- Bake for 20-25 minutes, or until bubbly and heated through.
- For a golden top, broil for the last 2-3 minutes, watching carefully to prevent burning.
- Optimal Result: Creamy, hot, with a slightly browned and bubbly cheese topping.
2. Speedy Air Fryer (Quick & Crispy)
- Advantages: Faster cooking, can yield slightly crispy edges.
- Instructions:
- Preheat air fryer to 350°F (175°C).
- Transfer dip mixture to an oven-safe dish that fits in your air fryer basket.
- Air fry for 12-18 minutes, shaking the basket or stirring halfway through, until heated through and bubbly.
- Optimal Result: Quick, hot, with a lovely texture.
3. Instant Pot (Hands-Off & Convenient)
- Advantages: Mostly hands-off, great for “dump and go” prep.
- Instructions:
- Combine all dip ingredients (except the extra topping cheese) directly in the Instant Pot liner.
- Stir well.
- Secure the lid and set the valve to sealing.
- Cook on HIGH pressure for 5 minutes, then perform a quick release.
- Stir well, then add the topping cheese. If desired, use the “Sauté” function on low for a few minutes with the lid off to melt the cheese further and thicken slightly.
- Optimal Result: Perfectly melded flavors, very creamy.
4. Slow Cooker (Party-Friendly & Warm)
- Advantages: Ideal for keeping warm at parties, great for make-ahead.
- Instructions:
- Combine all dip ingredients in your slow cooker.
- Cook on LOW for 2-3 hours or on HIGH for 1-1.5 hours, stirring occasionally, until heated through and bubbly.
- Switch to the “Warm” setting for serving.
- Optimal Result: Stays warm for extended periods, perfect for grazing.
Advanced Make-Ahead & Party Planning
Are you throwing a party?You really gotta have this dip!It may be prepared ahead of time, which saves a ton of time and usually results in a superior flavor!
Party Timeline
- 2-3 Days Before: Mash the cauliflower and cook and shred the chicken.Keep each one individually in the refrigerator in an airtight container.
- 1 Day Before: Combine all of the dip’s ingredients, excluding the final cheese garnish.Keep in the refrigerator in an airtight container.
- Day of Party (1-2 Hours Before Serving): Fill your cooking vessel (slow cooker or baking dish) with the prepared dip.After adding the last cheese topping, bake or cook according to the directions above.
- Serving: In a slow cooker or chafing dish.
Storage Optimization
- Refrigeration: Store leftover dip in an airtight container for up to 3-4 days.
- Freezing (Not Recommended): Because of the dairy, freezing can change the dip’s texture and increase the likelihood that it will separate when reheated. It is best consumed either fresh or briefly refrigerated.
Reheating Techniques
- Oven: Preheat the oven to 300°F (150°C). After transferring the dip to an ovenproof dish, loosely cover it with foil and bake it for 15 to 20 minutes, or until it is well warm.
- Microwave: Heat individual servings in 30-second increments, stirring occasionally, until they are warm.
- Stovetop: Heat the dip thoroughly in a saucepan over low heat, stirring often. If it looks too thick, add a little milk or chicken broth.
Content Differentiation: Enhancing Your Dip Experience
We’re going beyond the basics to ensure your Buffalo Chicken Cauliflower Dip stands out!
Equipment Comparison & Recommendations
Having the right tools makes all the difference!
- Baking Dishes: For oven baking, a typical 9×13-inch glass or ceramic baking dish works well. Use an 8×8 or 9×9-inch dish for a thicker dip.
- Potato Masher / Immersion Blender: An immersion blender or potato masher is necessary to get that really smooth cauliflower foundation.
- Slow Cooker: For keeping the dip warm at gatherings, a 4-6 quart slow cooker works well. Seek models that have a “warm” setting.
- Air Fryer: Any air fryer that has a basket big enough to fit a tiny ovenproof dish will do. Before buying, check the inside dimensions!
- Food Processor: If you want a particularly smooth texture, a food processor is great for rapidly shredding chicken and mashing cauliflower.
Dietary Variation Hub: Adapt Your Dip!
This recipe is incredibly versatile. Here’s how to tailor it to various dietary needs:
- Dairy-Free:
- Cream Cheese: Use a plant-based cream cheese alternative.
- Greek Yogurt: Substitute with plain, unsweetened dairy-free yogurt (e.g., almond, soy, or coconut-based).
- Cheese: Use your favorite dairy-free shredded cheddar and mozzarella.
- Paleo/Whole30:
- Cauliflower: Naturally compliant.
- Chicken: Ensure it’s compliant (no added sugars or questionable ingredients).
- Hot Sauce: Use a Whole30 approved hot sauce (check labels carefully, Frank’s Original is often compliant).
- Cream Cheese/Greek Yogurt/Cheese: This is the challenge. For a true Whole30 version, you’d need to omit these and find alternative ways to create creaminess, perhaps with cashew cream or a compliant dairy-free “cream cheese” made from nuts. Note: Achieving the exact texture without dairy is difficult, so set expectations.
- Vegan/Vegetarian:
- Chicken: Replace with shredded jackfruit, chickpeas, or store-bought vegan shredded chicken.
- Cream Cheese/Greek Yogurt/Cheese: Follow the dairy-free substitutions above.
- External Link: For a fully vegetarian buffalo cauliflower wing dip, check out this recipe for inspiration: Vegetarian Buffalo Cauliflower Wing Dip
Seasonal Optimization & Occasion-Specific Advice
Make your dip relevant year-round with these tips!
- Super Bowl Preparation: A food processor works well for quickly mashing cauliflower and shredding chicken if you want a very smooth texture. Serve with classic dippers and a side of Buffalo Chicken Garlic Bread for an epic spread.
- Tailgating Transport:Use a disposable aluminum pan to prepare and bake the dip. To keep warm, wrap firmly in foil and carry in an insulated carrier.
- Holiday Party Integration: Serve as a healthier substitute for heartier appetizers. Add festive garnishes, such as green onions and red bell pepper strips. For a refreshing counterpoint, consider serving a Virgin Pina Colada Mocktail!
- Summer BBQ: Serve cold or warm, along by fresh vegetable sticks.
- Meal Prep: You can put leftovers into tiny containers for easy, nutritious lunches, but a whole batch might be too much for daily meal planning. Serve alongside carrots and celery.
Serving Suggestions & Perfect Pairings
The right dippers elevate your Buffalo Chicken Cauliflower Dip from great to unforgettable!
- Classic Veggies: Celery sticks, carrot sticks, bell pepper strips (red, yellow, orange).
- Low-Carb Options: Cucumber slices, blanched broccoli florets, pork rinds, almond flour crackers.
- Traditional Favorites: Tortilla chips, pita bread, sturdy crackers.
- Unique Pairings: Serve alongside a crisp green salad, or as a topping for baked potatoes or even protein powder cinnamon rolls for a surprising sweet and savory brunch (okay, maybe just the first two!)
Conclusion: Your Path to Buffalo Dip Domination
This comprehensive guide to Buffalo Chicken Cauliflower Dip offers a step-by-step recipe for consistently making a healthier, delectable, and flawlessly textured appetizer. You’re now prepared to wow guests and sate appetites guilt-free thanks to our thorough troubleshooting, which addresses typical problems, a variety of cooking techniques, and sophisticated make-ahead solutions.
Keep in mind that knowing the science behind the ideal dip is just as important to success as the ingredients. Accept the cauliflower, learn the tricks, and savor your new favorite healthy party food!
Frequently Asked Questions
1. My cauliflower dip is always watery. How do I make it thicker?
The number one cause of watery dip is excess moisture in the cauliflower. To guarantee a thick, creamy dip, you must squeeze as much water as possible from the cooked, mashed cauliflower using a clean kitchen towel or cheesecloth before mixing it with other ingredients. This single step makes the biggest difference!
2. Is this Buffalo Chicken Cauliflower Dip keto-friendly and low-carb?
Yes, absolutely! By using cauliflower as the base instead of starches, this dip is naturally low in carbohydrates. With approximately 5-10g of carbs per serving, it’s an excellent choice for anyone following a ketogenic or low-carb diet.
3. Can I make this dip ahead of time for a party?
Yes, this dip is perfect for making ahead. You can fully assemble the dip (without the final cheese topping) up to 24 hours in advance and store it covered in the refrigerator. When you’re ready to serve, just add the cheese topping and bake according to the instructions. The flavors often get even better overnight!
4. Can I freeze this dip?
Freezing is not recommended for this dip. The high dairy content (cream cheese, Greek yogurt, and cheese) can cause the texture to become grainy and separate when thawed and reheated. For the best quality and creaminess, it’s best to enjoy it fresh or refrigerated for up to 4 days.
5. The dip is too spicy for my guests. How can I make it milder?
You can easily adjust the spice level. To make it milder, simply reduce the amount of hot sauce. If you’ve already made it and it’s too spicy, stir in a bit more cream cheese, Greek yogurt, or a dollop of sour cream. These dairy components will help temper the heat without compromising the creamy texture.
6. What’s the best way to reheat leftovers?
For best results, reheat the dip in an oven-safe dish at 150°C (300°F) for 15-20 minutes until warmed through. You can also microwave individual portions in 30-second intervals, stirring in between. Reheating gently on the stovetop over low heat also works well; add a splash of milk if it seems too thick.
7. Can I make a vegetarian or vegan version of this dip?
Definitely! For a vegetarian version, you can replace the shredded chicken with shredded jackfruit or crumbled chickpeas. For a fully vegan dip, use plant-based substitutes for the cream cheese, yogurt, and shredded cheese in addition to the chicken replacement. There are many high-quality dairy-free alternatives available today that work beautifully.
8. What are the best things to serve with this dip?
This dip is very versatile! For low-carb and healthy options, serve it with celery sticks, carrot sticks, bell pepper strips, cucumber slices, or pork rinds. For more traditional pairings, tortilla chips, sturdy crackers, pita bread, or toasted baguette slices are all fantastic choices.
