There are snacks that fill you up, and then there are snacks that genuinely make you feel good about eating them. Chilli Cheese Spinach Balls occupy that rare and wonderful intersection — the kind of recipe where you get to have it both ways. On the outside, they look and taste every bit as indulgent as your favorite fried snack: golden, crispy, crunch-coated, and deeply satisfying to bite into. On the inside, there’s a molten, stretchy, spice-kissed mozzarella filling surrounded by a base made from spinach, sweet corn, chickpeas, and roasted gram flour. You are, without really trying, eating something that is genuinely nutritious, genuinely high in protein, and genuinely packed with vegetables — while it tastes like a celebration.

This recipe is the answer to every situation where you want to serve something impressive without spending hours in the kitchen. It works as a party appetizer that disappears from the plate before you’ve even finished plating the second batch. It works as a tea-time snack on a rainy afternoon when you want something warm and satisfying. It works as a lunchbox addition that makes everyone around the table curious about what you’ve packed. It even works as a light dinner alongside a bowl of soup or a fresh salad when you want something substantial but not heavy.
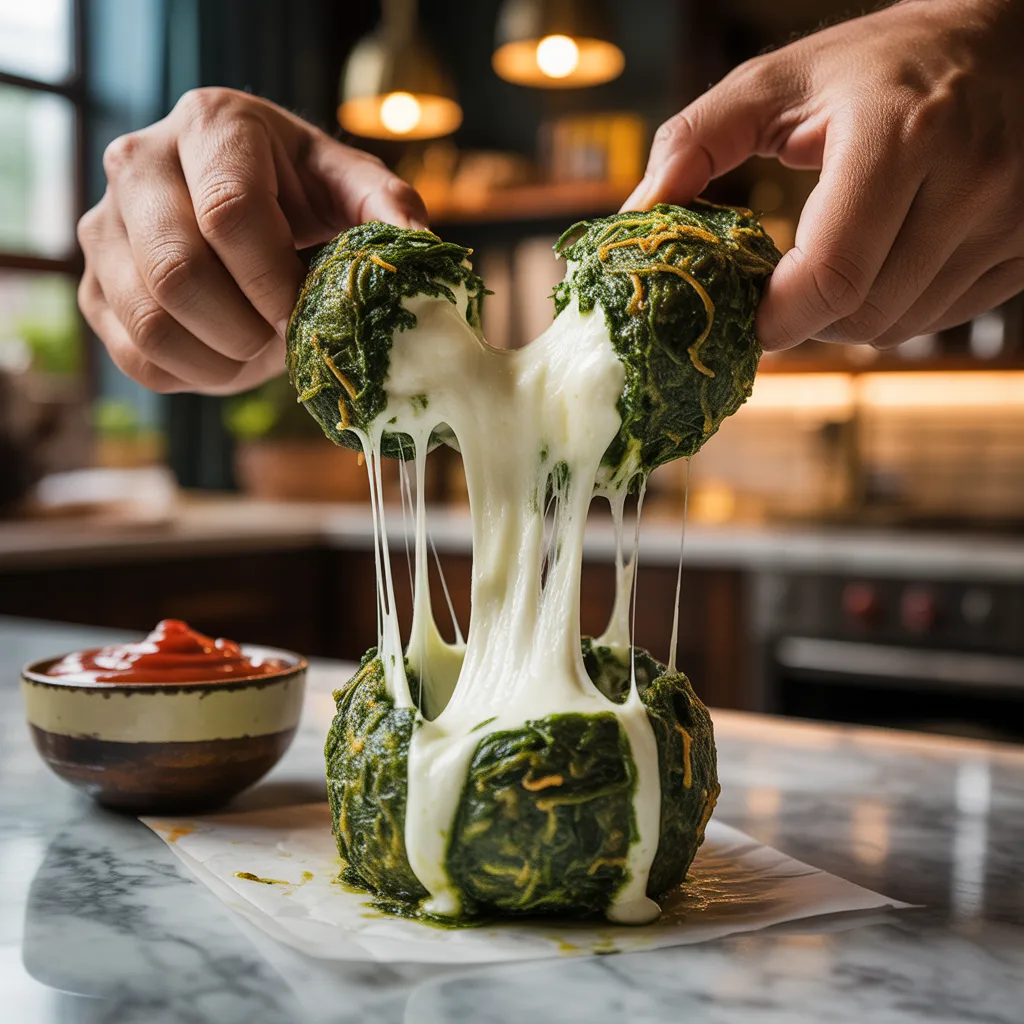
What makes it particularly special is the layering of flavors and textures throughout. The outer covering carries the earthiness of blanched spinach, the sweetness of corn, the nuttiness of roasted besan, and the savory backbone of chickpeas and garlic — all pressed together into a firm, shapeable base that holds its form beautifully whether you air fry, shallow fry, or deep fry it. The stuffing inside is where the drama lives: grated mozzarella mixed with chilli flakes, peri peri masala, and crushed garlic, so that every bite of the outer ball is followed by a hit of spicy, molten, stretchy cheese that pulls and stretches in the most deeply satisfying way.
These are not your average cheese balls. These are cheese balls with a story. Let’s make them.
Recipe at a Glance
| Feature | Details |
|---|---|
| Cuisine | Indian Fusion / Snack |
| Course | Appetizer / Snack / Party Bite |
| Difficulty | Easy to Medium |
| Servings | 4 (approximately 12–14 balls) |
| Prep Time | 20 Minutes |
| Cook Time | 15–20 Minutes (air fry) / 10–12 Minutes (fry) |
| Total Time | ~40 Minutes |
| Calories per Serving | ~220–260 kcal (air fried) / ~280–320 kcal (deep fried) |
Why This Recipe Works So Well
Most cheese ball recipes rely heavily on potatoes or refined flour as the binding base — which works, but produces something fairly one-dimensional in terms of nutrition and flavor. This recipe takes a completely different approach by building the outer covering from three genuinely substantive ingredients: spinach, sweet corn, and chickpeas.
Each of these contributes something distinct. The spinach, after blanching, adds a beautiful green color to the outer covering and carries a subtle earthy flavor that balances the richness of the cheese filling beautifully. The sweet corn adds natural sweetness, a pleasant textural variation, and acts as a moisture contributor that helps the mixture bind without needing any egg or potato. The chickpeas are the structural backbone — they are what gives the covering its firmness, its ability to hold shape during cooking, and its protein richness. Roasted gram flour (bhuna hua besan) ties everything together as the binding agent, adding a nutty, toasted quality that raw besan simply doesn’t have.
The stuffing is built around mozzarella for its stretch factor, then elevated with chilli flakes, peri peri masala, and crushed garlic into something that tastes intentional and exciting rather than just melted cheese. The peri peri masala is doing real work here — it brings a layered, complex heat with citrus notes and spice depth that chilli flakes alone cannot provide.
The breadcrumb coating seals everything in and provides the shatteringly crispy exterior that makes the first bite so rewarding.
Ingredients
For the Outer Covering
- ½ bunch fresh spinach, washed and blanched
- 1 cup sweet corn kernels, boiled
- 1 cup chickpeas, boiled (canned and drained works perfectly)
- 4–5 garlic cloves
- Salt to taste
- ½ cup roasted gram flour (bhuna hua besan)For the Stuffing
- 1 cup mozzarella cheese, grated or cut into small cubes
- 1 tablespoon chilli flakes
- 1 teaspoon peri peri masala
- 2 garlic cloves, crushed
For Coating and Cooking
- 1 cup breadcrumbs (fine or panko — both work, panko gives a crunchier result)
- Oil as needed (for brushing if air frying, or for shallow/deep frying)
A Note on Key Ingredients
Roasted Gram Flour (Bhuna Hua Besan)
Roasted gram flour is not the same as regular raw gram flour, and the distinction matters significantly in this recipe. Raw gram flour has a slightly raw, bitter edge when used as a binder without cooking. Roasted gram flour — which has been dry-toasted in a pan until lightly golden and fragrant — has a nutty, warm, mellow flavor that blends seamlessly with the spinach and chickpea base. To roast besan at home, simply dry-toast it in a pan over medium-low heat for 4 to 5 minutes, stirring continuously, until it turns a very light golden and smells nutty. Allow it to cool before using.
Peri Peri Masala
Peri peri masala is a commercially available spice blend inspired by the flavors of African Bird’s Eye chilli — it combines heat with citrus, garlic, and various warm spices into a single complex seasoning. Popular brands like Nandos or locally available supermarket versions all work well. If unavailable, you can approximate it with a mixture of cayenne, smoked paprika, garlic powder, lemon zest, and dried oregano.
Blanched vs. Raw Spinach
Blanching the spinach before using it in the covering is essential. Raw spinach contains a very high proportion of water — if used raw, this water releases into the mixture during mixing and cooking, making the covering too wet to hold its shape. Blanching removes this excess moisture and concentrates the flavor and color of the spinach. Squeeze the blanched spinach firmly in your hands or in a clean cloth to remove as much remaining water as possible before adding to the processor.
Step-by-Step Instructions
Step 1: Blanch and Prep the Spinach
Bring a pot of water to a rolling boil and add a generous pinch of salt. Add the washed spinach leaves to the boiling water and blanch for exactly 60 to 90 seconds — you want the leaves to be completely wilted and bright green, not gray or overcooked. Using a slotted spoon or tongs, transfer the spinach immediately into a bowl of ice-cold water. This ice bath halts the cooking process instantly and locks in that vivid green color.
Once the spinach is fully cooled, drain it from the ice bath and squeeze it firmly in your hands, in a clean kitchen cloth, or in a colander with a spoon — squeeze out as much water as you possibly can. The spinach should feel almost dry to the touch when adequately squeezed. Set aside.

Step 2: Boil the Sweet Corn and Chickpeas
If using fresh corn, strip the kernels from the cob and boil in salted water for 5 to 7 minutes until tender. If using frozen corn, cook from frozen in boiling water for 3 to 4 minutes. If using canned corn, simply drain and rinse.
For the chickpeas, canned chickpeas that have been drained and rinsed are perfectly convenient and will work just as well as freshly boiled chickpeas for this recipe. If cooking from dried chickpeas, soak overnight and boil until completely tender — no firm spots.
Step 3: Make the Outer Covering Mixture
In a food processor or blender, combine the squeezed spinach, boiled corn, boiled chickpeas, and the 4 to 5 garlic cloves. Pulse the mixture in short bursts rather than processing continuously — you want a coarse, slightly rough texture where some corn kernels are partially intact and the chickpeas are roughly broken down, not a completely smooth puree. If the mixture is too smooth, it will be too soft and wet to shape. Aim for a texture similar to rough mashed potatoes — it should hold together when pressed.
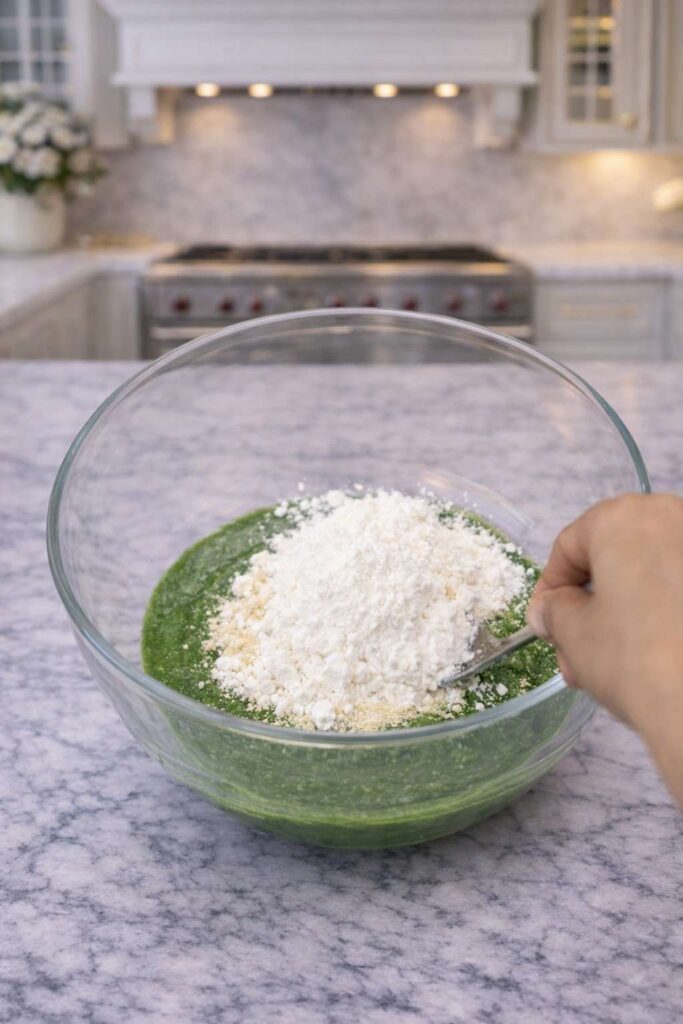
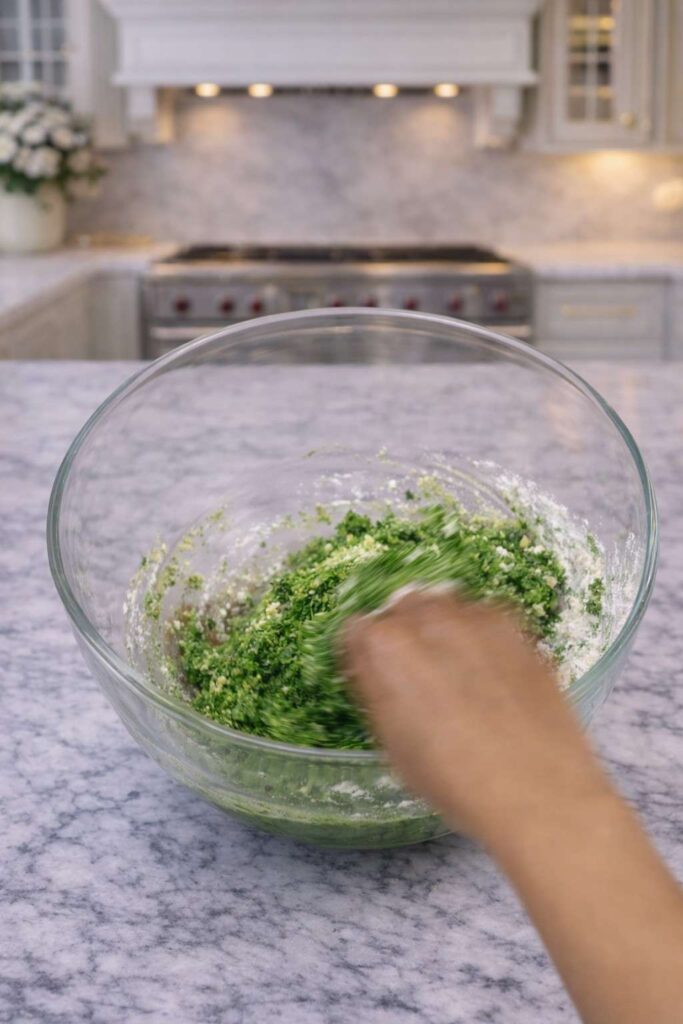
Transfer this mixture to a large mixing bowl. Add the roasted gram flour and salt to taste. Mix everything together thoroughly with your hands or a spatula. The roasted besan will absorb any remaining moisture in the mixture and bind everything together. The final mixture should be firm enough to shape into balls without sticking excessively to your hands. If it feels too wet or sticky, add an additional tablespoon of roasted besan. If it feels too dry or crumbly, add a very small splash of water — just enough to bring it together.
Cover the bowl and refrigerate for 15 minutes. This chilling time helps the mixture firm up and makes shaping significantly easier.
Step 4: Prepare the Cheese Stuffing
In a separate small bowl, combine the grated mozzarella, chilli flakes, peri peri masala, and crushed garlic. Mix well so the spices are distributed evenly throughout the cheese. Taste the mixture — it should be clearly spiced and savory, as the heat needs to be noticeable through the outer covering once the ball is assembled.
Divide this cheese stuffing into small portions — approximately one to one and a half teaspoons per ball. For easier handling during stuffing, you can roll the cheese mixture into small rough balls and place them on a plate, then refrigerate for 5 to 10 minutes to firm them slightly. This makes the filling easier to center inside the outer covering without it spreading and making the assembly messy.
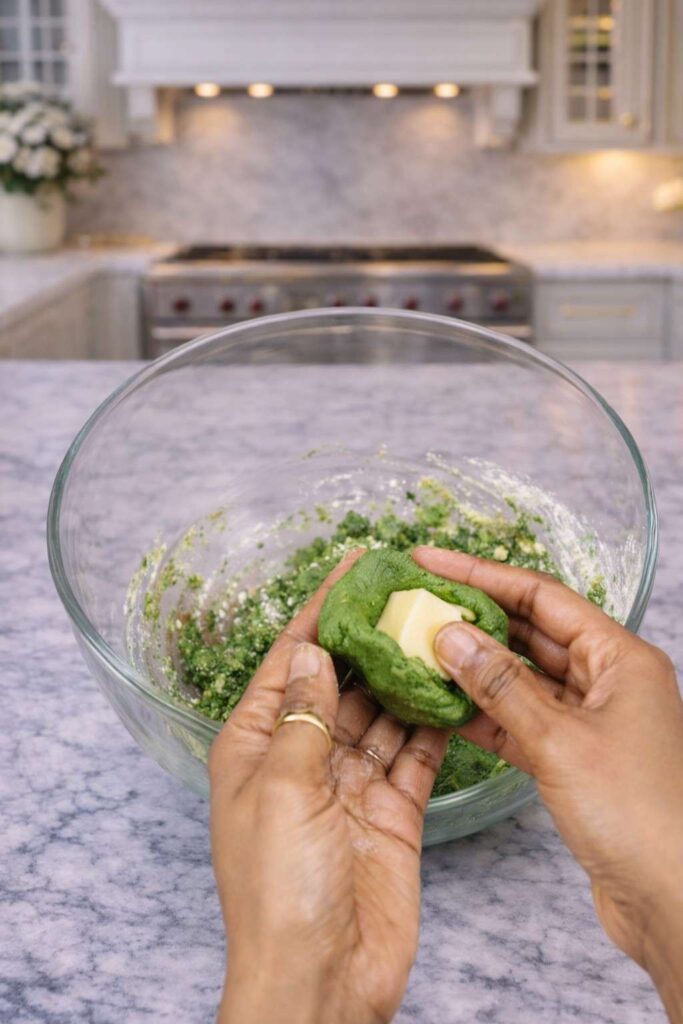
Step 5: Shape and Fill the Balls
Remove the outer covering mixture from the refrigerator. Divide it into equal portions — roughly golf-ball sized amounts for each finished ball (about 35 to 40 grams per portion).
Take one portion of the outer covering mixture and flatten it between your palms into a disc approximately 7 to 8 cm in diameter and about 1 cm thick. Place one portion of the cheese stuffing in the center of this disc. Bring the edges of the disc up and around the cheese, pressing and sealing them firmly together. If any cracks appear in the covering, smooth them closed with your fingertips.
Roll the sealed ball between your palms in a firm, circular motion until it is smooth and round. The ball should be completely sealed with no visible cracks or gaps — any opening is a point of weakness where the melted cheese can escape during cooking.
Place the shaped balls on a clean tray or plate as you work through the remaining portions.
Step 6: Coat in Breadcrumbs
Place your breadcrumbs in a wide, shallow bowl. Roll each shaped ball in the breadcrumbs, pressing gently to ensure an even, thorough coating on all sides. For an extra-thick, extra-crispy crust, you can double coat: brush or dip each ball very lightly in water or a thin slurry of flour and water, then roll again in breadcrumbs a second time. This double coating provides a noticeably crunchier exterior.
Once coated, the balls can be refrigerated for up to 24 hours before cooking — the coating will adhere better after a rest in the refrigerator, and the flavors inside will deepen.
Step 7: Cook Your Cheese Balls
Air Fry Method (Recommended): Preheat your air fryer to 180°C (350°F). Brush each breadcrumb-coated ball generously with oil on all sides — this is important for achieving a golden, evenly browned result in the air fryer rather than a pale, dull exterior. Place in the air fryer basket in a single layer without crowding. Air fry for 15 to 18 minutes, turning the balls halfway through (and ideally rotating them once more during cooking) for even color all around. They are done when deeply golden and crispy.
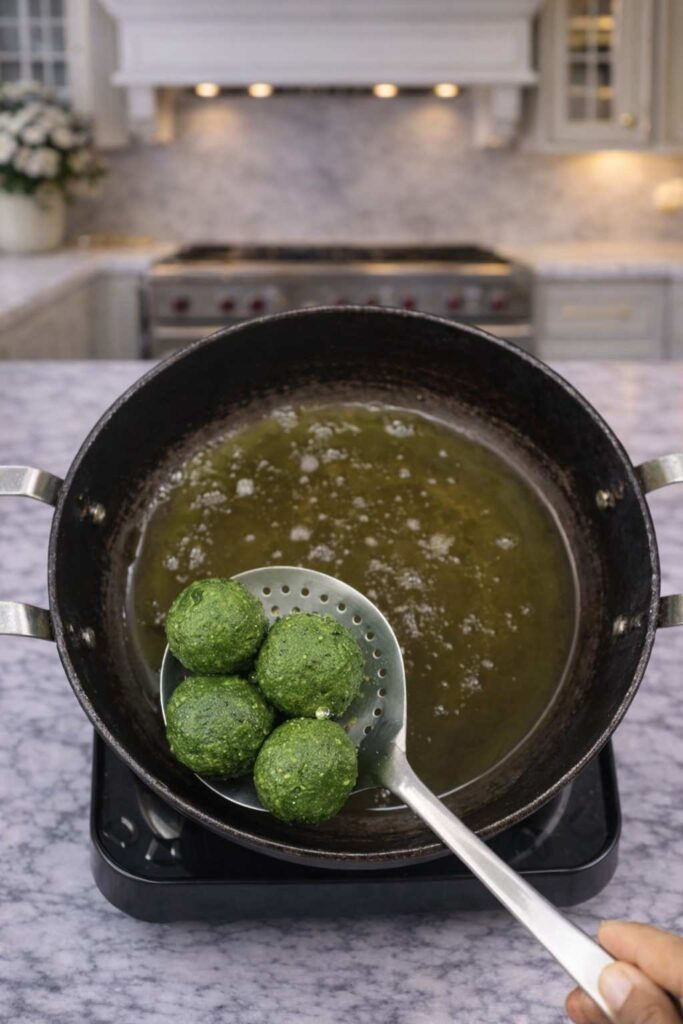
Shallow Fry Method: Heat about 2 to 3 cm of oil in a wide, flat pan over medium heat. When the oil is hot (test with a pinch of breadcrumb — it should sizzle immediately), add the balls and cook for 3 to 4 minutes per side, turning carefully and regularly to achieve even color on all sides. Work in batches without crowding the pan.
Deep Fry Method: Heat oil to 170°C to 180°C in a deep pot. Fry in small batches, turning occasionally, for 4 to 5 minutes until deep golden and crispy. Drain on paper towels.
Serving Suggestions
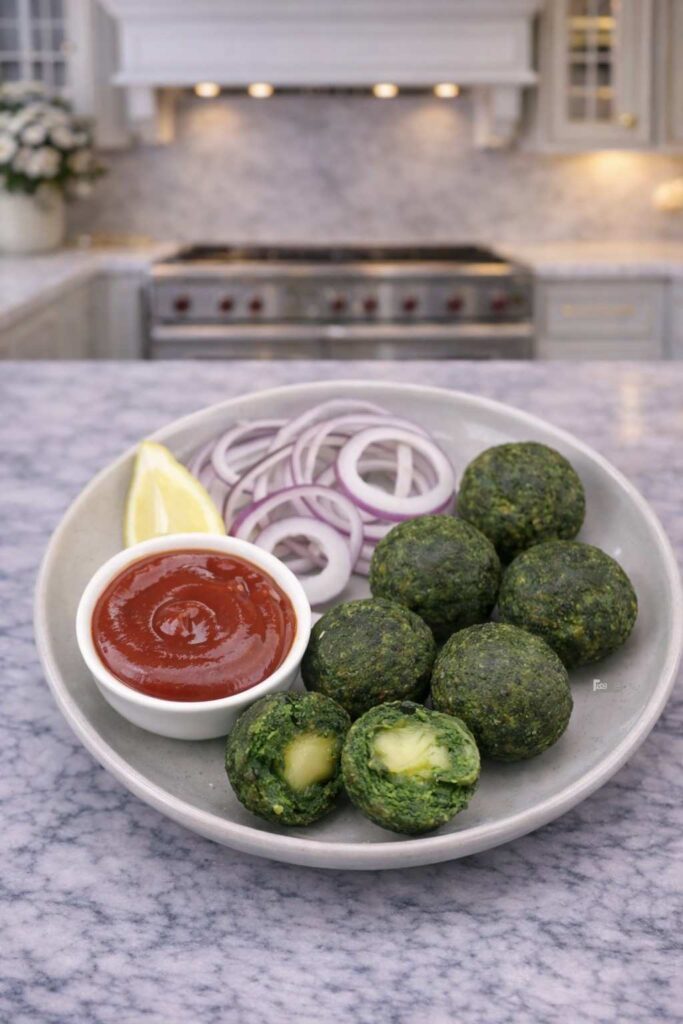
Serve the cheese balls hot, immediately after cooking, while the mozzarella inside is still fully molten and stretchy. Arrange them on a serving plate and serve alongside a green mint-coriander saavory jam, a sriracha mayo, a garlic aioli, or a simple ketchup. A squeeze of fresh lemon juice over the top just before serving brightens all the flavors and adds a pleasant acidity that cuts through the richness of the cheese.
These balls also work beautifully as a starter course at a dinner party, as a centerpiece snack at a high tea or party spread, or as part of a larger mezze or chaat-style platter alongside other small bites.
Approximate Nutritional Information (Per Serving — 3 to 4 Balls)
| Nutrient | Air Fried | Deep Fried |
|---|---|---|
| Calories | ~230–260 kcal | ~280–320 kcal |
| Protein | ~12–14g | ~12–14g |
| Carbohydrates | ~22g | ~24g |
| Dietary Fiber | ~5g | ~5g |
| Total Fat | ~10g | ~16g |
| Sodium | ~420mg | ~440mg |
Values are estimates. Exact nutritional content varies based on cheese quantity, oil absorption, and breadcrumb thickness.
Conclusion
What makes Chilli Cheese Spinach Balls genuinely special in a landscape crowded with cheese ball recipes is the integrity of the outer covering. This is not a recipe that hides behind potato or refined flour to do the binding work. Every element of the outer layer — the spinach, the corn, the chickpeas, the roasted besan, the garlic — is there because it contributes something meaningful to the flavor, the nutrition, and the structure. The result is a cheese ball that can hold its own as a complete snack rather than just a vehicle for melted cheese.
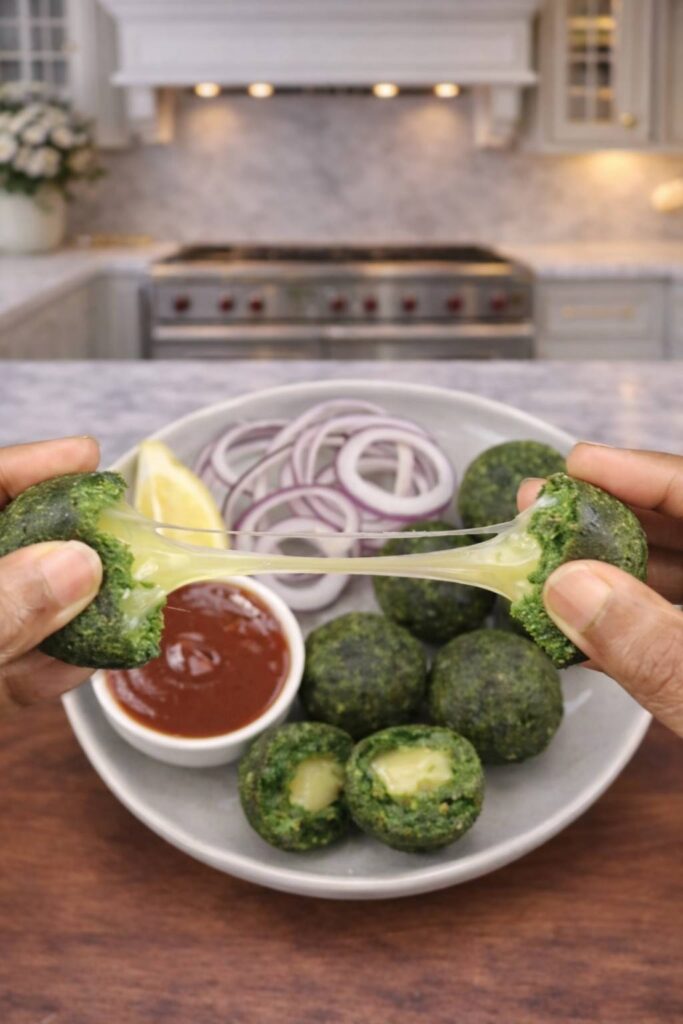
And that melted cheese filling, spiced with chilli flakes, peri peri masala, and crushed garlic, is doing its very best work here. It is not bland. It is not subtle. It is the kind of filling that makes the first bite a genuine event — the crack of the breadcrumb crust, the firm give of the spinach and chickpea layer, and then the sudden release of molten, spicy, garlicky mozzarella that stretches and pulls in the most satisfying possible way.
This is a recipe that rewards everyone who encounters it. The people making it get a satisfying cooking experience with clear steps and achievable technique. The people eating it get something that tastes far more indulgent than it actually is, served hot and crispy and absolutely at its best within minutes of cooking. Make a double batch, because they will be gone far faster than you expect. And the next time someone asks you what’s in them and you tell them spinach, chickpeas, and corn — watch their expression shift from surprise to absolute delight.
FAQs about Chilli Cheese Spinach Balls
Why must the spinach be blanched before using?
Raw spinach contains a very high percentage of water — typically around 91% by weight. If raw spinach is used in the outer covering mixture, this water releases during mixing and cooking, making the mixture too wet to hold a firm shape and causing the balls to fall apart or fail to crisp up properly. Blanching removes the majority of this water and concentrates the flavor and color of the spinach. The subsequent squeezing step removes whatever residual water the blanching leaves behind.
How long should I blanch the spinach?
Exactly 60 to 90 seconds in briskly boiling salted water. Beyond 90 seconds, the spinach begins to lose its vibrant green color and starts to develop a slightly sulfurous, overcooked flavor. The goal is fully wilted, bright-green, just-cooked spinach — not gray or mushy spinach. The ice bath immediately after blanching is what locks in the color by stopping the cooking process instantly.
Can I use baby spinach instead of regular spinach?
Baby spinach works perfectly well. It has a slightly milder, less bitter flavor than mature spinach leaves and blanches even more quickly — 30 to 45 seconds is usually sufficient. Squeeze and drain just as thoroughly as you would mature spinach.
Can I use canned chickpeas instead of boiling from dried?
Canned chickpeas are an excellent choice for this recipe. They are already fully cooked, save significant time, and produce a perfectly adequate texture in the covering mixture. Drain and rinse them thoroughly under cold water before using to remove the excess sodium from the brine. Pat them dry before adding to the food processor to avoid adding unnecessary moisture to the mixture.
Can I substitute the chickpeas with another legume?
Yes. White kidney beans (cannellini beans) produce a very similar texture with a slightly creamier, more neutral flavor. Black-eyed peas (lobia) work well with a slightly more assertive flavor. Boiled and mashed green peas are another option, though they produce a wetter mixture and you may need additional besan to compensate. Avoid lentils — they become too soft and wet to provide adequate structure.
How finely should the outer covering mixture be processed?
The ideal texture is coarse and rough — not smooth like a puree. You want to be able to see pieces of corn, roughly broken chickpeas, and strands of spinach in the mixture. A smooth puree becomes too wet and dense, and the balls made from it will be heavy and difficult to coat evenly. Use the pulse function on your food processor in short bursts rather than running it continuously.
Printable Recipe Card
Want just the essential recipe details without scrolling through the article? Get our printable recipe card with just the ingredients and instructions.