Chocolate dipped strawberries feel special without being fussy. They’re perfect for date nights, small celebrations, or a fun weekend project. You only need a few ingredients, and the results look like they came from a fancy bakery.
Jump to RecipeThe key is dry, fresh berries and good-quality chocolate. With the right technique, you’ll get a smooth, glossy shell that snaps when you bite it, and a juicy, sweet center.
Why This Recipe Works
This recipe focuses on technique, not complexity. Dry strawberries help the chocolate stick and set cleanly, so you avoid streaks and clumps. Gently melted chocolate stays smooth and shiny, giving a crisp finish that doesn’t bloom or turn chalky. A small amount of neutral oil or cocoa butter improves flow and helps the coating set with a nice sheen.
Jump to RecipeIn short, simple steps done right make for professional-looking results at home.
What You’ll Need
- 1 pound fresh strawberries (choose firm, ripe berries with green tops intact)
- 8 to 10 ounces chocolate (dark, semi-sweet, or milk; bars or chips)
- 1 to 2 teaspoons neutral oil or cocoa butter (optional, for a smoother finish)
- Optional toppings: finely chopped nuts, shredded coconut, crushed freeze-dried berries, sprinkles, or flaky sea salt
- Optional decoration chocolate: a small amount of white or contrasting chocolate for drizzles
- Equipment: parchment paper, baking sheet, microwave-safe bowl or double boiler, small heatproof spatula, paper towels
Step-by-Step Instructions
- Pick and prep the berries. Choose strawberries that are bright, firm, and free of soft spots. Rinse gently, then spread them on paper towels to dry.
- Dry completely. Pat each strawberry carefully. Make sure every surface is dry, especially around the leaves. Any moisture will make the chocolate seize or slip off.
- Line your tray. Set a sheet of parchment paper on a baking sheet.This prevents sticking and makes cleanup easier.
- Chop the chocolate. If using bars, chop into small, even pieces. Smaller pieces melt more evenly and reduce the risk of burning.
- Melt the chocolate. Microwave method: Add chocolate to a dry, microwave-safe bowl. Heat for 30 seconds, stir, then continue in 15-second bursts, stirring between each until mostly melted.Stir until fully smooth. Double boiler method: Set a heatproof bowl over barely simmering water, making sure the bowl doesn’t touch the water. Stir until melted and glossy.
- Adjust texture (optional). Stir in 1 to 2 teaspoons of neutral oil or melted cocoa butter.This helps with dipping and sets a smoother shell.
- Cool slightly. Let the melted chocolate sit for 2 to 3 minutes. It should be warm and fluid, not hot. Overly hot chocolate can soften the berries and drip too thin.
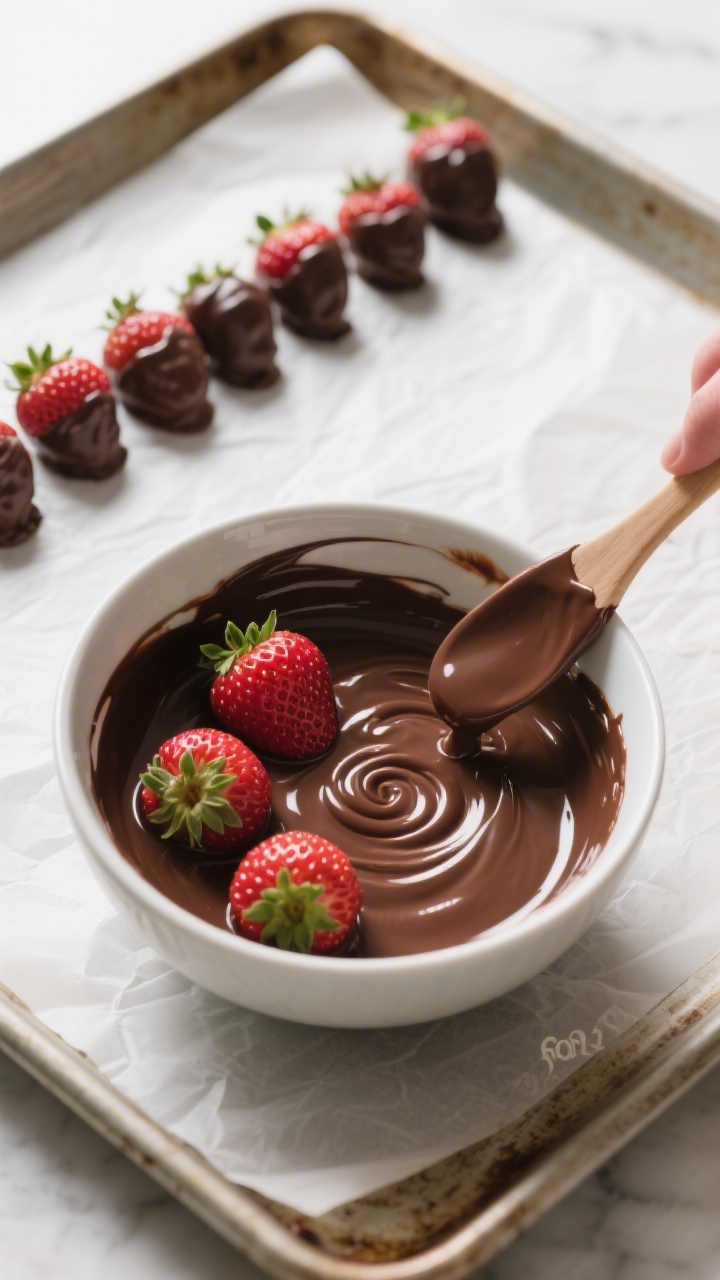
- Dip the strawberries. Hold each berry by the green top and dip at a slight angle. Swirl to coat, then lift and let excess chocolate drip back into the bowl.Lightly scrape the bottom of the berry on the bowl’s edge to avoid a big “foot.”
- Add toppings. If using nuts, coconut, or sprinkles, apply immediately after dipping while the chocolate is still wet. For flaky salt, use a light hand—just a pinch per berry.
- Set on parchment. Place dipped berries on the lined tray. Leave space between them so they don’t stick together.
- Drizzle (optional). Melt a little white or contrasting chocolate.Use a spoon or piping bag to drizzle thin lines across set or partially set berries for a bakery-style look.
- Let them set. Leave at room temperature (cool, dry spot) for 30 to 45 minutes, or refrigerate for 15 to 20 minutes until firm. Avoid humidity, which can cause condensation and dull the finish.
- Serve fresh. Enjoy the same day for the best texture: crisp shell, juicy center, and bright flavor.
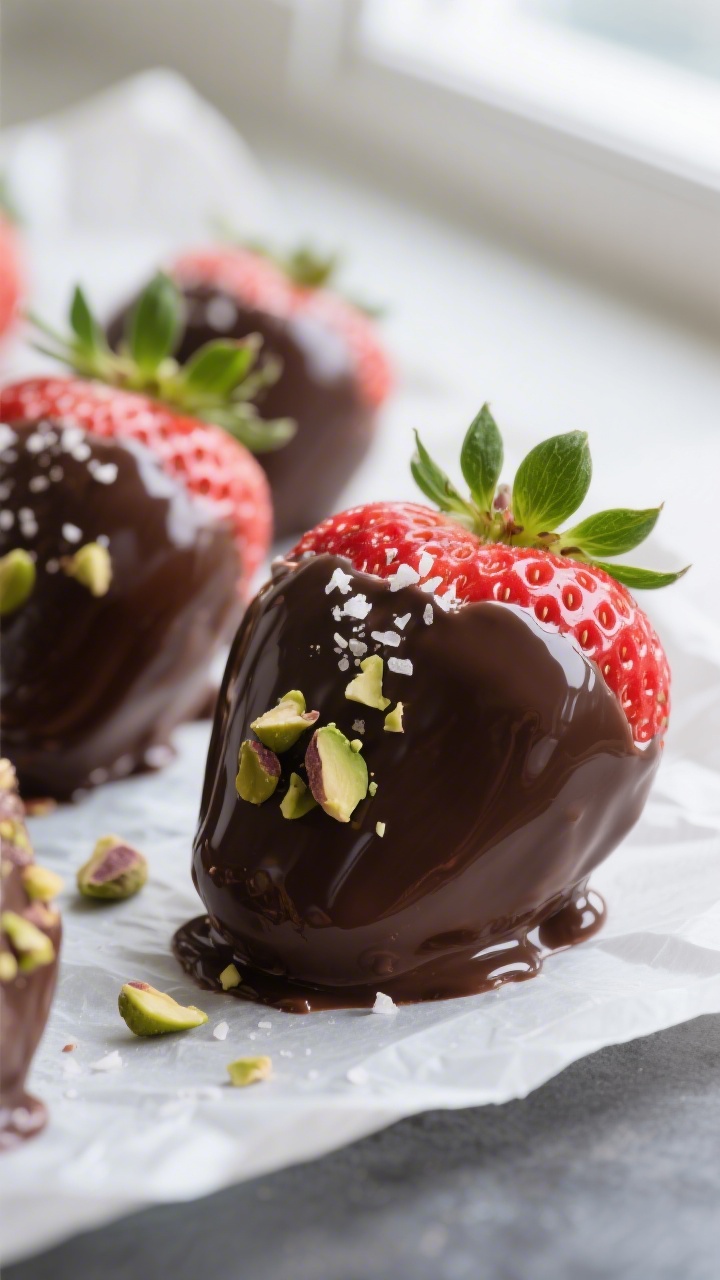
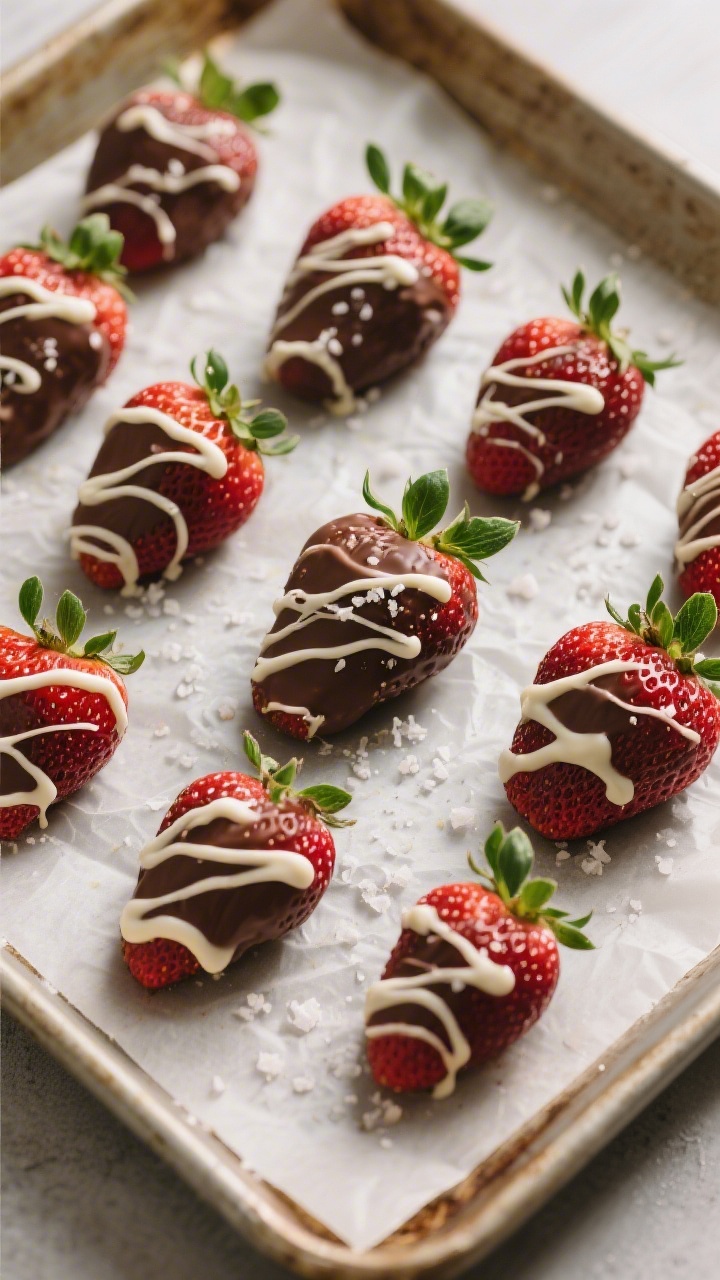
Chocolate Dipped Strawberries
Juicy strawberries, glossy chocolate, and a crisp sweet shell — an easy treat that always feels special
Ingredients
- 1 pound fresh strawberries, firm and ripe, with green tops intact
- 8–10 oz chocolate (dark, semi-sweet, or milk; bars or chips)
- 1–2 tsp neutral oil or cocoa butter, optional, for a smoother finish
Optional Toppings
- Finely chopped nuts
- Shredded coconut
- Crushed freeze-dried berries
- Sprinkles
- Flaky sea salt
- White or contrasting chocolate for drizzling
Instructions
- Prep the StrawberriesChoose strawberries that are bright, firm, and free of soft spots. Rinse them gently, then spread them on paper towels to dry.Keep the green tops attached so the berries are easier to dip neatly.
- Dry CompletelyPat each strawberry very well, making sure every surface is fully dry, especially around the leaves. Any moisture can make the chocolate seize or slide off.This is one of the most important steps for smooth, glossy chocolate coverage.
- Line the TrayLine a baking sheet or tray with parchment paper so the dipped strawberries can set without sticking.
- Melt the ChocolateAdd the chocolate to a dry microwave-safe bowl. Microwave for 30 seconds, stir, then continue in 15-second bursts, stirring between each, until mostly melted. Stir until fully smooth. You can also melt it in a heatproof bowl over barely simmering water.Melt gently and stir often so the chocolate stays smooth and does not burn.
- Adjust the TextureIf desired, stir in 1–2 teaspoons of neutral oil or melted cocoa butter. Let the chocolate cool for 2–3 minutes so it is warm and fluid, not hot.A small amount of oil helps the chocolate flow more easily and gives a smoother finish.
- Dip the StrawberriesHold each strawberry by the green top and dip it into the chocolate at a slight angle. Swirl to coat, then lift and let the excess drip back into the bowl. Lightly scrape the bottom against the edge of the bowl to prevent a thick chocolate foot.Scraping the bottom keeps the berries looking cleaner and more bakery-style.
- Add ToppingsIf using chopped nuts, coconut, sprinkles, freeze-dried berries, or flaky salt, add them right away while the chocolate is still wet.
- Set and DecoratePlace the dipped strawberries on the lined tray, leaving space between them. If you want, drizzle with melted white or contrasting chocolate once partially set or fully set.A spoon or small piping bag works well for neat drizzles.
- Let Them SetLet the strawberries set at room temperature in a cool, dry place for 30–45 minutes, or refrigerate for 15–20 minutes until firm.Avoid the freezer, which can cause cracking or a chalky finish later.
- Serve FreshServe the strawberries the same day for the best texture — a crisp chocolate shell with a juicy center.
Tips for the Best Results
- Dry the strawberries completely before dipping or the chocolate may seize or slide off.
- Use good-quality chocolate with cocoa butter for the best shine and snap.
- Melt the chocolate slowly and stir often so it stays smooth and glossy.
- Let the melted chocolate cool slightly before dipping so it does not run too thin or soften the berries.
- Scrape the bottom of each berry lightly on the bowl edge to avoid a thick chocolate base.
- Add toppings immediately while the chocolate is still wet so they stick well.
- Set the berries in a cool, dry place whenever possible because humidity can dull the finish.
- Chocolate dipped strawberries are best eaten the same day, but they can be stored in the fridge for up to 24 hours in a single layer.
- Do not use frozen strawberries because they release too much water as they thaw.
- For a dairy-free version, use high-quality dairy-free dark chocolate.
How to Store
Chocolate dipped strawberries are best eaten the day they’re made. If you need to store them, place them in a single layer on parchment in an airtight container. Keep them in the refrigerator for up to 24 hours. Do not stack, or the coating may smudge.
If condensation forms when bringing them back to room temperature, let them sit uncovered for 10 to 15 minutes to dry on the surface.

Health Benefits
- Antioxidants from strawberries: Strawberries are rich in vitamin C and plant compounds that support immune health and skin function.
- Potential perks from dark chocolate: Dark chocolate (70% cacao or higher) contains flavonoids linked to heart health when enjoyed in moderation.
- Fiber plus satisfaction: The fiber in strawberries and the richness of chocolate can make this a satisfying dessert in smaller portions.
- Lower sugar options: Choosing darker chocolate reduces added sugar compared to milk or white chocolate.
Pitfalls to Watch Out For
- Wet berries: Any water on the fruit will cause the chocolate to seize or slide off. Dry thoroughly.
- Overheating chocolate: Chocolate burns easily. Melt slowly and stir often for a glossy, smooth finish.
- Humid environment: Moisture can dull the shine and create condensation.Set and store in a cool, dry place when possible.
- Using low-quality chocolate: Cheap chocolate may be waxy and not melt well. Choose bars or couverture for the best texture.
- Rushing the set: Freezing can cause cracking and bloom later. Chill briefly in the fridge instead of the freezer.
- Old berries: Overripe strawberries leak juice, which can break the seal and make the shell spotty.
Alternatives
- Different chocolate styles: Try milk for a creamier taste, dark for a richer snap, or white for a sweet, candy-like finish.Mix and match for variety.
- Flavor boosts:</-strong> Add a drop of vanilla, almond extract, or orange zest to the melted chocolate. A tiny pinch of espresso powder deepens chocolate flavor.
- Decorations: Roll in crushed pistachios, toasted almonds, or coconut. Drizzle contrasting chocolate for a tuxedo effect.
- Dairy-free: Use high-quality dairy-free dark chocolate or a vegan chocolate brand to suit dietary needs.
- Sugar-conscious: Choose a high-cacao chocolate or a no-sugar-added variety.Pair with smaller berries for built-in portion control.
- Other fruits: Banana slices (freeze briefly before dipping), seedless grapes, or dried apricots also take well to chocolate.
FAQ
Do I Need to Temper the Chocolate?
Tempering gives the glossiest finish and a firm snap, but it’s not required for home batches eaten the same day. If you want a pro shine that holds at room temp longer, tempering is worth it. Otherwise, gentle melting plus a cool set will still look great.
Why Is My Chocolate Thick and Lumpy?
It likely overheated or came into contact with water.
Melt at low power, stir often, and keep all tools completely dry. A teaspoon of neutral oil can loosen slightly thick chocolate, but if it has fully seized, you’ll need to start over.
Jump to RecipeCan I Make These Ahead?
Yes, but only by about a day for the best texture. Past 24 hours, the berries can weep and the chocolate may spot.
If making ahead, store uncovered for the first 10 minutes in the fridge to set, then cover lightly.
How Do I Get a Neat Bottom Without a Chocolate “Foot”?
After dipping, gently scrape the bottom of the berry along the rim of the bowl to remove extra chocolate. Set it down, then give the stem a tiny twist to prevent pooling.
Which Chocolate Is Best?
Use real chocolate with cocoa butter listed as a main ingredient. For beginners, semi-sweet or 60–70% dark is a safe choice.
Couverture chocolate melts and coats beautifully if you can find it.
Can I Use Frozen Strawberries?
No. As they thaw, they release water, which prevents the chocolate from sticking. Frozen berries also turn mushy and won’t hold their shape.
Jump to RecipeWhat If I Don’t Have Parchment Paper?
Use a silicone baking mat or lightly oiled foil.
Avoid bare plates; the chocolate may stick and tear when you lift the berries.
Wrapping Up
Chocolate dipped strawberries are simple, pretty, and always a hit. With dry berries, gently melted chocolate, and a few easy touches, you’ll get a glossy shell and fresh, bright flavor every time. Keep the steps light and the ingredients quality-focused, and you’ll have a dessert that looks impressive without breaking a sweat.
Enjoy them the day you make them, and don’t be afraid to play with toppings and drizzles for your own signature look.