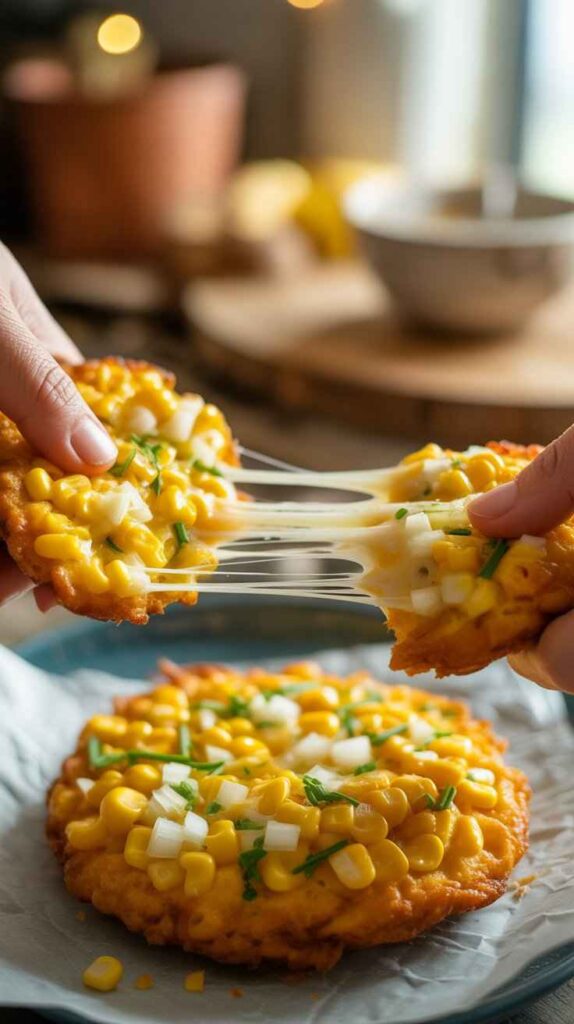
There are some snacks that you make once and immediately regret not discovering sooner. Corn fritters are exactly that kind of recipe. The moment that first golden, crispy-edged fritter hits the plate, something happens — it disappears. Before you’ve even finished frying the second batch, someone’s already reaching for another. And another. And then suddenly the plate is empty and everyone’s looking at you like you’re some kind of genius.
What makes corn fritters so universally loved is how they manage to be so many things at once. The outside is shatteringly crisp. The inside is soft, sweet, and almost custardy from the corn. There’s a gentle kick of chilly flakes and oregano running through every bite, a subtle sharpness from the processed cheese that melts into the batter and makes everything taste richer and more indulgent than something this simple has any right to be. Spring onions add a fresh, slightly sharp note. Regular onions bring body and sweetness when cooked. Coriander brings that unmistakable bright herbaceous Ness that ties the whole thing together.
These fritters are the kind of thing that works everywhere — as a chai-time snack on a rainy afternoon, as a party appetizer that gets people crowding around the serving platter, as a lunchbox addition that makes everyone at the table curious, or honestly just as a midnight snack that you make for yourself and eat standing in the kitchen. They come together in under 30 minutes, use pantry-friendly ingredients, and require absolutely no special equipment or advanced technique.
This is the recipe you’ll come back to again and again. Let’s make it.
Recipe at a Glance
| Feature | Details |
|---|---|
| Cuisine | Indian-Fusion / Snack |
| Course | Appetizer / Snack |
| Difficulty | Easy |
| Servings | 4 (approximately 12–14 fritters) |
| Prep Time | 15 Minutes |
| Cook Time | 20 Minutes |
| Total Time | 35 Minutes |
| Calories per Serving | ~280–320 kcal |
What Makes These Corn Fritters Special?
Before we dive into the recipe itself, it’s worth talking about what actually makes this version stand out from the dozens of corn fritter recipes floating around out there.
The first thing is the corn preparation. Boiling the corn with both sugar and salt is a technique that amplifies the corn’s natural sweetness while seasoning it all the way through the kernel — not just on the surface. This one small step makes an enormous difference in the final flavor of the fritter.
The second thing is processed cheese. It might seem like an unusual choice — many fritter recipes skip cheese entirely, and those that include it tend to reach for mozzarella or cheddar. But processed cheese melts completely and uniformly into the batter, creating a smooth, creamy richness that holds the fritter together and prevents it from tasting too dry or starchy.
The third thing is the seasoning combination. Oregano and chilly flakes together give these fritters a slightly Italian-American personality that pairs beautifully with the sweet, Indian-style corn base. It’s unexpected, and it works brilliantly.
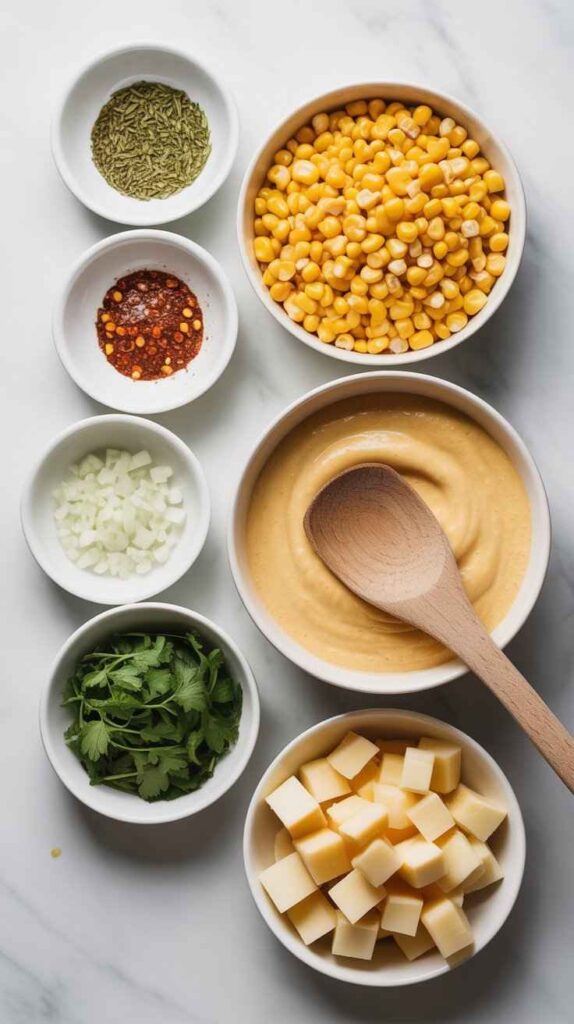
Ingredients
For Boiling the Corn
- 1.5 cups corn kernels (fresh, frozen, or canned)
- Water, enough to submerge the corn
- 1 teaspoon sugar
- 1 teaspoon salt
For the Fritter Batter
- 1.5 cups boiled corn kernels (from above)
- ¼ cup spring onions (greens and whites both), finely chopped
- ½ cup onion, finely chopped
- 2 cubes processed cheese, grated or finely crumbled
- ¼ cup fresh coriander, finely chopped
- Salt to taste
- 1.5 teaspoons black pepper, freshly cracked
- 1.5 teaspoons dried oregano
- 1 teaspoon chilly flakes (adjust to your heat preference)
- ¼ cup maida (all-purpose flour)
- ¼ cup milk (approximately — you may need slightly more or less depending on the moisture content of your corn)
For Frying
- Oil for shallow or deep frying (a neutral oil like sunflower or refined oil works best)
Step-by-Step Instructions
Step 1: Boil the Corn the Right Way
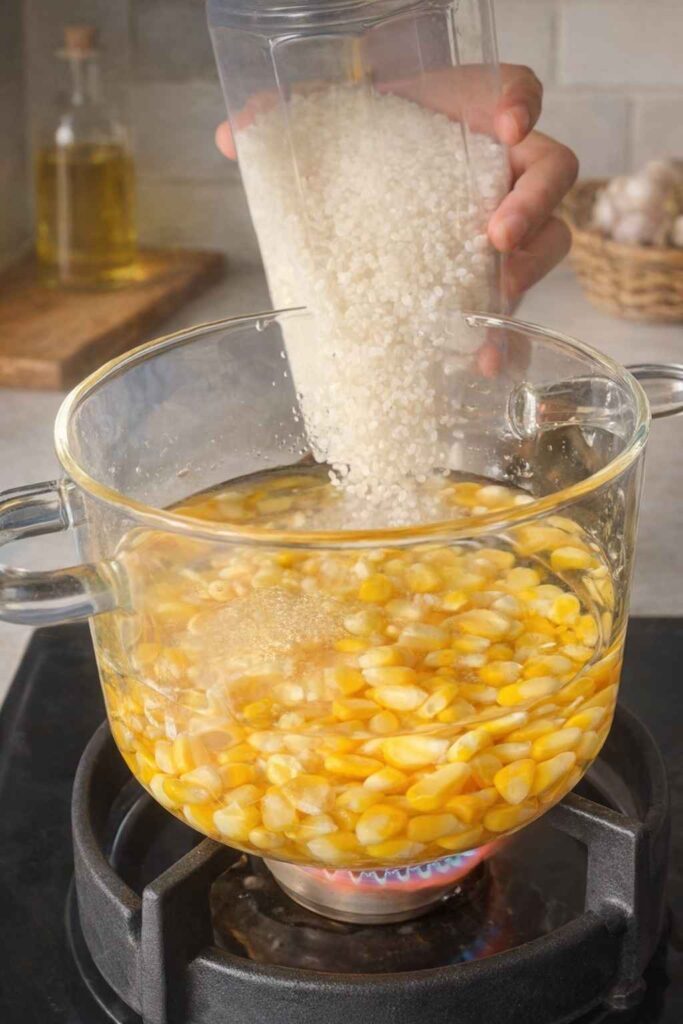
This is the foundational step, and it deserves more attention than most recipes give it. If you’re starting with fresh corn on the cob, strip the kernels off cleanly using a sharp knife — hold the cob upright on a cutting board and slice downward in smooth, even strokes, rotating the cob as you go.
Place your corn kernels in a saucepan and cover them with enough water to fully submerge them. Add one teaspoon of sugar and one teaspoon of salt. The sugar is not there to make your fritters sweet — it’s there to enhance the corn’s existing natural sweetness and round out the overall flavor. The salt seasons from within. Bring the water to a rolling boil and cook the corn for 5 to 7 minutes. The kernels should be tender but still have a slight bite — not mushy, not raw. Drain completely and allow them to cool slightly before adding to your batter. Excess water in the batter is your enemy when frying, so draining well matters.
If you’re using frozen corn, thaw it completely first and pat it as dry as possible with a clean kitchen towel before boiling. Canned corn should be drained and rinsed thoroughly.
Step 2: Prepare Your Vegetables and Mix-Ins
While the corn is draining and cooling, prep everything else. Finely chop your onions into small, uniform pieces — you want the onion to distribute evenly through every fritter rather than having large raw chunks that don’t cook through in the pan. Do the same with your spring onions, using both the white bulb portion and the green tops, which contribute two slightly different flavors.
Chop the fresh coriander finely — stems and all, as the stems carry just as much flavor as the leaves. Grate your processed cheese cubes using a box grater, or crumble them finely with your fingers. Having everything prepped and ready before you start mixing makes the entire process much smoother.
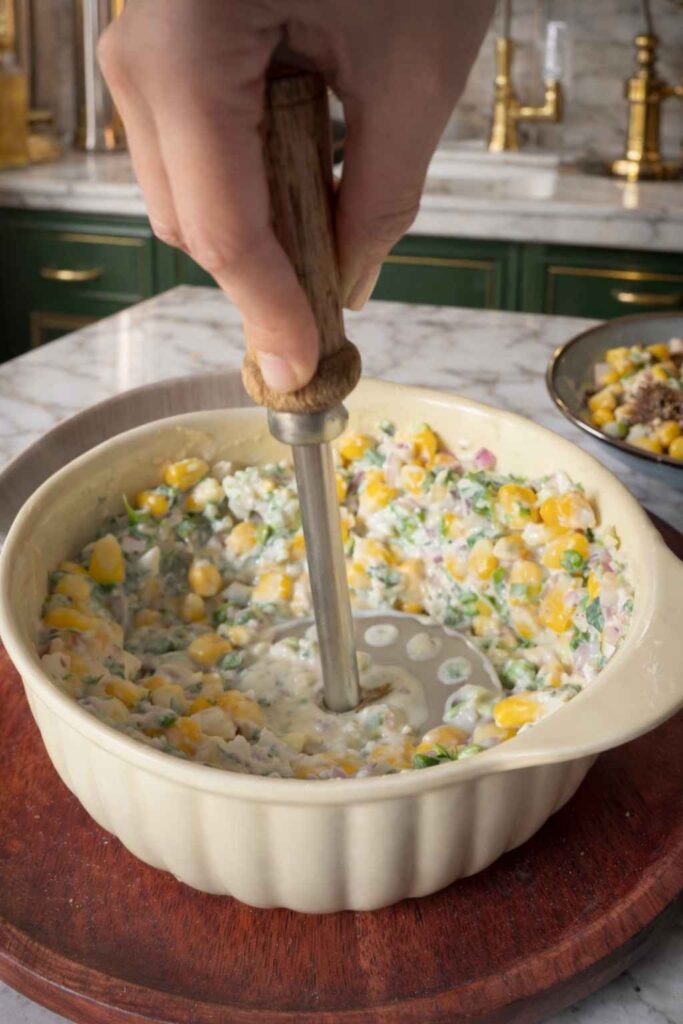
Step 3: Build the Fritter Batter
In a large mixing bowl, add your drained and slightly cooled boiled corn kernels. Using the back of a fork or a potato masher, lightly crush about one-third of the corn kernels. You’re not pureeing the corn — you want to break some of the kernels open so their natural starch and moisture releases into the batter and helps everything bind together, while the rest of the kernels remain whole for texture and those little bursts of sweet corn flavor.
Add the finely chopped onions, spring onions, grated processed cheese, and fresh coriander to the bowl. Toss everything together lightly to distribute the mix-ins evenly through the corn.
Now add the dry seasonings: salt to taste (remember the corn was already salted during boiling, so taste before you add more), 1.5 teaspoons of freshly cracked black pepper, 1.5 teaspoons of dried oregano, and 1 teaspoon of chilly flakes. Mix these through the vegetables and corn until evenly distributed.
Sift the maida (all-purpose flour) directly into the bowl. Maida acts as your binding agent — it holds the fritter together structurally, gives the outside its crispy shell when it hits the hot oil, and absorbs excess moisture from the vegetables and corn. Mix gently until the flour is incorporated throughout.
Now add the milk in slowly — start with 3 tablespoons and mix. The goal is a batter that is thick and scoopable, not pourable. It should hold its shape when you spoon it up and drop it — almost like a thick cookie dough or a scone batter. If the mixture feels too dry or crumbly and won’t hold together, add more milk one tablespoon at a time until you get that cohesive, scoopable consistency. You should be able to shape a small disc of it and have it hold without cracking or crumbling apart.
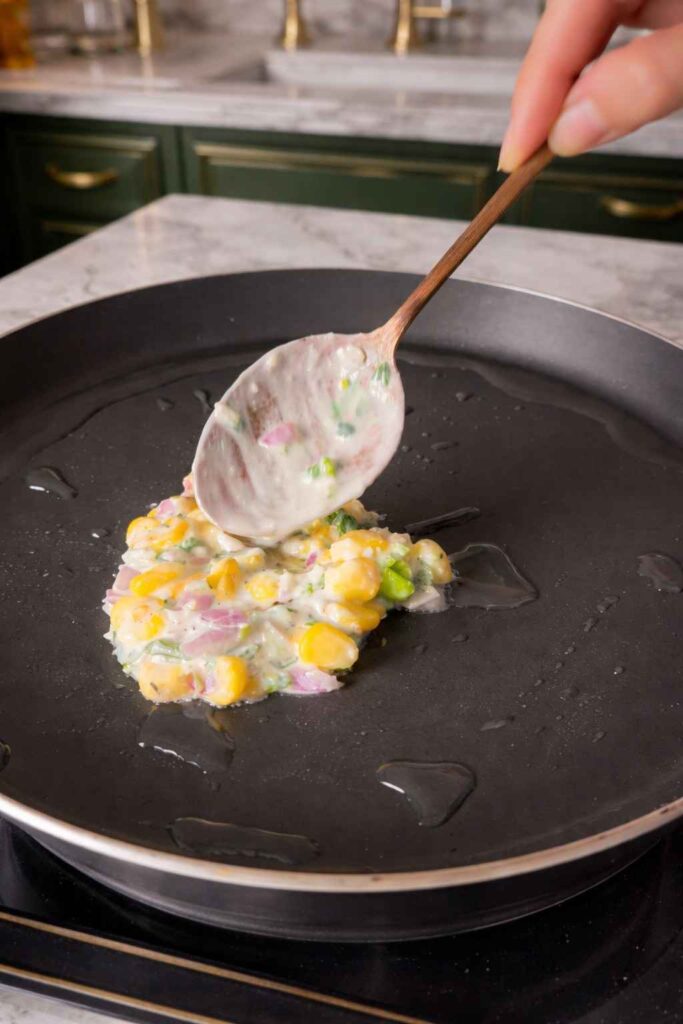
Step 4: Heat the Oil and Fry
Pour oil into a wide, heavy-bottomed pan — a cast-iron skillet or a thick stainless steel pan works ideally here. For shallow frying, you want enough oil to come about halfway up the sides of each fritter. For deep frying, enough to fully submerge them.
Heat the oil over medium heat until it reaches approximately 170°C to 180°C (340°F to 360°F). If you don’t have a thermometer, test the oil by dropping a tiny pinch of batter into it — if it sizzles immediately, rises to the surface within a second or two, and starts turning golden without burning instantly, your oil is at the right temperature.
Maintaining this temperature throughout the frying process is critical. Oil that is too cool will result in fritters that absorb excess oil and turn out greasy and heavy. Oil that is too hot will brown the outside rapidly while leaving the inside undercooked and doughy.
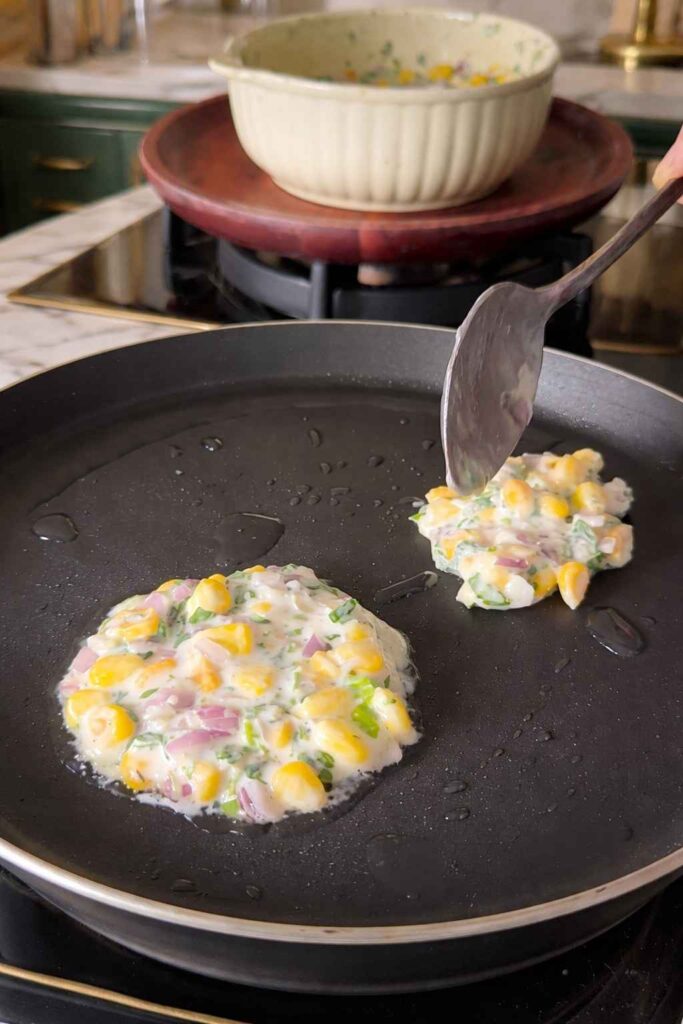
Using a large spoon or an ice cream scoop for uniform sizing, gently drop spoonfuls of the batter into the hot oil. Do not overcrowd the pan — fry in batches of 3 or 4 at most. Overcrowding drops the oil temperature dramatically and causes the fritters to steam rather than fry, which kills the crispiness.
Press each fritter gently with the back of your spoon to flatten it slightly into a disc shape. Fry on medium heat for 3 to 4 minutes per side without disturbing them. Resist the urge to move them around — letting them sit undisturbed is what creates that even, deeply golden crust. Flip once, carefully, using a slotted spoon or a flat spatula, and fry the second side for another 3 minutes until equally golden.
Step 5: Drain and Serve

Remove the fritters using a slotted spoon and place them on a plate lined with absorbent paper towel to drain any surface oil. Do not stack them directly on top of each other while they’re hot — the steam trapped between them will soften the crust. Spread them in a single layer.
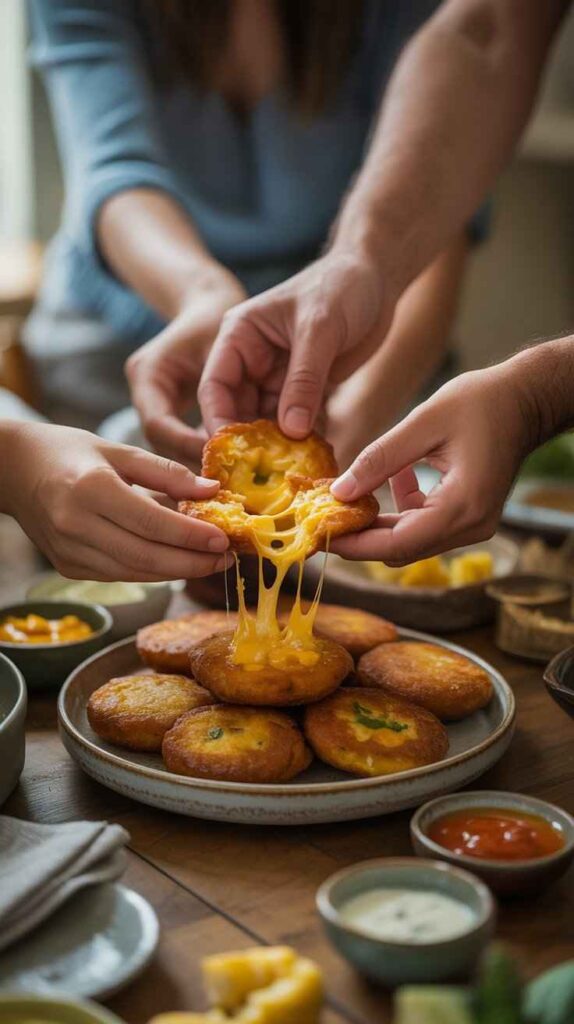
Serve immediately while hot. Corn fritters are at their absolute peak within the first 10 minutes of frying. The crust is at maximum crispiness, the cheese inside is still slightly molten, and the corn filling is soft and fragrant.
Serve with a green chutney, a garlic-yogurt dip, ketchup, or simply on their own. They need very little accompaniment.
Serving Suggestions
These fritters are versatile enough to work in multiple contexts. Serve them as a chai-time snack alongside a cup of masala chai on a cold or rainy day. Arrange them on a platter as a party appetizer — they’re the kind of finger food that disappears fast and earns you compliments for the rest of the evening. Pack them in lunchboxes for kids with a small container of ketchup on the side. Serve them as a side dish alongside a bowl of soup or a light salad for a complete meal.
For a dipping sauce that goes beautifully with these fritters, whisk together half a cup of plain yogurt with a minced garlic clove, a pinch of salt, a squeeze of lemon juice, and a small handful of finely chopped mint. It takes two minutes and is an absolute revelation alongside the warm, spiced fritters.
Cheesy Corn Fritters
Crispy golden fritters loaded with sweet corn, melty cheese, spring onions & oregano
- 1½ cups corn kernels (fresh/frozen/canned)
- Water, to submerge
- 1 tsp sugar
- 1 tsp salt
- 1½ cups boiled corn (from above)
- ¼ cup spring onions, finely chopped
- ½ cup onion, finely chopped
- 2 cubes processed cheese, grated
- ¼ cup fresh coriander, chopped
- Salt to taste
- 1½ tsp black pepper, cracked
- 1½ tsp dried oregano
- 1 tsp chilli flakes
- ¼ cup maida (all-purpose flour)
- ¼ cup milk (adjust as needed)
- Oil for shallow/deep frying
Boil the Corn
Submerge corn kernels in water with 1 tsp sugar + 1 tsp salt. Boil 5–7 min until tender with slight bite (not mushy). Sugar enhances natural sweetness, salt seasons from within. Drain completely — excess water ruins crispiness. If using frozen: thaw & pat dry first. Canned: drain & rinse.
Prep Vegetables
While corn drains, finely chop onions (small, uniform pieces), spring onions (whites + greens), and coriander (stems too — full of flavor). Grate or crumble cheese cubes. Having everything prepped makes mixing seamless.
Build the Batter
Add drained corn to bowl. Lightly crush ⅓ of kernels with fork (releases starch for binding, rest stays whole for texture). Add onions, spring onions, cheese, coriander. Toss to distribute. Add pepper, oregano, chilli flakes, salt (taste first — corn is already salted). Sift in flour, mix gently.
Add Milk & Check Consistency
Add milk slowly — start with 3 tbsp. Goal: thick, scoopable batter (like cookie dough), NOT pourable. Should hold shape when spooned. Too dry? Add 1 tbsp milk at a time. Should form a disc without cracking or crumbling.
Heat Oil & Fry
Heat oil to 170–180°C in heavy pan (cast iron ideal). Test: drop tiny batter bit — should sizzle immediately, rise in 1–2 sec, turn golden. Drop spoonfuls (3–4 max per batch), flatten gently. Fry 3–4 min per side undisturbed. Flip once. Don’t overcrowd — kills crispiness!
Drain & Serve
Remove with slotted spoon to paper towel. Don’t stack while hot (steam softens crust). Serve immediately — peak crispiness lasts only 10 min! Cheese is still molten, corn is fragrant. Serve with green chutney, yogurt dip, or ketchup.
Storage and Reheating
Corn fritters are always best eaten fresh, but leftovers can be stored in an airtight container in the refrigerator for up to 2 days. To reheat, place them on a baking tray in a preheated oven at 180°C (350°F) for 8 to 10 minutes, or in an air fryer at 175°C for 5 to 6 minutes. Both methods will restore a good amount of the original crispiness. Avoid the microwave for reheating — it turns the crust soft and rubbery.
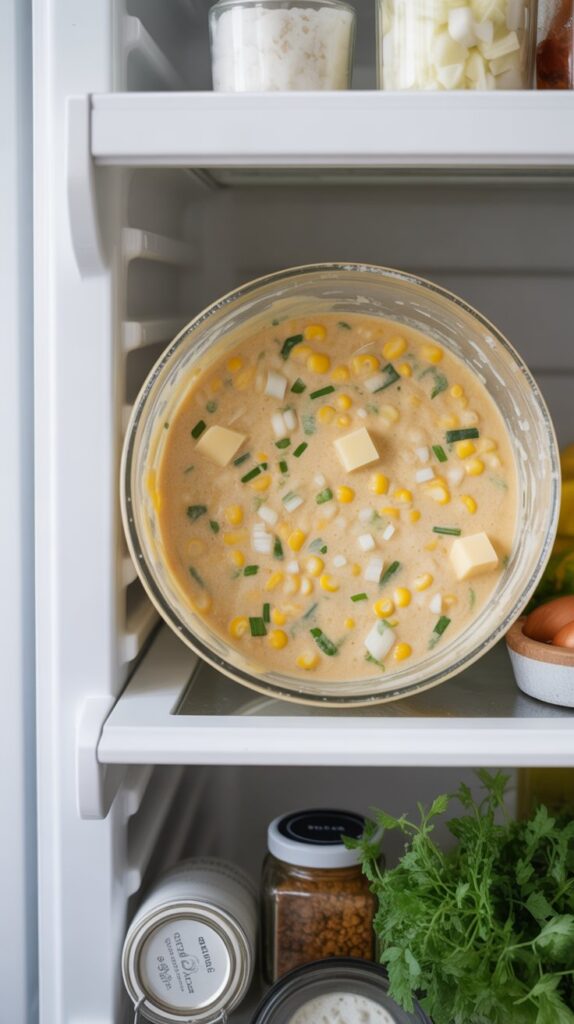
Do not freeze assembled fritters. The batter can be prepared and refrigerated (without the milk added) for up to 24 hours, with the milk added just before frying.
Approximate Nutritional Information (Per Serving)
| Nutrient | Amount (Approx.) |
|---|---|
| Calories | ~280–320 kcal |
| Protein | ~7–9g |
| Carbohydrates | ~32g |
| Dietary Fiber | ~3g |
| Total Fat | ~14g |
| Sodium | ~380mg |
Values are estimates based on standard ingredients and shallow frying. Deep frying will increase fat content slightly.
Conclusion
Corn fritters are one of those recipes that prove definitively that great food doesn’t have to be complicated. You don’t need a long list of exotic ingredients, specialized kitchen equipment, or hours of preparation time. You need good technique, attention to a few key details — how you cook the corn, how you build the batter, how you manage your oil temperature — and the willingness to serve them the moment they come out of the pan.
What’s most satisfying about this particular version is how it manages to feel both familiar and interesting at the same time. The corn base is warm and comforting, the kind of flavor that resonates with almost everyone. But the oregano, the chilly flakes, the spring onions, the processed cheese — these elements push the fritters into something that feels genuinely original. It’s not just another corn fritter recipe. It’s a corn fritter recipe that people will ask you for.
Make these once and you’ll understand immediately why they disappear so fast. The crunch when you bite through the golden exterior. The soft, sweet, cheesy interior. The lingering warmth of the pepper and chilly. The freshness of the coriander. It’s a snack that fires on every single level. Whether you’re making them for yourself on a quiet afternoon, or for a crowd at your next gathering, one thing is guaranteed — you are going to need to make more than you think. Always make more than you think.
Common FAQs on Corn Fritters
Can I use frozen corn instead of fresh corn?
Yes, absolutely. Thaw the frozen corn completely and pat it as dry as possible with a kitchen towel before boiling. Excess moisture from frozen corn can make your batter too wet and cause the fritters to absorb more oil during frying.
Why do I need to crush some of the corn kernels?
Crushing a portion of the corn releases the natural starch inside the kernels into the batter. This starch acts as a natural binder and helps the fritters hold together without needing excessive flour. It also creates a more cohesive, unified texture in the finished fritter rather than a loose collection of whole kernels.
Can I make corn fritters gluten-free?
Yes. Replace the flour with rice flour or a certified gluten-free all-purpose flour blend. Rice flour is particularly recommended as it produces a crispier exterior than wheat-based flours. Make sure your other ingredients (processed cheese, spices) are also certified gluten-free if you’re cooking for someone with celiac disease.
Can I use regular cheddar or mozzarella instead of processed cheese?
Yes. Sharp cheddar adds a stronger, more pronounced cheese flavor and works particularly well. Mozzarella melts very smoothly and adds a mild, milky richness. If you use mozzarella, opt for low-moisture mozzarella rather than fresh, as fresh mozzarella contains too much water and can make the batter too wet.
How do I check if my oil is hot enough without a thermometer?
Drop a small pinch of batter into the oil. If it sinks to the bottom and stays there without bubbling, the oil is not hot enough. If it rises immediately to the surface, sizzles actively, and starts browning within 30 to 45 seconds, the temperature is right. If it browns almost instantly, the oil is too hot — reduce the heat and wait a minute before testing again.
Why are my fritters falling apart while frying?
There are two common causes. First, the batter may be too wet — if there’s excess moisture from the corn or vegetables, the batter won’t hold together. Make sure the corn is well-drained and the batter is thick enough to scoop and shape. Second, the fritters may be being moved or flipped too soon — let them cook undisturbed for the full 3 to 4 minutes before flipping so a proper crust can form.
Browse Every Recipe
The Complete Recipe Collection
From comforting weeknight dinners to elegant cocktails — every recipe from Relish the Recipe, all in one place.
- Beef Bourguignon
- Steak au Poivre
- Perfect Filet Mignon
- Grilled Coffee-Cola Skirt Steak
- Grilled Mojo Beef
- Vietnamese Lemongrass Chicken
- Honey Balsamic Pomegranate Glazed Chicken
- Mushroom Stuffed Chicken Breast
- Zesty Herb Marinated Grilled Chicken Thighs
- Baked French Onion Chicken
- One-Pan Tuscan Orzo with Chicken
- Creamy Peri Peri Chicken Pasta
- One-Pan Chicken Chorizo Orzo
- Jamaican Jerk Chicken & Plantain Skillet
- Pan Seared Pork Tenderloin in Peppercorn Gravy
- Citrus Glazed Roasted Pork Ribs
- Smothered Pork Chops with Mushroom Gravy
- Teriyaki Pork Noodles
- One-Pan Chorizo Rice Skillet
- Greek Lemon Roast Lamb & Potatoes
- Greek Lamb with Orzo
- Classic Greek Beef Stifado
- Sausage Ragù
- Italian Sausage & Lamb Ragù
- Sausage & Pepper Bolognese
- Sausage Ragù with Spinach & Ricotta
- Sausage & Zucchini Rigatoni
- 3 Italian-Style Meatloaves
- Brown Butter & Sage Mezzi Rigatoni
- Red Pesto Gnocchi
- Creamy Chicken Meatball Orzo
- Creamy French Onion Orzo Casserole
- Quick Vegan Lasagna
- Vegan Ramen
- Spicy Maple Tofu Rice Bowl
- Oven-Baked Potatoes with Meatballs & Cheese
- Oven-Roasted Crispy Potatoes
- Crispy Potato Tacos
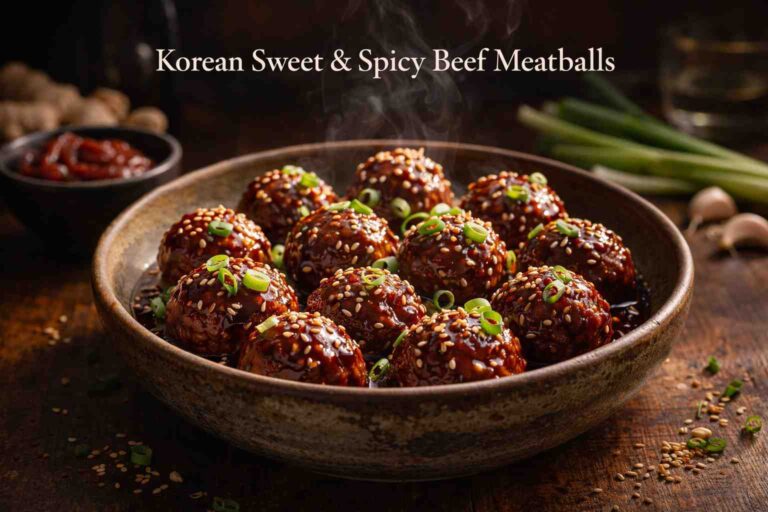
- Korean Sweet & Spicy Beef Meatballs
- Lean Jalapeño Beef Burger
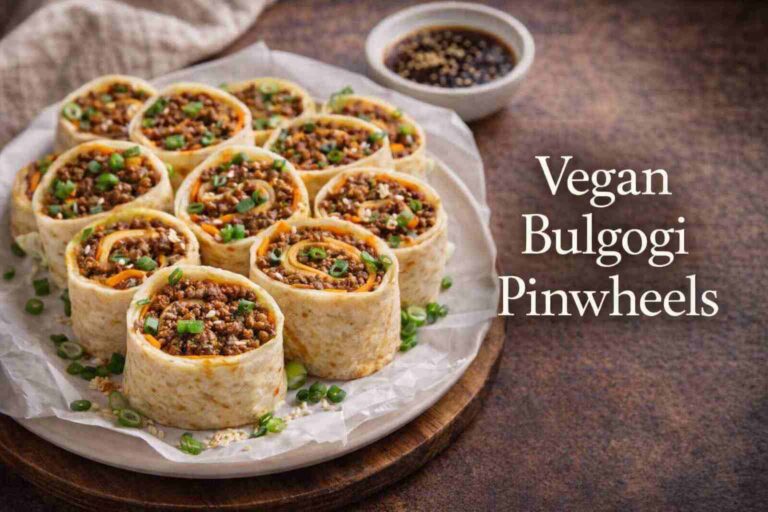
- Vegan Bulgogi Pinwheels
- Vegan Cabbage Rolls
- Creamy Broccoli & Garlic Soup
- New England Creamy Clam Chowder
- Manhattan Clam Chowder
- Split Pea Soup
- Ham & Bean Soup
- Hearty Vegetable Barley Soup
- Creamy Asparagus Soup
- French Cream of Chestnut Soup
- Classic Provençal Fish Soup
- Carnival Squash Soup with Turmeric
- Vegan Chicken & Dumpling Soup
- 30-Minute Creamy Shrimp Alfredo
- Crispy Buffalo Chicken Wonton Cups
- Buffalo Chicken Cauliflower Dip
- Buffalo Chicken Garlic Bread
- Crispy Garlic Parmesan Wings
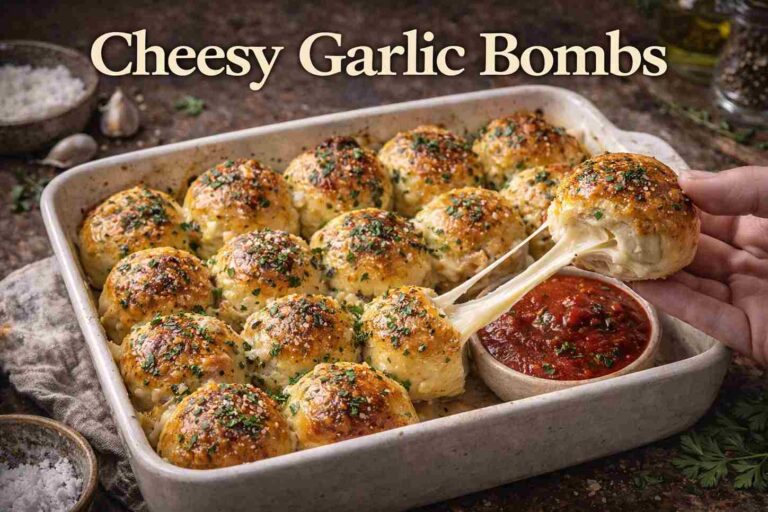
- Garlic Butter Cheese Bombs
- Quick Ham & Cheese Pinwheels
- Philly Cheesesteak Stuffed Rolls
- Bacon Cheeseburger Dip
- Pepperoni Pizza Dip
- Brown Sugar Bacon-Wrapped Smokies
- Chili Crisp Egg Avocado Toast
- Crispy Rice Cake Benedict
- Savory Chicken Salad Cucumber Rolls
- Cabbage & Lentil Rolls
- Shrimp Bruschetta
- Honey Butter Cornbread
- Spinach & Onion Savory Jam
- Ultimate Big Mac Salad
- Chicken & Potato Croquettes
- High-Protein Lentil Crackers
- Blueberry Tiramisu
- Kunafa Tiramisu
- Lighter Eggnog Tiramisu
- Mirror Glaze Raspberry Mousse Cake
- Ombré Heart Buttercream Cake
- Valentine’s Day Mini Cakes
- Molten Mini Chocolate Lava Cakes
- High-Protein Pumpkin Mousse
- No-Bake Oreo Delight
- No-Bake Pistachio Cheesecake
- No-Bake Banana Pudding
- Samoa Brownies
- Cream Cookie Chunk Fudge
- Thin & Chewy Chocolate Chip Cookies
- Red Velvet Cookies
- Valentine Heart Cookies
- Strawberry Cheesecake Tacos
- Healthy Oatmeal Apple Banana Cake
- Sugar-Free Oat Cakes
- Sugar-Free Banana Oat Brownies
- Coconut Cove Baked Oatmeal
- Blueberry Apple Morning Oats Cake
- Sugar-Free Dates, Banana & Chocolate
- Low-Carb Cottage Cheese Ice Cream
- Keto Schnitzel
- Keto Beef Roulades
- Fluffy Keto Cloud Bread
- Keto Muffins
- Keto German Chocolate Cake
- Keto Yogurt Almond Cake
- Keto Spinach & Feta Omelette
- Keto Bacon Cheeseburger Casserole
- Keto Eggplant Parmesan
- 15-Min Keto Creamy Garlic Chicken
- Low-Carb Tuscan Chicken Bake
- One-Pot Zoodle Alfredo
- Keto Garlic & Herb Breadsticks
- Keto Chocolate Chip Banana Bread
- Keto Tortillas
- 3-Ingredient Carnivore Bun
- Mediterranean Stuffed Roasted Peppers
- Red Lentil Bread
- Classic Whiskey Sour
- Old Fashioned
- Manhattan
- Hot Apple Whisky Lime
- Classic Margarita
- Frozen Strawberry Margarita
- Strawberry Coconut Margarita
- Mango Chilli Margarita
- Paloma
- Aperol Spritz
- Moscow Mule
- Strawberry Basil Mule
- Vodka Cranberry
- 3 Ways: Blueberry Vodka Lemonade
- Homemade Piña Colada
- Mermaid Mimosa
- Passion Fruit Martini
- Honolulu Highball
- Angel Face
- Mandarin Sunrise
- Pomegranate Gimlet
- Southside Gin Cocktail
- Paper Plane
- White Lady
- Almond Joy Cocktail
- Green Tea Shot
- Black Grapes Mojito
- 10 Best Rum Cocktails