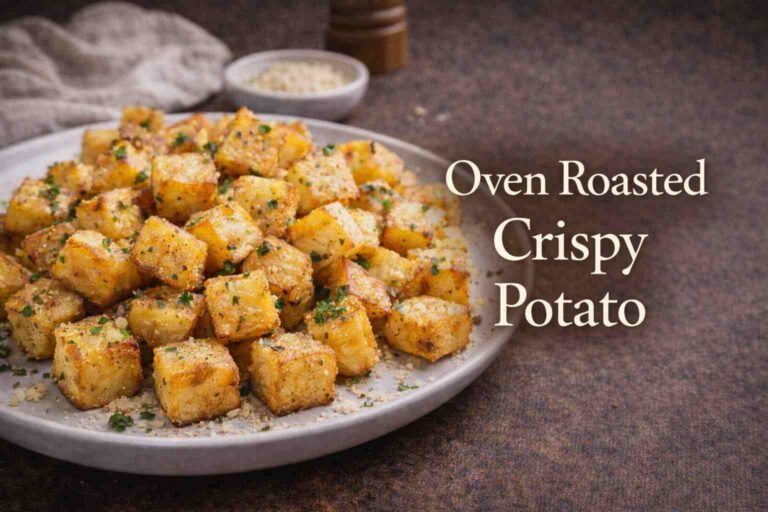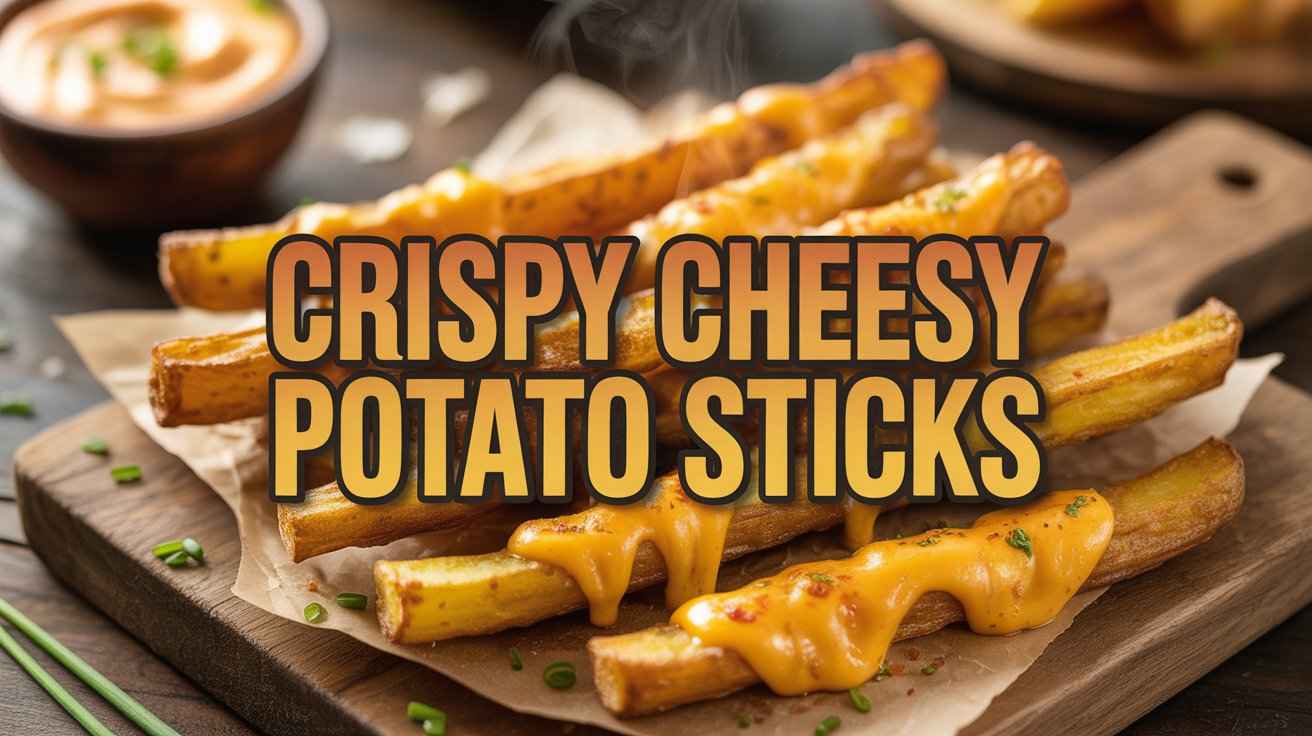
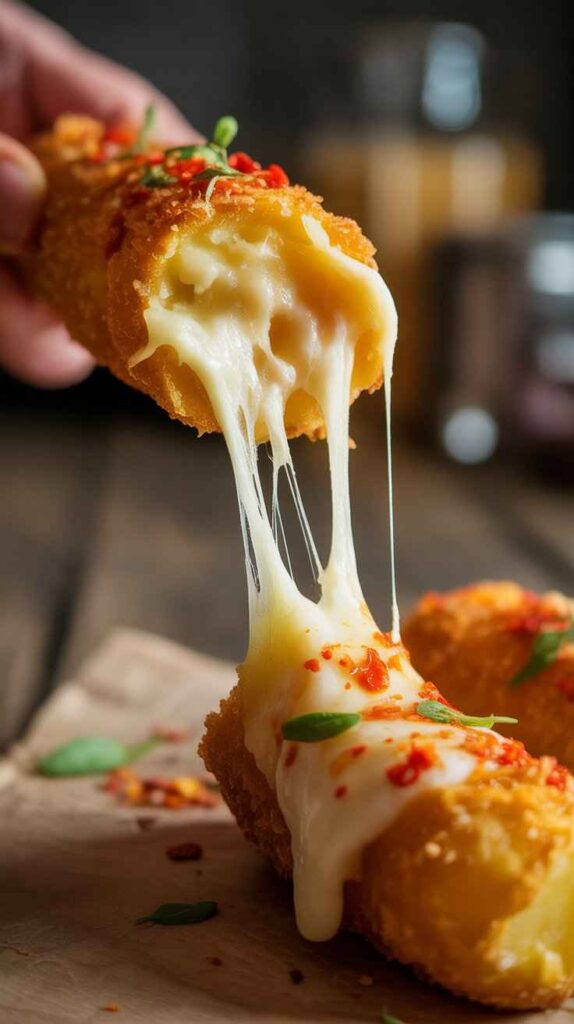
These Crispy Cheesy Potato Sticks are the kind of snack that makes people stop mid-conversation, reach for another piece before they have even finished the first, and immediately ask you for the recipe — golden and shattering on the outside, soft and pillowy with a warm melted cheesy centre, and seasoned with chilli flakes, oregano, and fresh coriander, they disappear from the plate within minutes no matter how many you make. What makes this recipe so special is how beautifully it transforms one of the most humble, affordable ingredients in the kitchen into something that feels genuinely indulgent: potatoes mashed until completely smooth, combined with corn flour for structure and cheese slices for that irresistible molten centre, shaped into a dough that is frozen until firm, cut into neat sticks, dipped in a light seasoned slurry, coated thoroughly in breadcrumbs, and fried to a deep golden brown so satisfying you can hear the crunch from across the room. The technique is entirely approachable — no specialist equipment, no hard-to-find ingredients, no advanced skills — just a simple dough, a quick slurry, and a hands-off freezing step that makes cutting and handling the sticks completely effortless.
These potato sticks work beautifully across almost any occasion, from a tea-time snack alongside a hot cup of chai on a rainy afternoon to a party starter that guests of all ages will love, a game night staple, a movie evening treat, or a potluck contribution that is easy to eat by hand and guaranteed to impress — just serve them hot from the oil with tomato ketchup and mayonnaise on the side and watch them vanish. They are also wonderfully economical, made entirely from affordable pantry staples that most home kitchens already have or can pick up at any grocery store for very little, producing a batch that costs a fraction of a comparable café snack and tastes significantly better because it is made fresh, hot, and exactly to your taste. If you have been looking for a go-to snack recipe that never fails, that can be prepared ahead by freezing the dough in advance, and that consistently produces something impressive enough to have people asking for the recipe before the plate is even empty — this is exactly it.
Recipe Details
| Detail | Info |
|---|---|
| Cuisine | Fusion / Indo-American |
| Course | Snack / Appetizer / Starter |
| Difficulty | Easy |
| Servings | 4–5 |
| Prep Time | 20 minutes + 1–2 hours freezing |
| Cook Time | 15–20 minutes |
| Calories Per Serving | ~280–320 kcal |
Ingredients
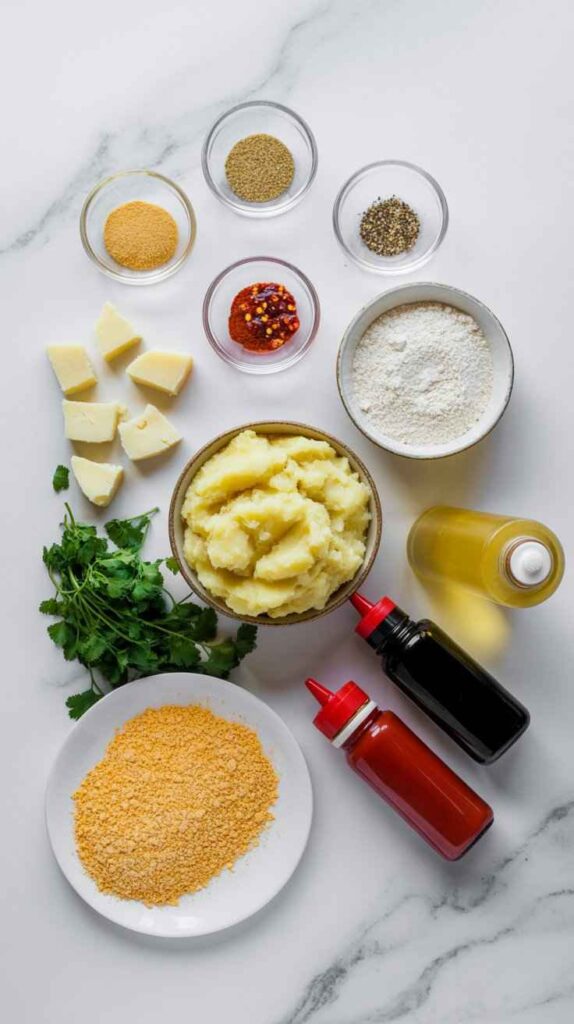
For the Potato Dough:
- 4 to 5 medium potatoes, boiled and mashed until completely smooth
- ½ cup corn flour
- 4 to 5 cheese slices, roughly torn or chopped
- 1 tsp chilli flakes (adjust to taste)
- 1 tsp dried oregano
- ½ tsp black pepper powder
- Salt, to taste
- A small handful of fresh coriander, finely chopped
For the Slurry:
- 2 tbsp maida (all-purpose flour)
- 2 tbsp corn flour
- A pinch of salt
- A pinch of black pepper
- Water, added gradually to achieve a smooth, medium-thick consistency
For Coating and Frying:
- Breadcrumbs, enough to generously coat all the sticks
- Oil, for deep frying
To Serve:
- Tomato ketchup
- Mayonnaise
Step-by-Step Instructions
Step 1: Boil and Mash the Potatoes
Start by boiling your potatoes until they are completely tender throughout — a fork should slide through the center of the largest potato with no resistance at all. Properly cooked potatoes make all the difference to the texture of the final dough, so do not rush this step. Undercooked potato will leave lumps in the mash that make the dough uneven and difficult to shape cleanly.
Once the potatoes are cooked, drain them thoroughly and allow them to steam dry for a few minutes in the colander or pot. Excess moisture is one of the biggest challenges in potato-based snack recipes — a wet mash will make the dough sticky, difficult to handle, and more likely to absorb oil during frying rather than crisping up properly. If possible, peel the potatoes while they are still warm, as the flesh releases steam more efficiently this way.
Mash the potatoes until they are completely, utterly smooth — no lumps, no fibrous bits, no chunks. A potato ricer gives the finest, smoothest result, but a regular potato masher or even a fork will work if you take the time to be thorough. The smoother the mash, the better the final texture of your potato sticks will be.
Step 2: Make the Potato Dough
Transfer the smooth mashed potato to a large mixing bowl and allow it to cool to room temperature before adding the remaining ingredients. Adding the cheese and flour to hot potato will cause the cheese to melt immediately and the mixture to become sticky rather than forming a workable dough.

Once the mash is cool, add the corn flour, torn cheese slices, chilli flakes, dried oregano, black pepper powder, salt, and finely chopped fresh coriander. Using clean hands or a sturdy spatula, bring everything together and mix until a smooth, cohesive dough forms. The corn flour absorbs the moisture from the potato and binds everything into a dough that is firm enough to shape and handle but soft enough to have a fluffy, yielding texture once cooked.
Taste the dough at this stage and adjust the seasoning if needed — add more chilli flakes for extra heat, more salt if required, or an additional pinch of oregano for more herbal flavor. The dough should taste well-seasoned and flavorful on its own, because the coating and frying process will not add any significant additional seasoning.
Step 3: Freeze the Dough
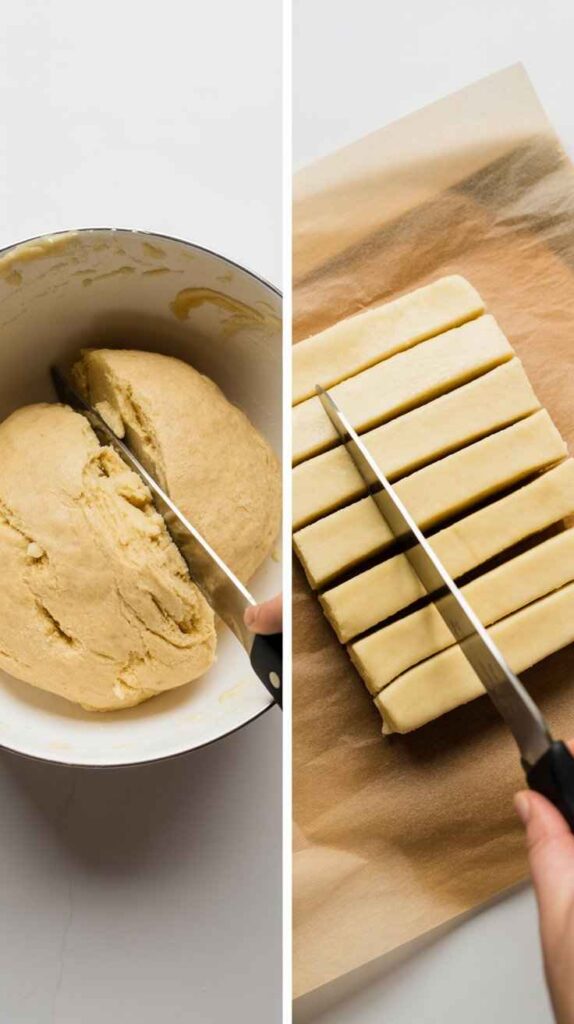
This is the step that transforms a soft, sticky dough into something you can handle, cut, and shape with ease. Lightly grease a flat-bottomed dish or tray with a drizzle of oil, or line it with cling film. Transfer the potato dough into the dish and press it out into an even, flat layer approximately 2 to 3 cm thick. The thickness of this layer determines the thickness of your finished sticks, so aim for something consistent.
Cover the tray with cling film or a plate and place it in the freezer for 1 to 2 hours until the dough is completely firm and solid all the way through. You should be able to press it with your finger and feel no give whatsoever. A well-chilled dough cuts cleanly into neat sticks without crumbling or sticking to the knife, and it holds its shape throughout the coating and frying process. Do not try to skip or shorten this step — it is what makes the difference between potato sticks that stay intact and ones that fall apart in the oil.
Step 4: Cut into Sticks
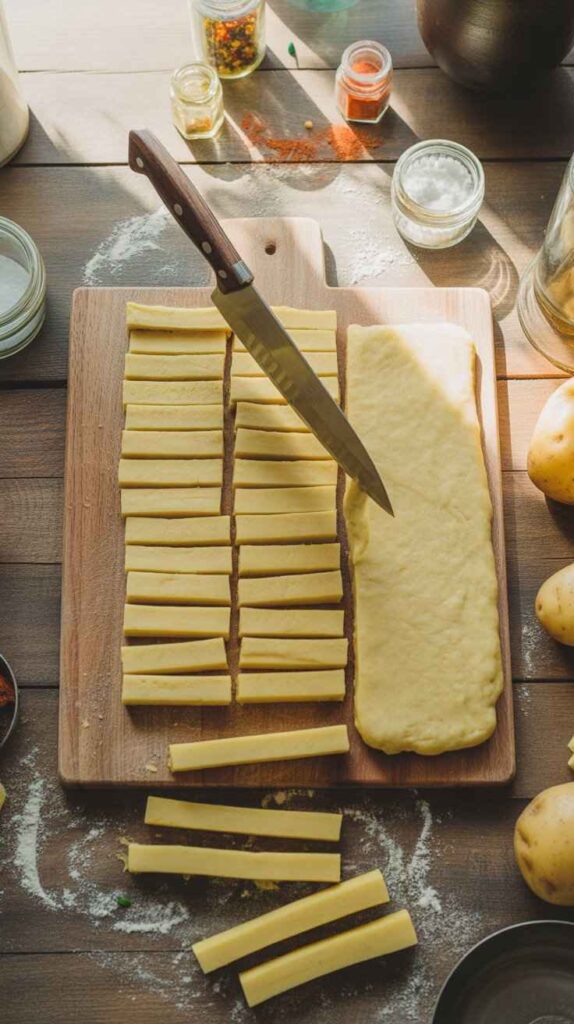
Remove the firm, frozen dough from the freezer. Turn it out onto a clean cutting board and use a sharp knife to cut it into even sticks of your preferred size. Traditional finger-food sticks are approximately 1 to 1.5 cm wide and 6 to 8 cm long — a size that is easy to pick up, easy to dip, and cooks evenly all the way through. Work quickly and decisively with the knife, as the dough will begin to soften as it warms up at room temperature.
If you want to make a different shape — small cubes, rounds, or even coin shapes — this dough works well in any form. The stick shape is classic because it maximizes the surface area of crunchy coating relative to the soft center, but feel free to experiment and find the shape you enjoy most.
Step 5: Prepare the Slurry
In a medium mixing bowl, combine the maida, corn flour, a pinch of salt, and a pinch of black pepper. Gradually add water a splash at a time, whisking constantly after each addition to prevent lumps from forming. Continue adding water slowly until the slurry reaches a smooth, medium-thick consistency — it should coat the back of a spoon evenly and flow off slowly rather than dripping off instantly. Think of it as being similar to a thin pancake batter: fluid and smooth but thick enough to cling to the potato stick and provide a base for the breadcrumb coating to adhere to.
The combination of maida and corn flour in the slurry is deliberate. Maida provides the binding strength to hold the breadcrumb coating in place during frying, while corn flour contributes extra crispiness to the outer layer. Together they create a coating that stays on the potato stick reliably and fries up to a beautifully crunchy finish.
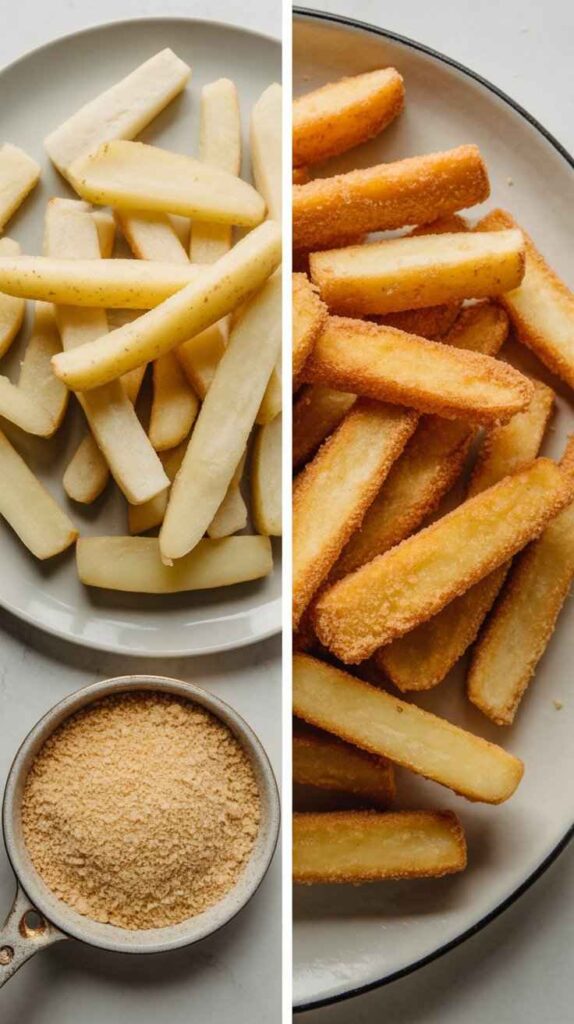
Step 6: Coat with Breadcrumbs and Fry
Set up a simple coating station: the bowl of slurry on one side, a wide plate of breadcrumbs on the other, and a clean tray or plate for the coated sticks. Working one at a time, dip each potato stick into the slurry, making sure it is coated on all sides and at both ends. Allow the excess slurry to drip back into the bowl for a second, then roll the coated stick in the breadcrumbs, pressing gently to make sure the breadcrumbs adhere firmly to every surface.
Place the coated stick on the clean tray and repeat with the remaining sticks. For an extra-thick, extra-crunchy coating — which is highly recommended — you can double coat the sticks: slurry, breadcrumbs, slurry, breadcrumbs. This creates a thicker shell that stays crunchier for longer and provides an even more satisfying bite.
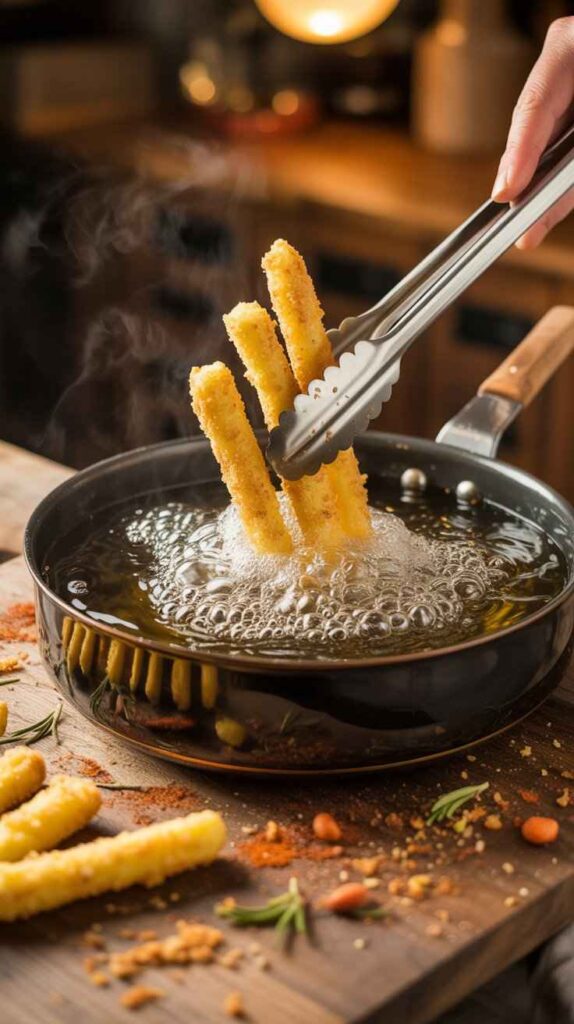
Pour enough oil into a deep frying pan or kadai for deep frying and heat over medium-high heat. Test the oil temperature by dropping a small pinch of breadcrumb into it — if it sizzles immediately and rises to the surface, the oil is ready. Carefully lower the coated potato sticks into the hot oil in small batches of 4 to 5 at a time. Never overcrowd the pan, as this lowers the oil temperature and results in greasy, pale, soft sticks rather than golden, crispy ones.
Fry each batch for 3 to 4 minutes, turning gently once or twice, until the sticks are evenly deep golden brown all over and the coating is completely set and crunchy. Remove with a slotted spoon and drain briefly on paper towels. Serve immediately while hot.
Tips for Perfect Crispy Cheesy Potato Sticks
Dry your mash thoroughly. The drier your mashed potato, the firmer and more manageable your dough will be, and the crispier the finished sticks will be. Steam the boiled potatoes in the open pot for a few minutes after draining to drive off excess moisture before mashing.
Do not skip the freezing step. Freezing the dough is non-negotiable for clean, even sticks that hold their shape during coating and frying. A soft dough will deform when you try to cut it and will be difficult to coat without it sticking to your hands and the work surface.
Use processed cheese slices for the best melt. Processed cheese slices melt very evenly and smoothly throughout the dough, creating that satisfying gooey, cheesy pull in the center. Fresh cheese or hard grated cheese can be used but will not melt as uniformly.
Keep the oil at the right temperature. Oil that is too cool will make the sticks absorb more fat and turn greasy. Oil that is too hot will brown the outside before the inside heats through. Medium-high heat and small frying batches are the key to consistently golden, perfectly cooked results.
Serve immediately. These sticks are best eaten within minutes of coming out of the oil while the coating is at its crunchiest and the cheese center is still warm and melted. They will soften as they sit, so time your frying to coincide with when people are ready to eat.
Conclusion
These Crispy Cheesy Potato Sticks are proof that the most satisfying and impressive snacks do not require complicated techniques, expensive ingredients, or hours of effort. Built on the foundation of a smooth, well-seasoned potato dough with a molten cheesy heart, coated in a light crispy shell, and fried to a perfect golden brown, they deliver a combination of textures and flavors that is simply irresistible. Make them for a tea-time treat, a party starter, a game night snack, or any occasion where you want to put something on the table that makes people genuinely happy. Prepare the dough ahead of time, keep it in the freezer, and fry fresh whenever you need them — you will never be without a spectacular snack again. Once you make these, they will become the recipe everyone in your household asks for again and again.
Frequently Asked Questions
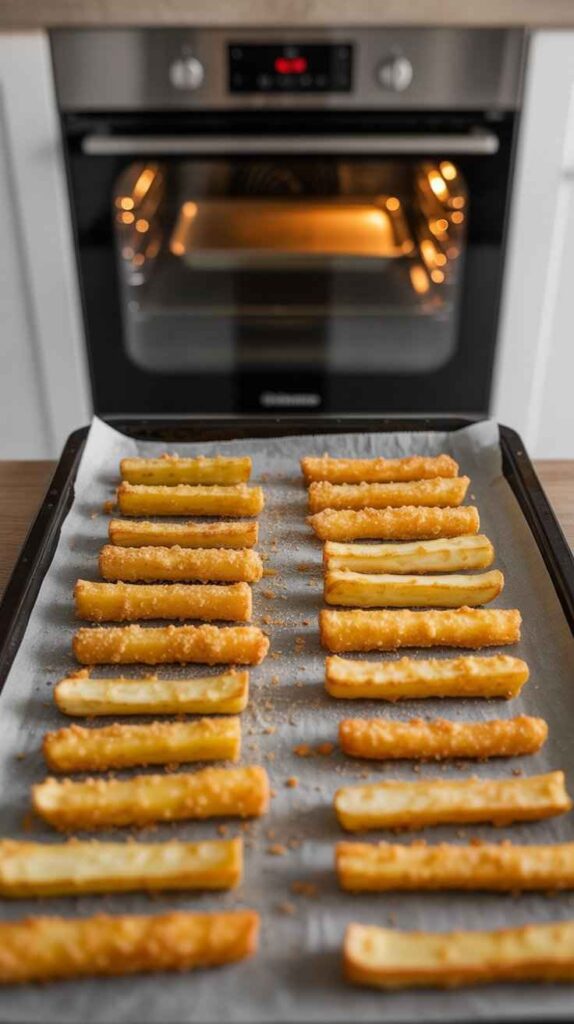
Can I bake these potato sticks instead of deep frying them? Yes, you can bake them as a lighter alternative to deep frying. Arrange the coated sticks on a greased or parchment-lined baking tray, brush or spray them generously with oil on all sides, and bake in a preheated oven at 200°C for 20 to 25 minutes, flipping them over halfway through. The baked version will not be quite as deeply golden or shatteringly crunchy as the fried version, but it is still very satisfying and considerably lower in oil content.
Can I air fry these potato sticks? Yes, the air fryer works very well for this recipe. Preheat your air fryer to 200°C, place the coated sticks in a single layer in the basket without overlapping, and spray or brush them with a light coating of oil. Air fry for 15 to 18 minutes, turning halfway through, until golden and crispy all over. Work in batches if needed to avoid overcrowding, which prevents even browning and crisping.
Why is the freezing step necessary? Can I skip it? The freezing step is essential and should not be skipped. The potato dough is naturally soft and sticky at room temperature, which makes it almost impossible to cut into neat sticks, very difficult to coat without deforming, and likely to fall apart in the oil during frying. Freezing firms the dough completely, allowing you to cut clean, even sticks that hold their shape perfectly through the coating and frying process. It is entirely hands-off time and the results are dramatically better for it.
What type of cheese works best in this recipe? Processed cheese slices — such as standard sandwich cheese slices — work best because they melt very evenly and smoothly throughout the dough, creating that characteristic gooey, stretchy cheese centre. Mozzarella is an excellent alternative if you want a more dramatic cheese pull and a milder flavor. Cheddar can be used for a sharper, more pronounced cheese flavor. Avoid very hard, aged cheeses as they do not melt as uniformly and can create a greasy rather than creamy result.
Can I make the dough ahead of time and store it? Yes, this is one of the great practical advantages of this recipe. Once the dough is pressed into the tray and covered, it can be stored in the freezer for up to 1 month. Simply cut, coat, and fry directly from frozen whenever you need them — making these an excellent make-ahead snack for parties and gatherings. You can also cut and coat the sticks, arrange them on a tray, and freeze them again before frying, so they are ready to go straight from the freezer into the hot oil.
Why do my potato sticks fall apart in the oil? The two most common causes are insufficient freezing and oil that is not hot enough. If the dough was not firm all the way through when it was cut, the sticks will not have enough structural integrity to hold together when the heat of the oil begins to soften the exterior. Make sure the dough is frozen completely solid before cutting. Also ensure the oil is at the right temperature before adding the sticks — cold oil causes the coating to soften and absorb fat rather than immediately setting into a crispy shell.
Can I use panko breadcrumbs instead of regular breadcrumbs? Yes, panko breadcrumbs are an excellent choice and will actually give a slightly crunchier, more textured result than regular fine breadcrumbs. Panko breadcrumbs are lighter and more open in structure, which creates a thicker, crispier coating with more surface area. Either variety works well in this recipe, so use whichever you have available or prefer.
How do I make these potato sticks spicier? There are several easy ways to increase the heat level. Add more chilli flakes to the potato dough — up to double the stated amount if you enjoy significant heat. Include a pinch of red chilli powder or cayenne pepper in both the dough and the slurry. You can also add a small amount of finely chopped fresh green chilli to the dough along with the coriander. Serve with a spicy chilli sauce or sriracha alongside the ketchup and mayonnaise for extra heat at the table.
Can I add other ingredients to the potato dough? Absolutely — this dough is very adaptable and welcomes a wide range of additions. Finely chopped spring onions add a mild, fresh bite. Sweet corn kernels add bursts of sweetness and texture. Finely diced bell pepper adds color and crunch. A pinch of chaat masala adds a tangy, complex flavor that is particularly popular in Indian-style snacks. Grated garlic stirred into the dough adds a savory depth. Keep any additions finely chopped so they do not interfere with the smooth texture of the dough.
Why are my potato sticks greasy rather than crispy? Greasy potato sticks are almost always caused by frying in oil that is not hot enough. When the oil temperature is too low, the coating absorbs oil rather than immediately setting and crisping, resulting in a greasy, heavy texture. Always test the oil with a small piece of breadcrumb before adding the sticks — it should sizzle vigorously and rise to the surface immediately. Also avoid overcrowding the pan, as adding too many sticks at once dramatically drops the oil temperature.
Can I use sweet potato instead of regular potato for this recipe? Yes, sweet potato can be used as a full or partial substitute for regular potato in this dough. Sweet potato mash is naturally slightly wetter and stickier than regular potato mash, so you may need to add a little extra corn flour to achieve the right dough consistency. The finished sticks will have a slightly sweeter flavor and a beautiful orange color, and they pair particularly well with a yogurt-based dipping sauce alongside the ketchup.
What dipping sauces work well with these potato sticks besides ketchup and mayo? These potato sticks are versatile enough to pair with a wide range of dipping sauces. Mint and coriander chutney is a classic Indian accompaniment that provides a bright, herby, cooling contrast to the warm spiced potato. A simple garlic aioli adds sophistication. A sweet chilli sauce provides tangy heat. Chipotle mayo — regular mayo mixed with a little chipotle sauce or smoked paprika — adds a smoky, creamy richness. Cheese sauce is particularly indulgent and doubles down on the cheesiness of the sticks themselves.
How do I prevent the breadcrumb coating from falling off during frying? The most important factor is ensuring the slurry coats the potato stick thoroughly and evenly before the breadcrumbs are applied. Press the breadcrumbs firmly onto the surface of the slurry-coated stick rather than just rolling it loosely. Allowing the coated sticks to rest for 5 minutes on a tray before frying lets the coating set and adhere more firmly. Chilling the coated sticks in the refrigerator for 15 to 20 minutes before frying is an even more effective way to ensure the coating stays perfectly intact during cooking.
Can I make a vegan version of these potato sticks? Yes. Replace the cheese slices with a good-quality vegan melting cheese — many plant-based cheese slices designed specifically for melting are now widely available and work very well in recipes like this. All other ingredients in this recipe are already plant-based, including the slurry, which uses water rather than egg as its liquid base. The finished result will be very similar in texture and flavor to the original version.
How thick should I cut the potato sticks? A width of approximately 1 to 1.5 cm and a length of 6 to 8 cm is the recommended size for even cooking, easy handling, and a good ratio of crispy coating to soft, cheesy interior. Thinner sticks will cook faster but may not retain as much of the soft, fluffy center that makes this snack so appealing. Thicker sticks take longer to heat through but deliver a more pronounced contrast between the crunchy exterior and the soft, melted center.
Why is corn flour used in both the potato dough and the slurry? Corn flour serves different but complementary purposes in each component. In the potato dough, corn flour absorbs the moisture from the mashed potato and binds the mixture into a firm, workable dough that holds its shape during the freezing, cutting, and frying stages. In the slurry, corn flour contributes to the crispiness of the fried coating alongside the maida, as it does not absorb oil as readily as wheat flour and therefore produces a lighter, crunchier result when fried.
Can I reheat leftover potato sticks? Yes, though they are always best eaten fresh from the oil. To reheat, place them in a preheated oven at 180°C for 8 to 10 minutes until warmed through and the coating has crisped up again. An air fryer is even better for reheating — 5 to 7 minutes at 180°C will restore a significant amount of the original crunch. Avoid microwaving as it softens the coating and makes the sticks unpleasantly chewy rather than crispy.
How many potato sticks does this recipe make? The exact number depends on how large you cut the sticks and how thick you press the dough, but a batch made with 4 to 5 medium potatoes typically yields approximately 20 to 25 sticks — enough to serve 4 to 5 people generously as a snack or starter. If you are cooking for a larger group, the recipe scales up very easily: simply double or triple all the quantities and prepare the dough in a larger tray.
Is this recipe suitable for children? Yes, this is a wonderfully child-friendly snack. The combination of potato and melted cheese is universally popular with children, and the mild seasoning of oregano and black pepper is well-tolerated by most young palates. For younger children or those sensitive to spice, simply reduce or omit the chilli flakes from the dough and serve with mild tomato ketchup rather than a spicy sauce. The fun stick shape also makes them easy and enjoyable for children to pick up and dip.
What is the best oil to use for frying these potato sticks? Any neutral-flavored oil with a high smoke point works well for deep frying these sticks. Sunflower oil, refined vegetable oil, canola oil, and groundnut oil are all excellent choices. Avoid olive oil for deep frying as its lower smoke point means it can break down and develop off-flavors at the high temperatures needed for deep frying. The most important factor is that the oil is clean, fresh, and heated to the correct temperature before the sticks are added.
Printable Recipe Card
Want just the essential recipe details without scrolling through the article? Get our printable recipe card with just the ingredients and instructions.