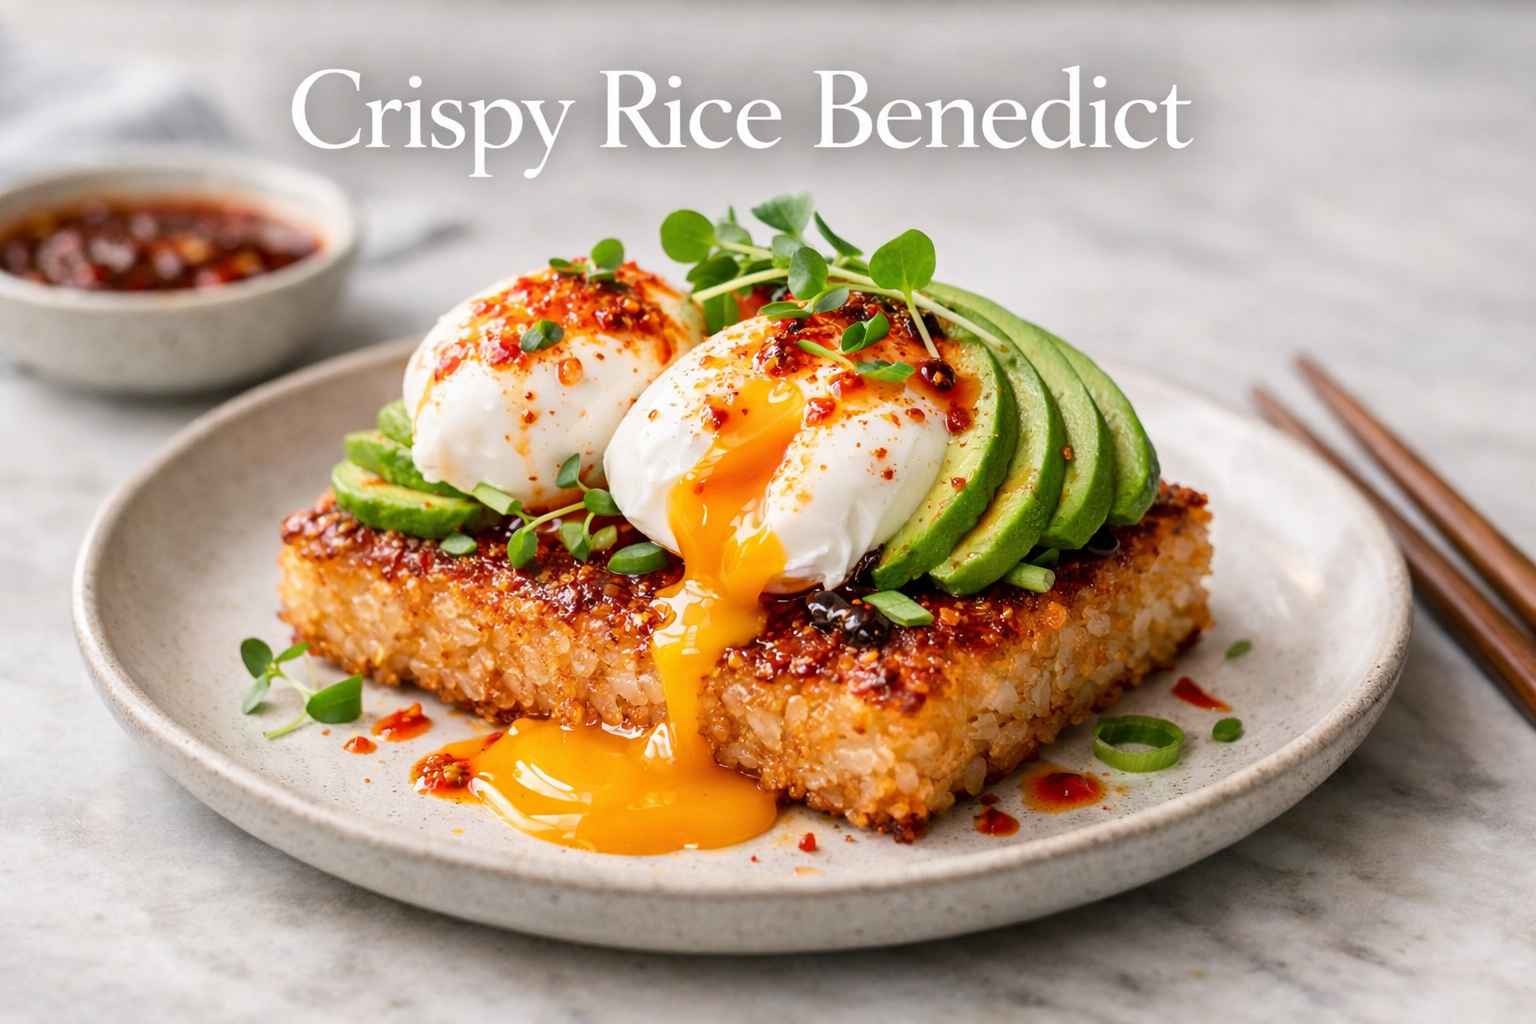
If you’ve ever scrolled through food content online and found yourself stopping dead in your tracks at the sight of a golden, pan-fried rice cake crowned with silky poached eggs, creamy avocado, and a fiery drizzle of chili oil — you already know what this recipe is about. Crispy Rice Benedict is the modern, gluten-free reimagining of the classic Eggs Benedict that has taken brunch culture by storm, and for every good reason. It swaps out the traditional English muffin for a pressed, pan-fried block of seasoned sushi-style rice that crisps up to absolute perfection on the outside while staying pillowy and chewy on the inside. The result is a textural masterpiece that no brioche bun or sourdough slice could ever compete with. Born at the intersection of Japanese culinary technique and Western brunch tradition, this dish is a celebration of contrast — crispy meets creamy, rich meets bright, simple meets stunning. Whether you’re hosting a Sunday brunch for friends or treating yourself to a solo indulgence, this Crispy Rice Benedict recipe will earn you the kind of compliments that make people think you’ve secretly trained in a professional kitchen. Let’s get into it.
Recipe Details
| Detail | Info |
|---|---|
| Cuisine | Asian-Fusion / Japanese-Inspired |
| Course | Brunch / Breakfast |
| Difficulty | Intermediate |
| Servings | 2 People (4 crispy rice cakes / 4 poached eggs) |
| Prep Time | 15 Minutes (+ 4 Hours or Overnight Refrigeration) |
| Cook Time | 20 Minutes |
| Total Active Time | 35 Minutes |
| Calories Per Serving | ~480–520 kcal (estimated) |
Ingredients
For the Crispy Rice:
- 1 Cup White Short-Grain or Sushi Rice, uncooked
- 2 Tbsp Rice Vinegar
- 1 Tbsp Granulated Sugar
- 1 tsp Fine Sea Salt
- Avocado Oil (enough for shallow frying, approximately ¼ inch depth)
For the Benedict Assembly:
- 1 Ripe Avocado, peeled and sliced thin
- Maldon Flaky Sea Salt, to finish
- 4 Large Fresh Eggs
- 1 tsp White Vinegar (for poaching water)
- Chili Oil, to drizzle
- Micro Greens, to garnish
Equipment You’ll Need
- Rice cooker or medium saucepan with lid
- 9×9 inch baking dish (or any similarly sized container)
- Plastic wrap
- Round cookie cutter or a similarly sized drinking glass
- Large heavy-bottomed pot or Dutch oven
- Medium saucepan or deep pot (for poaching)
- Fine mesh sieve
- Small ramekins or bowls (4, one per egg)
- Slotted spoon
- Paper towels
- Mixing bowl
Step-by-Step Instructions
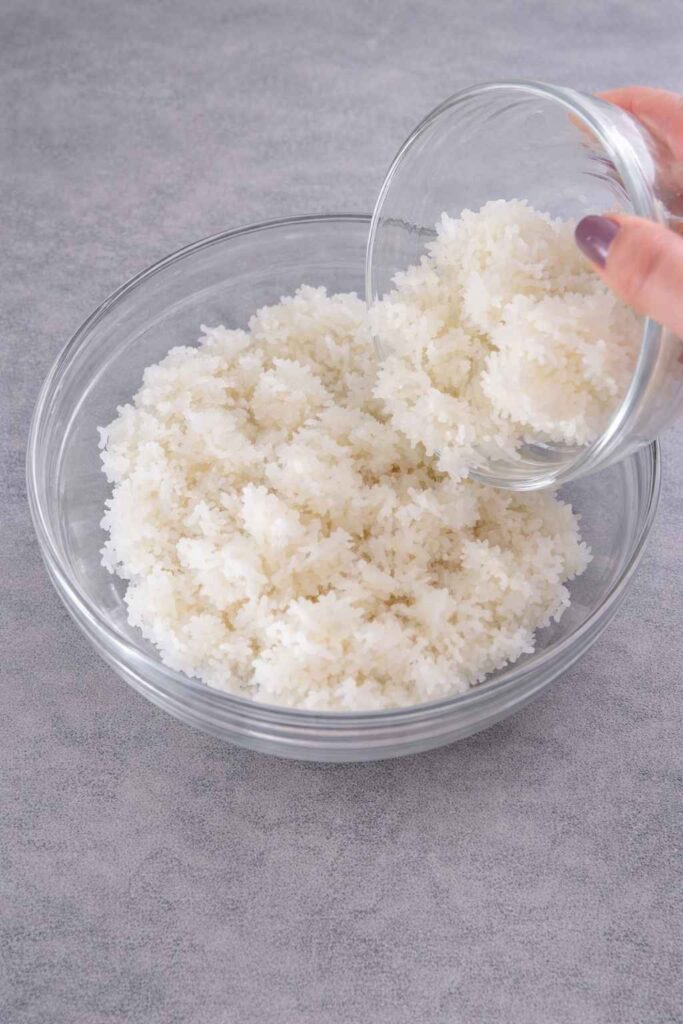
Step 1: Cook and Season the Rice
Cook 1 cup of uncooked sushi or short-grain white rice in your rice cooker according to the manufacturer’s instructions, or on the stovetop using the absorption method (typically 1 cup rice to 1.25 cups water, brought to a boil, then reduced to the lowest possible simmer with a lid on for 18 minutes). While the rice is cooking, whisk together the rice vinegar, granulated sugar, and fine sea salt in a small bowl until the sugar and salt are fully dissolved — this is your sushi seasoning mixture, and it’s what gives the rice its signature tangy, slightly sweet depth of flavor. The moment the rice is done cooking and still piping hot, pour the vinegar mixture over the rice in even distribution. Using a rice paddle or a silicone spatula, fold the seasoning into the rice using gentle, sweeping cuts — do not mash or stir aggressively, as you want the rice grains to remain intact. The steam will help absorb the seasoning beautifully.
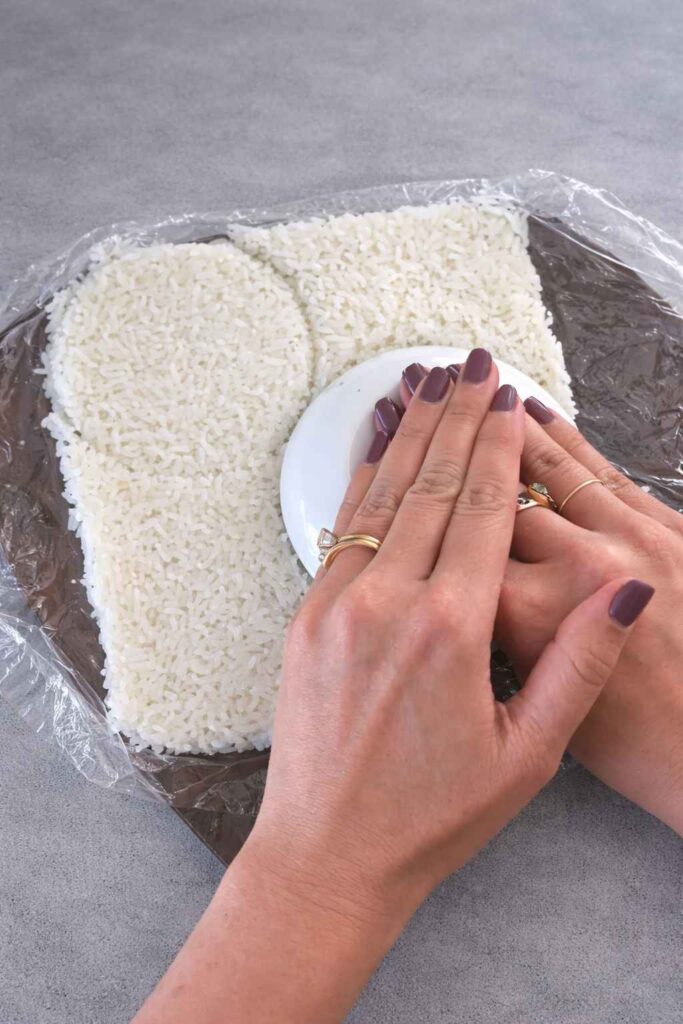
Step 2: Press and Refrigerate the Rice Block
Line your 9×9 inch baking dish generously with plastic wrap, leaving enough overhang on all sides to fold back over the top later. Transfer all of the warm, seasoned rice into the lined dish and begin pressing it down firmly and evenly using the back of a spoon, a flat-bottomed glass, or your hands (dampened slightly with water to prevent sticking). You’re not just spreading it — you are actively compressing it into a dense, unified block. Press firmly and repeatedly across every inch of the surface until the rice is approximately ¾ to 1 inch thick throughout and it visibly holds its shape when pressed. Fold the plastic wrap overhang over the top of the rice to seal it completely and place another small dish or flat object on top to add weight and encourage further compression. Refrigerate for a minimum of 4 hours, though overnight is strongly preferred for the best results. The cold temperature gelatinizes the starch in the rice, causing it to bond into a firm, sliceable slab that will hold up beautifully during frying.
Step 3: Cut the Rice Into Circles
Remove the baking dish from the refrigerator and peel back the plastic wrap. The rice block should now be completely firm, cool, and stable. Using a round cookie cutter (approximately 3–3.5 inches in diameter) or the rim of a similarly sized drinking glass, press straight down through the rice block in a decisive, clean motion to cut out perfect circles. You should be able to cut three clean circles from a standard 9×9 slab. For the fourth portion, gather all of the remaining scraps of rice and press them firmly together with damp hands, molding and compressing them back into a rough circle of similar size and thickness. Don’t worry if the fourth one looks less perfect — it will still fry up beautifully. Lay all four rice rounds on a plate or tray and pat them gently dry with a paper towel if there is any surface moisture, as excess water can cause oil to splatter dangerously during frying.
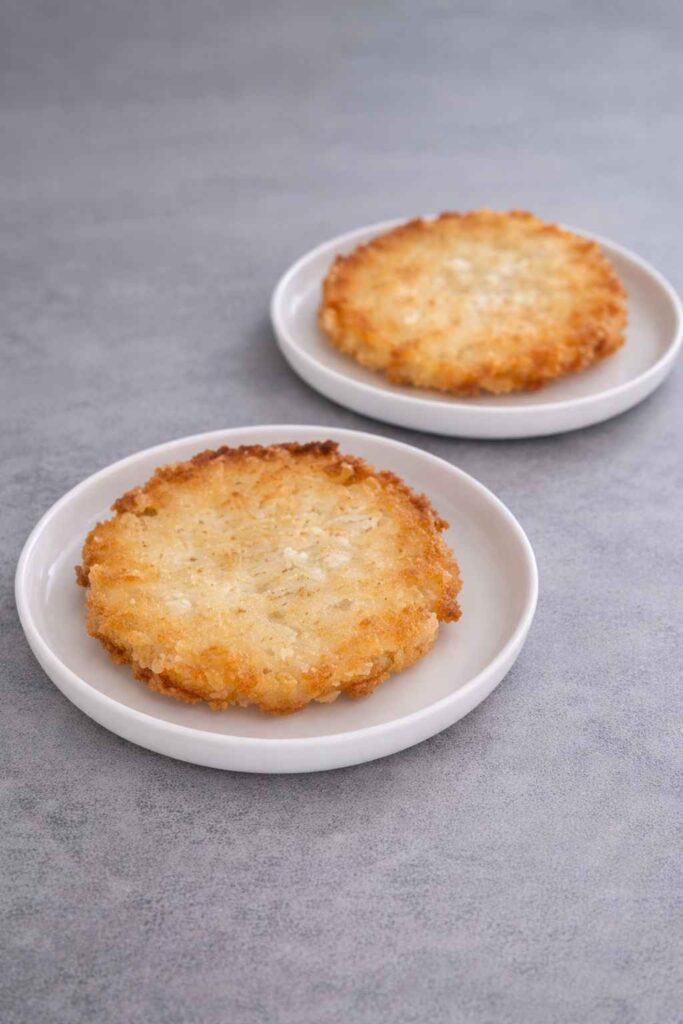
Step 4: Fry the Crispy Rice Cakes
Pour avocado oil into your large pot or Dutch oven until it reaches approximately ¼ inch depth. Avocado oil is specifically ideal here due to its very high smoke point (around 500°F / 260°C), which allows you to fry at a high enough temperature to achieve that signature deep-golden crust without burning or imparting any unwanted flavor. Heat the oil over medium-high heat for about 2–3 minutes until it shimmers and is visibly hot — you can test readiness by dipping the very edge of one rice cake into the oil; it should immediately sizzle aggressively. Carefully lower two rice cakes into the oil using a fish spatula or tongs, laying them away from you to avoid oil splatter. Fry undisturbed for approximately 3 minutes per side, resisting the urge to move them, until the underside is deep golden brown and visibly crisp. Flip carefully using a wide spatula and fry the second side for another 3 minutes. The cakes should be uniformly golden with crackling edges. Remove and transfer to a plate lined with paper towels to drain. Fry the remaining two rice cakes in the same manner, adjusting heat as needed.
Step 5: Prepare the Eggs for Poaching
Fill a medium pot or deep saucepan with water and bring it to a full rolling boil over high heat. While the water is heating, prepare your eggs one at a time using a technique that guarantees the cleanest, most restaurant-quality poached eggs. Crack one egg into a fine mesh sieve held over a small bowl. The very thin, watery portion of the egg white — which is the part responsible for those wispy, ragged strings that appear during poaching — will naturally fall through the mesh, separating from the thicker, higher-protein white that clings to the yolk. Gently tap the sieve against the bowl’s edge a few times to encourage the release of any remaining thin white. Then carefully transfer the strained egg into its own small ramekin or bowl. Repeat this process with all four eggs, each in its own vessel. This extra step takes only seconds per egg but makes an enormous difference in the final appearance and texture of your poached eggs.
Step 6: Poach the Eggs
Once the water has reached a full boil, add 1 teaspoon of white vinegar directly to the water. The acidity of the vinegar lowers the pH of the water, which causes the egg white proteins to coagulate and tighten more rapidly around the yolk, helping the egg hold its shape more cohesively during cooking. Stir the water in a slow, wide circular motion using a spoon to create a gentle vortex. Now carefully lower the heat so the water is at a very gentle simmer — you want movement, but not an aggressive boil that will tear the egg whites apart. One at a time, hold a ramekin as close to the water’s surface as possible and gently slide the egg into the center of the vortex. The circular movement of the water will naturally coax the white to wrap around the yolk. Plop each egg in one at a time with a brief pause between each addition.
Step 7: Cook and Remove the Eggs
Once all eggs are in the water, maintain a very gentle simmer and keep the water moving slowly with a spoon throughout the cooking process. Set a timer for exactly 4 minutes for a classic poached egg with fully set whites and a warm, runny, jammy yolk. If you prefer a slightly more set yolk, extend to 4.5 to 5 minutes. When the timer is up, use a slotted spoon to gently lift each egg from the water one at a time, and rest the bottom of the spoon briefly on a clean paper towel or kitchen cloth to absorb any excess water before transferring the egg to your assembly surface. The eggs should look smooth, fully enclosed in white, with a gorgeous dome shape.
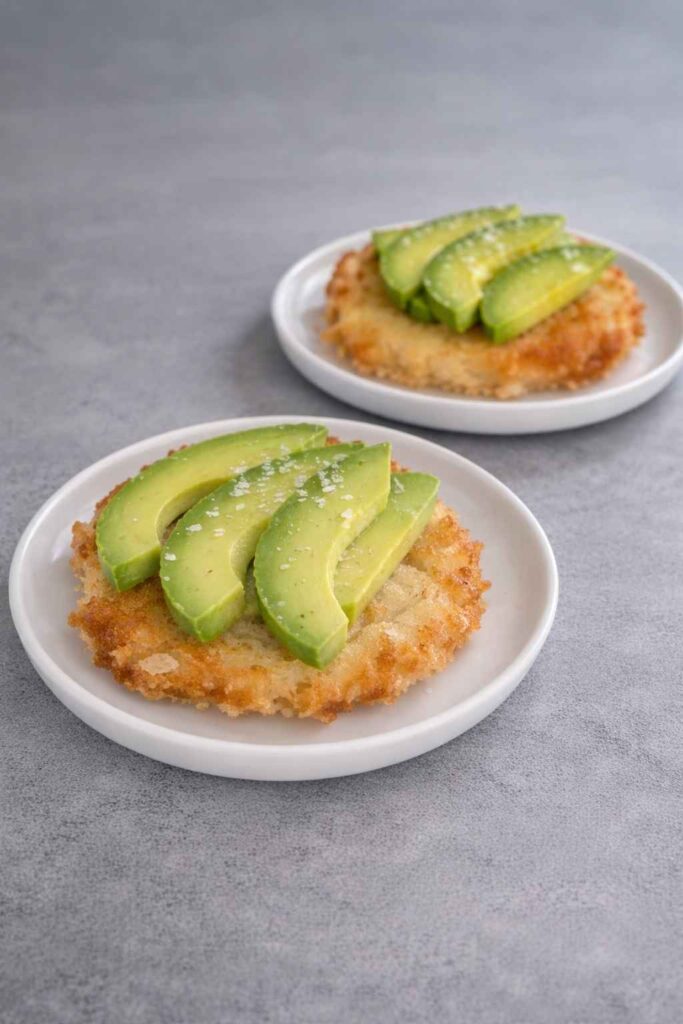
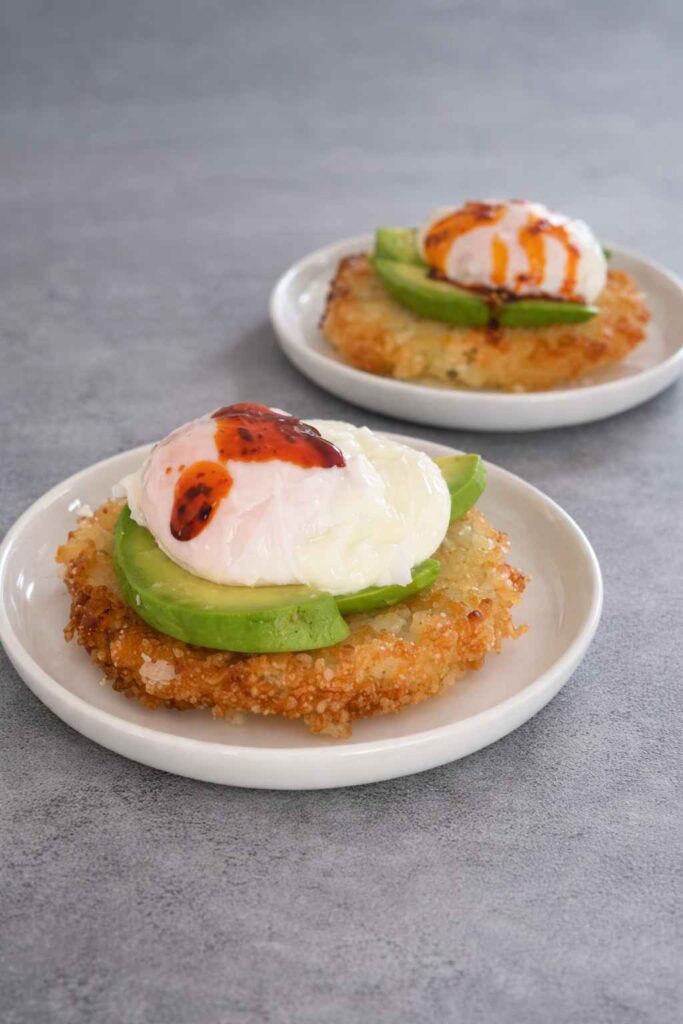
Step 8: Assemble and Serve
Now for the most visually rewarding moment. Lay your four golden crispy rice cakes on serving plates. Fan three thin slices of ripe avocado across the top of each rice cake, spreading them slightly for coverage. Finish the avocado with a generous pinch of Maldon flaky sea salt — the large crystals will add bursts of salinity and textural crunch. Carefully place one poached egg on top of each avocado-adorned rice cake. Drizzle generously with chili oil, making sure to let it pool in the crevices for maximum impact. Finish the entire plate with a small crown of micro greens for freshness, color, and a gentle peppery bite. Serve immediately and watch people’s expressions change the moment they cut into that yolk.
Pro Tips for Success
Rice type matters: Short-grain or sushi rice is non-negotiable here. Long-grain varieties like basmati or jasmine don’t have the starch content needed to hold together into a firm, fry-able block.
Don’t rush the refrigeration: The longer the rice chills and compresses, the better it will fry. Overnight refrigeration is the gold standard.
Oil temperature is critical: Too cool and the rice will absorb oil and become greasy. Too hot and it’ll burn before the interior warms. Medium-high heat with shimmering oil is your target.
Fresh eggs make better poached eggs: Older eggs have thinner whites and will fall apart more during poaching. The freshest eggs you can find will give you the tightest, most beautiful results.
Don’t overcrowd the poaching pot: Poach no more than two to three eggs at a time in a standard-size pot to maintain water temperature and prevent the eggs from sticking together.
Conclusion
The Crispy Rice Benedict is more than just a visually stunning brunch dish — it’s a statement. It’s proof that with a little patience, a few technical tricks, and a willingness to think outside the traditional breakfast box, you can create something at home that rivals the best brunch spots in any city. What makes this recipe so enduringly brilliant is the harmony of its components: the seasoned rice block, pressed and chilled to architectural perfection, then fried into something with the soul of a cracker and the heart of a dumpling. The poached egg, strained and swirled into silky perfection. The avocado, cool and creamy. The chili oil, fiery and bold. The micro greens, delicate and alive. Each element is doing essential work, and together they create a plate that is infinitely greater than the sum of its parts. Once you’ve made this recipe, you’ll understand why it has captured the imagination of food lovers around the world. The 4-hour wait for the rice to chill will feel like the most worthwhile investment of your culinary week. Share it, photograph it, bring it to your next brunch gathering — and most importantly, enjoy every single bite of it. This is the kind of dish that earns a permanent place in your recipe rotation.
Common FAQs about Crispy Rice Cake Benedict
Why does short-grain rice work better than long-grain rice for crispy rice cakes?
Short-grain rice contains a much higher proportion of amylopectin (a branching starch molecule) compared to long-grain varieties, which are higher in amylose (a linear starch). Amylopectin is responsible for the sticky, cohesive texture in cooked rice. When pressed and chilled, the amylopectin chains form a dense, interlocking network that gives the rice block the structural integrity needed to withstand slicing and frying without crumbling.
What is the science behind adding rice vinegar, sugar, and salt to the cooked rice?
This is the classic sushi-su (sushi vinegar seasoning) technique. The acetic acid in the rice vinegar seasons the rice, inhibits microbial growth, and slightly alters the starch structure to enhance stickiness. The sugar adds a subtle sweetness and promotes Maillard browning during frying. The salt enhances overall flavor perception by suppressing bitterness and amplifying other taste compounds.
Why does straining the egg through a fine mesh sieve produce a better poached egg?
Egg whites have two distinct layers: a thick, high-protein chalaziferous white that tightly surrounds the yolk, and a thin, watery outer white with lower protein content and higher moisture. This thin white is what creates the feathery, stringy wisps during poaching. By removing it through the sieve, you ensure only the thick white surrounds the yolk, resulting in a compact, smooth, restaurant-quality appearance.
What temperature should poaching water be?
Ideal poaching temperature is between 160–180°F (71–82°C), which is a gentle simmer with occasional small bubbles, not a rolling boil. A full boil creates turbulence that physically tears the egg white apart. At this lower temperature range, the white sets gently and the yolk remains fluid.
Why does the recipe instruct you to turn off the heat before adding the eggs?
This is a technique to eliminate boiling turbulence that would tear the egg white. By turning off the heat immediately before adding the eggs, the water retains enough thermal energy to cook the eggs at a gentle simmer while losing the violent agitation of an active boil. The residual heat is sufficient for a 4-minute cook time in a properly insulated pot.
What is the significance of the 4-hour minimum chilling time?
During the first 2 hours of refrigeration, the rice cools from cooking temperature to refrigerator temperature (around 37°F / 3°C), allowing starch retrogradation to begin. Between 2 and 4 hours, the retrogradation process produces sufficient re-crystallization of amylopectin chains to create a mechanically stable block. Overnight refrigeration (8+ hours) allows more complete retrogradation and results in a firmer, more consistently fry-ready block.
Discover an even more extensive selection of culinary creations spanning every meal and occasion imaginable. Begin your day with our five egg breakfast ideas, chili crisp egg avocado toast, and protein powder cinnamon rolls. For healthier morning choices, try healthy oatmeal apple banana cake, coconut cove baked oatmeal, and blueberry apple morning oats cake. For lunch, savor our ultimate big mac salad, quick ham and cheese pinwheels, crispy potato tacos, and vegan bulgogi pinwheels. Our impressive main courses include Vietnamese lemongrass chicken, honey balsamic pomegranate glazed chicken, mushroom stuffed chicken breast, baked French onion chicken, and low carb Tuscan chicken bake. Meat enthusiasts will delight in three Italian style meatloaves, pan seared pork tenderloin in creamy peppercorn gravy, citrus glazed roasted pork ribs with creamy mushroom potatoes, beef bourguignon, sausage ragu, and Korean sweet spicy beef meatballs. For pasta and seafood lovers, explore shrimp aglio e olio, creamy chicken meatball orzo, red pesto gnocchi, one pan Tuscan orzo with chicken, creamy peri peri chicken pasta, teriyaki pork noodles, one pan chicken chorizo orzo, and brown butter and sage mezzi rigatoni. Our soup collection spans creamy broccoli and garlic soup, carnival squash soup with turmeric, split pea soup, ham bean soup, hearty vegetable barley soup, creamy asparagus soup, French cream of chestnut soup, classic Provençal fish soup, New England creamy clam chowder, and Manhattan clam chowder soup. Vegetarian delights include vegan ramen, quick vegan lasagna, vegan cabbage rolls, spicy maple tofu rice bowl, and vegan chicken and dumpling soup. Side dishes shine with garlic butter cheese bombs, oven baked potatoes with meatballs and cheese, broccoli recipes that taste amazing, oven roasted crispy potato, honey butter cornbread, and 3-ingredient carnivore bun. Appetizers feature the ultimate crispy buffalo chicken wonton cups, the ultimate buffalo chicken cauliflower dip, the ultimate buffalo chicken garlic bread, garlic parmesan wings, brown sugar bacon wrapped smokies, Philly cheesesteak stuffed rolls, bacon cheeseburger dip, and pepperoni pizza dip. Desserts range from blueberry tiramisu and heavenly molten mini chocolate lava cakes to thin and chewy chocolate chip cookies. Special occasion treats include red velvet cookies, Valentine heart cookies, ombre heart buttercream cake, and homemade Valentine’s day mini cake delight. Keto enthusiasts can enjoy keto schnitzel, sugar free keto German chocolate cake, keto yogurt almond cake, keto beef roulades, fluffy keto cloud bread, keto muffins, Korean marinated eggs, and low carb cottage cheese ice cream. Health-conscious options also feature sugar free oat cakes and sugar free banana oat brownies. For cocktail lovers, explore our collection including classic whiskey sour, hot apple whisky lime cocktail, easy margarita, Paloma tequila cocktail, vodka cranberry cocktail, Angel Face cocktail, Mandarin Sunrise cocktail, Aperol Spritz, homemade Piña Colada, virgin Piña Colada mocktail, Moscow Mule, Old Fashioned, Manhattan cocktail, Pomegranate Gimlet, Southside gin cocktail, Paper Plane cocktail, Mango Chilli Margarita, and our ten best rum cocktails. This comprehensive collection ensures there’s a perfect recipe for every craving, celebration, and culinary occasion.