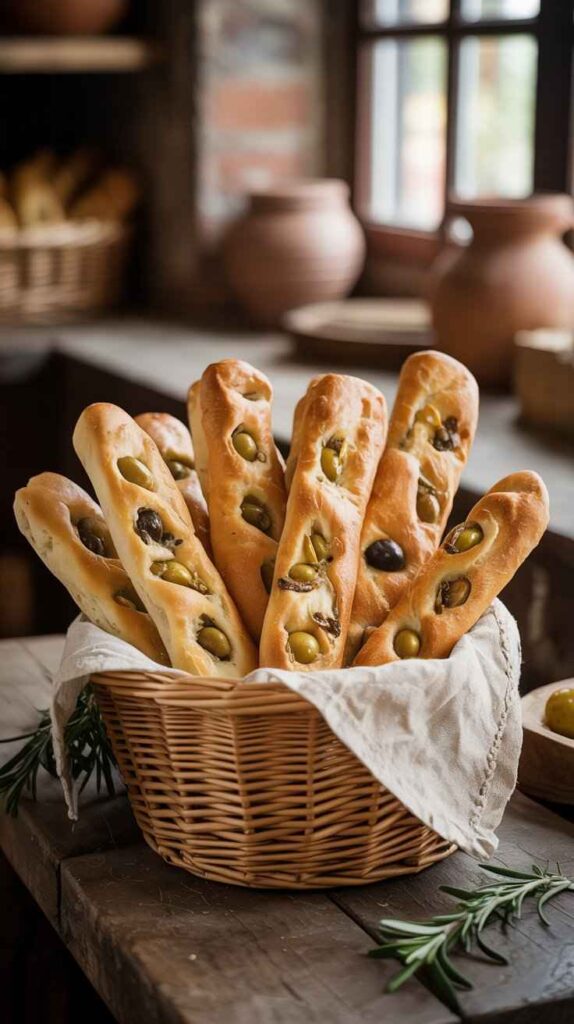
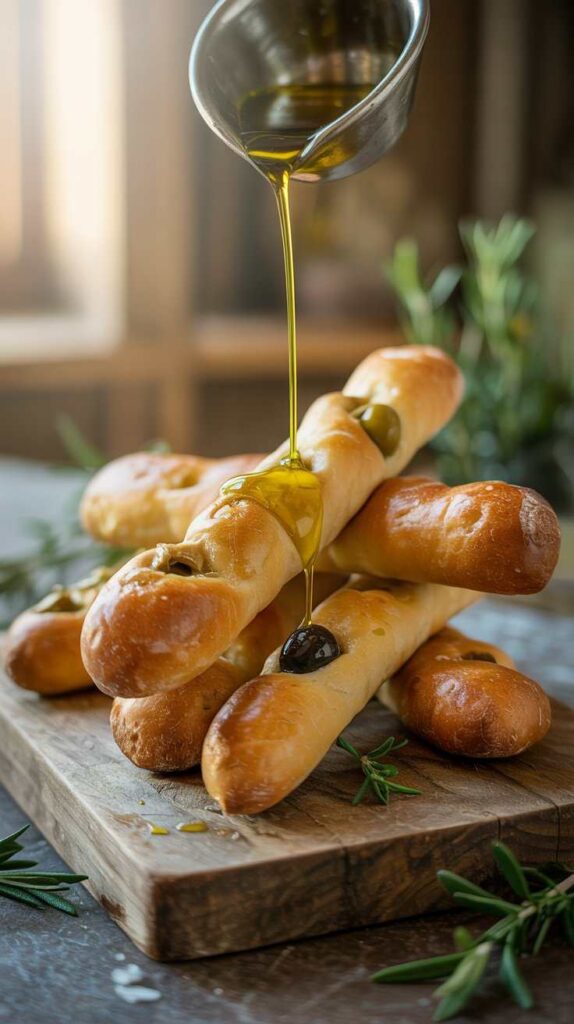
There is a particular kind of recipe that feels almost too good to be true — the kind where the ingredient list is so short and the method so simple that you find yourself double-checking it before you start, convinced you must be missing something. These Four Ingredient Olive Breadsticks are exactly that recipe. Self-raising flour, Greek yoghurt, olives, and a little cheese. Mix, shape, bake. Twenty-five minutes later, you have golden, tender, flavour-packed breadsticks that taste like something you would find on the table at a good Mediterranean restaurant, and they cost a fraction of the effort of any traditional bread recipe.
What makes this recipe genuinely remarkable beyond its simplicity is the nutritional profile. At just 119 calories per breadstick with 6 grams of protein, these are the kind of snack that fits into virtually any eating approach without compromise. The Greek yoghurt is doing double duty here — it acts as the liquid and the fat in the dough simultaneously, while also contributing that protein content that makes these breadsticks far more satisfying than standard bread. No yeast, no proving time, no kneading, no complexity. Just a bowl, a spoon, and an oven.
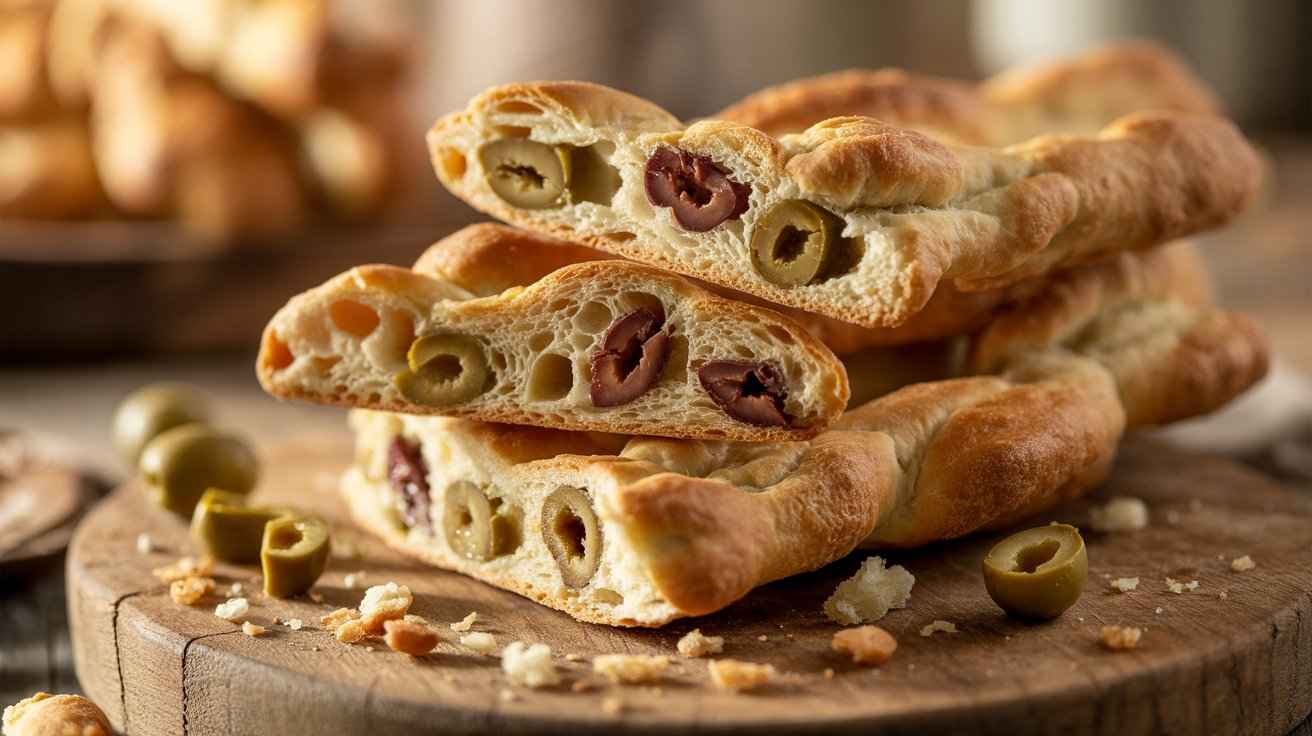
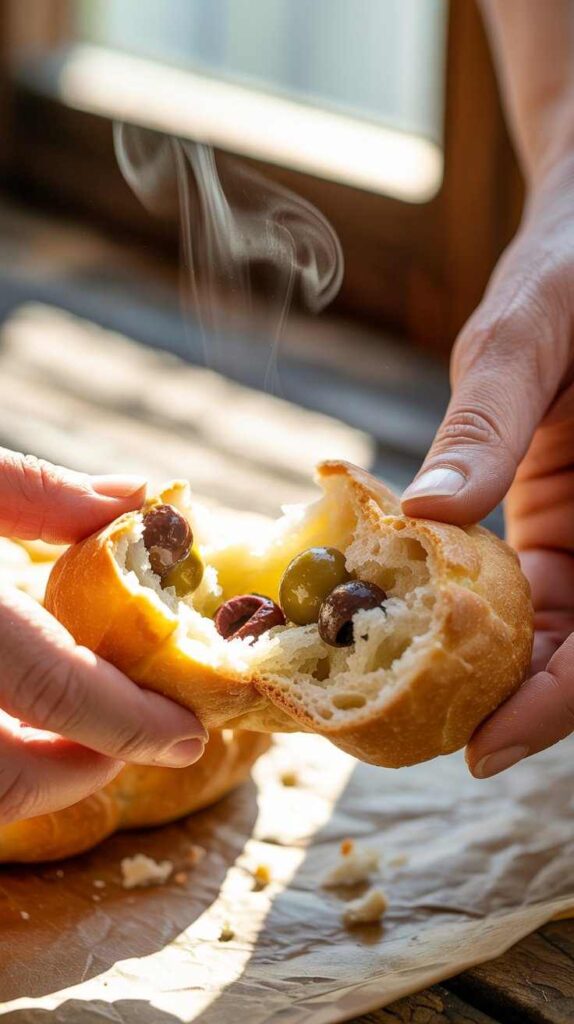
The olive combination is where the flavour magic happens. Tangy, briny Spanish stuffed green olives paired with deeply savoury Kalamata olives give the breadsticks a bold, Mediterranean character in every single bite. The light shredded cheese adds a subtle richness and helps bind the dough into something that bakes up with a beautiful golden exterior and a soft, slightly chewy interior. These are the breadsticks that disappear from a platter in minutes and have everyone asking for the recipe before the plate is clear.
Recipe at a Glance
| Detail | Info |
|---|---|
| Cuisine | Mediterranean-Inspired |
| Course | Snack / Side / Appetiser |
| Difficulty | Very Easy |
| Servings | 8 breadsticks |
| Prep Time | 10 minutes |
| Cook Time | 25 minutes |
| Total Time | 35 minutes |
| Calories per Serving | 119 kcal per breadstick |
Macros per Breadstick: Protein 6g · Carbohydrates 17g · Fat 3g
Why These Breadsticks Are Worth Making Again and Again
Traditional bread making is a wonderful process, but it is also one that requires time, yeast, proving, and a degree of experience to get consistently right. This recipe sidesteps all of that entirely by using self-raising flour and Greek yoghurt to create a dough that requires no yeast, no proving time, no kneading, and no special technique. The baking powder already present in the self-raising flour provides all the lift the breadsticks need in the oven. The Greek yoghurt provides the moisture, the fat, and the protein that would normally come from a combination of water, oil, and eggs in a traditional dough.
The result is a dough that comes together in under five minutes, shapes easily, and bakes into something that genuinely surprises people with its texture and flavour. The outside develops a light golden colour with a slightly crisp surface. The inside is soft, slightly chewy, and studded throughout with pieces of olive that burst with briny, savoury flavour as you eat. The cheese melts into the dough during baking, binding everything together and adding a gentle richness that rounds out the saltiness of the olives beautifully.
These breadsticks also store exceptionally well in the refrigerator for up to three days — though in most households they rarely last that long.
Ingredients
(Makes 8 breadsticks)
- 180g self-raising flour
- 190g protein Greek yoghurt (full-fat or low-fat both work)
- 80g sliced olives — 40g Spanish stuffed green olives and 40g Kalamata olives recommended
- 25g shredded light tasty cheese (or any mild melting cheese)
- Salt to taste — a generous pinch in the dough plus extra for sprinkling on top
How to Make Four Ingredient Olive Breadsticks
Step 1 — Prepare Your Ingredients and Oven
Preheat your oven to 200°C (390°F / Gas Mark 6) and line a baking tray with baking paper. Having the oven fully preheated before the breadsticks go in ensures they start baking immediately, which contributes to a better rise and a more even golden colour across the surface.
If your olives are whole, slice them now into rounds or roughly chop them — you want them in pieces small enough to distribute evenly throughout the dough without creating large pockets that might cause the breadsticks to break apart during shaping. Pat the sliced olives dry with a piece of paper towel if they seem very wet from their brine — excess moisture can make the dough stickier and more difficult to work with.
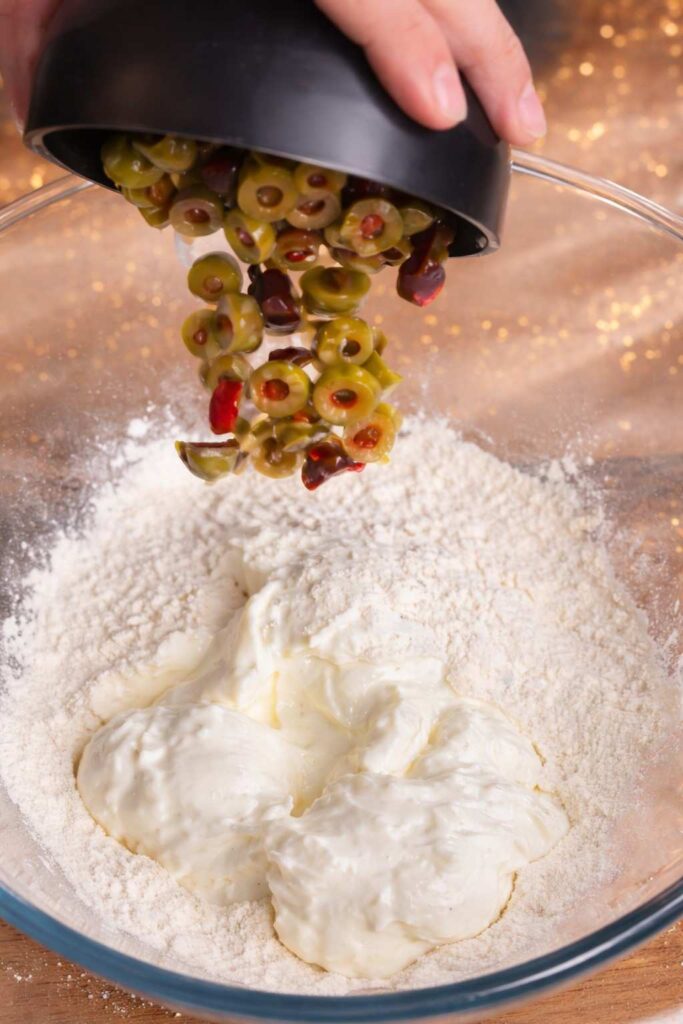
Step 2 — Mix the Dough
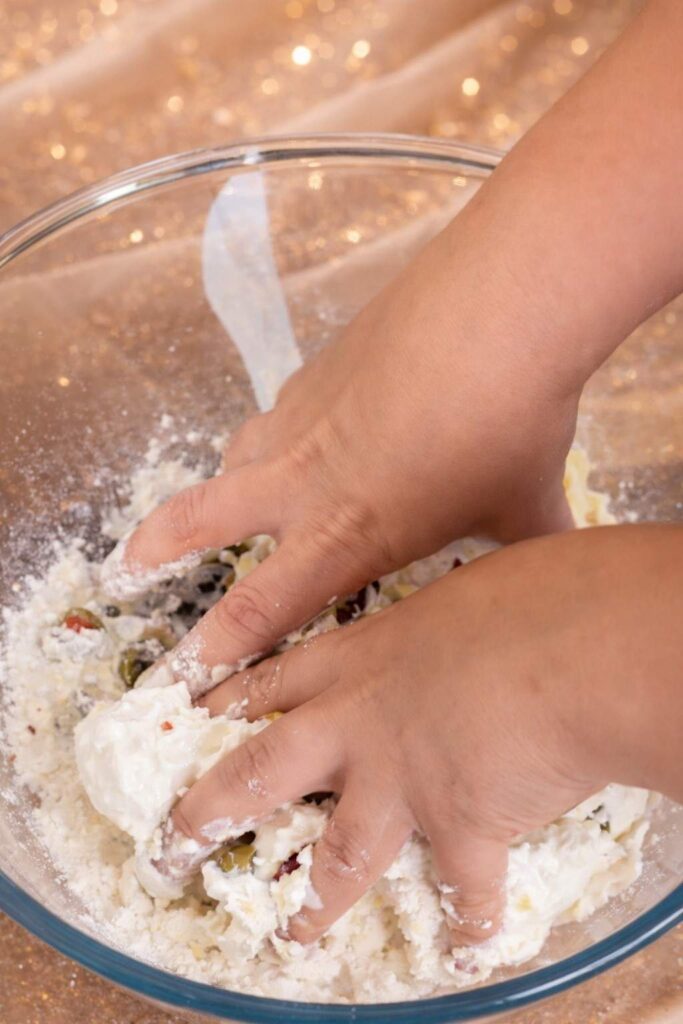
Place the self-raising flour in a large mixing bowl. Add the Greek yoghurt, sliced olives, shredded cheese, and a generous pinch of salt. Use a wooden spoon or a spatula to combine everything together, then switch to your hands to bring the dough together into a cohesive mass. Work the ingredients together firmly until no dry flour remains and the olives and cheese are evenly distributed throughout the dough.
The dough will feel slightly sticky — this is completely normal and expected with a yoghurt-based dough. If it is so sticky that it won’t come away from your hands at all, add a small additional tablespoon of flour and work it through. If it feels too dry and crumbly, add a teaspoon of yoghurt at a time until it comes together. You are looking for a dough that holds its shape when squeezed and can be rolled without sticking excessively to your hands.
Step 3 — Divide and Shape the Breadsticks
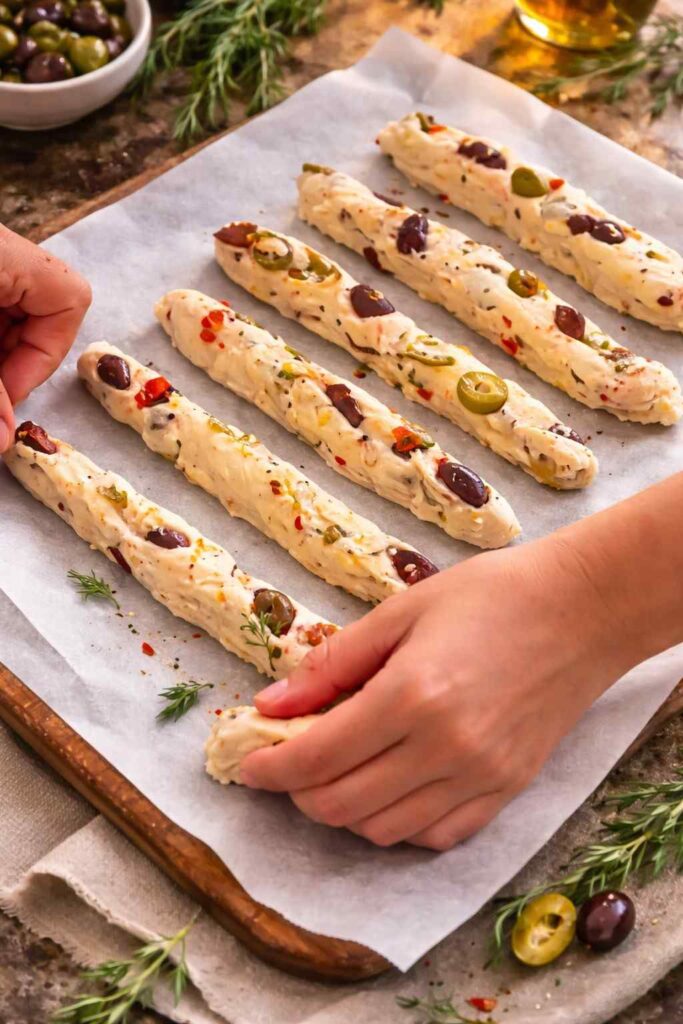
Turn the dough out onto a lightly floured surface. Divide it into 8 roughly equal portions — you can do this by eye or by weighing each piece on a kitchen scale for consistency. Each portion should be approximately 60 to 65 grams.
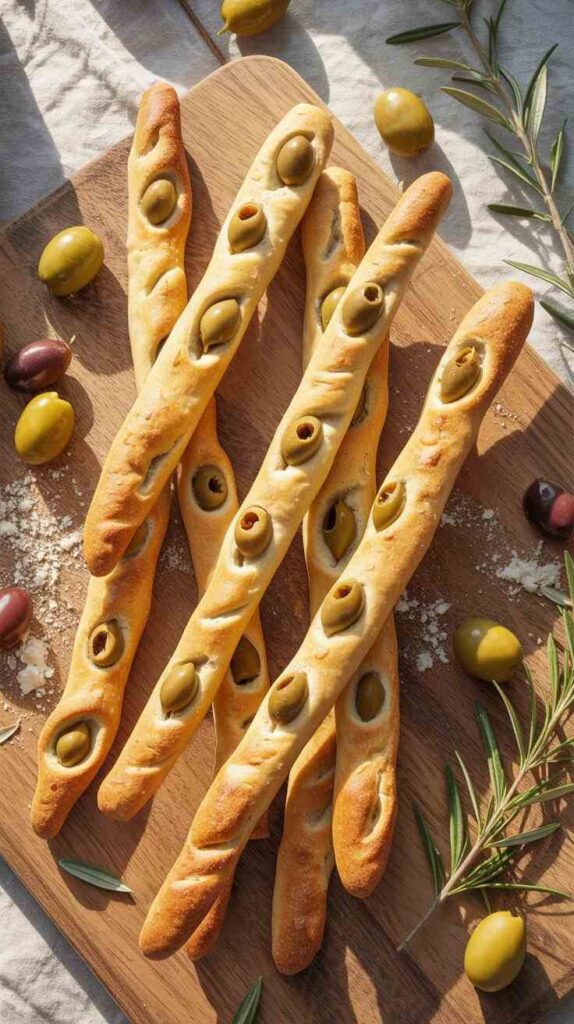
Take one portion at a time and roll it gently between your palms into a rough log shape, then place it on the prepared baking tray and use your fingers to stretch and elongate it further into a breadstick shape — aiming for a length of approximately 15 to 20cm. The breadsticks do not need to be perfectly uniform or smooth — slight irregularities in shape are completely fine and actually give them a pleasingly rustic, handmade appearance that is part of their charm.
Space the shaped breadsticks evenly across the baking tray, leaving a couple of centimetres between each one to allow for slight spreading during baking.
Step 4 — Season and Bake

Sprinkle a small pinch of salt evenly over the top of each shaped breadstick. This top seasoning creates a lightly salted crust as the breadsticks bake and enhances the overall flavour considerably — don’t skip it. If you have any additional toppings you would like to add — a light sprinkle of dried herbs, a few extra olive pieces pressed onto the surface, or a pinch of chilli flakes — add them now before the tray goes into the oven.
Place the tray in the preheated oven and bake for 25 minutes, or until the breadsticks are golden on the outside and cooked through. Baking times may vary slightly depending on your specific oven and the thickness of your shaped breadsticks — start checking at the 22-minute mark. The breadsticks are ready when they are lightly golden all over and sound hollow when tapped gently on the bottom.
Step 5 — Serve or Store
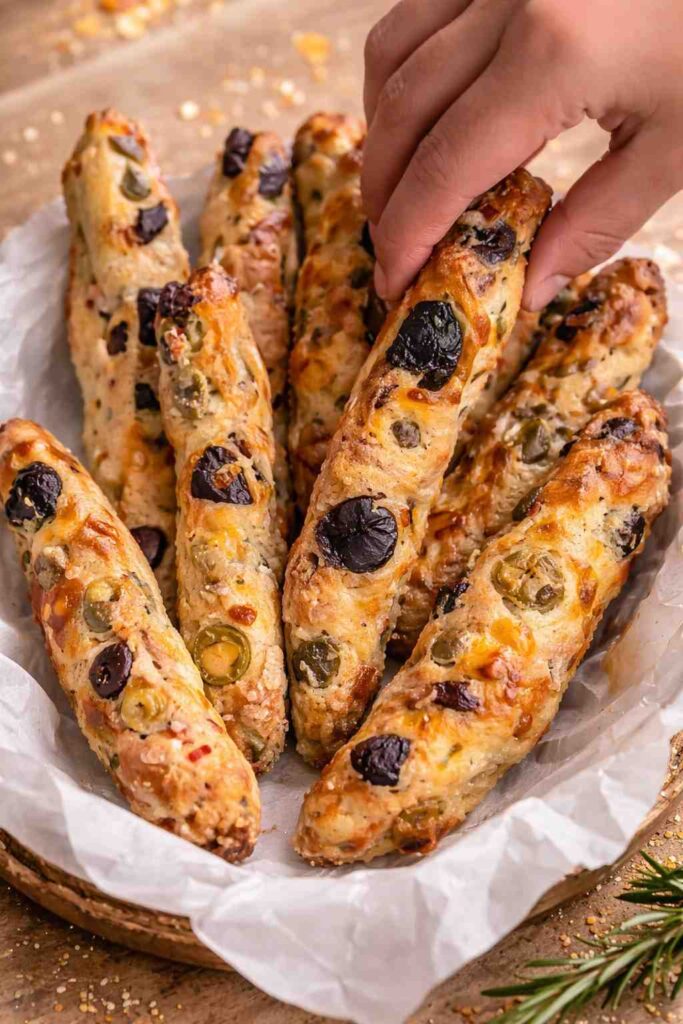
Remove from the oven and allow to cool for 5 minutes on the tray before transferring to a serving board or plate. These breadsticks are at their absolute best eaten warm, fresh from the oven — the exterior is slightly crisp, the interior is soft and fragrant with olive and cheese, and the flavour is at its peak. Serve them alongside a cheese board, a dip spread, a soup, or simply on their own as a snack.
If you have leftovers, store them in an airtight container in the refrigerator for up to 3 days. To refresh them, place them in a preheated oven at 180°C for 5 minutes or warm them briefly in an air fryer — they will regain much of their original texture and warmth.
Tips for the Best Results
- Pat the olives dry before adding them to the dough. Excess brine can make the dough too wet and difficult to shape.
- Don’t overwork the dough. Mix just until everything is combined — overworking a yoghurt-based dough can make the finished breadsticks tough rather than tender.
- Stretch, don’t roll. Stretching the dough lengthways with your fingertips rather than rolling it creates a more open, slightly irregular texture that bakes up better than a perfectly smooth cylinder.
- Use a mix of olives. The combination of green stuffed and Kalamata olives gives the breadsticks a flavour complexity that using only one type cannot achieve. The green olives bring a lighter, slightly tangy brightness and the Kalamatas bring depth and richness.
- Season generously. The dough itself benefits from a proper pinch of salt throughout — underseasoned breadstick dough results in a flat, bland flavour regardless of how good the olives are.
Serving Suggestions
- Arranged on a grazing or charcuterie board alongside cured meats, dips, and cheeses
- Served warm alongside a bowl of tomato soup or minestrone
- As a side to a mezze spread with hummus, tzatziki, and baba ganoush
- On a snack plate with sliced vegetables and a yoghurt dip
- Packed into a lunchbox alongside salad for a satisfying midday meal
- Simply on their own as a high-protein snack between meals
Frequently Asked Questions
Can I use plain flour instead of self-raising flour? Self-raising flour is specifically recommended because it already contains baking powder, which provides the lift these breadsticks need without yeast or proving time. If you only have plain flour, add 2 teaspoons of baking powder and ¼ teaspoon of salt per 180g of flour to replicate the effect of self-raising flour. The result will be very similar to using self-raising flour directly.
Can I use regular Greek yoghurt instead of protein Greek yoghurt? Yes, absolutely. Regular full-fat or low-fat Greek yoghurt works identically in this dough — the protein Greek yoghurt is used in the original recipe to boost the protein content per serving, but it has no different effect on the dough’s texture or the breadsticks’ baked result. Use whichever Greek yoghurt you have available.
Can I change the olive variety or add different mix-ins? This recipe is very flexible when it comes to additions. Sun-dried tomatoes finely chopped and folded through the dough add an intense, sweet-savoury character. Finely chopped fresh rosemary or dried herbs like oregano and thyme work beautifully with the olive base. Jalapeño slices add heat. Crumbled feta can replace some of the shredded cheese for a more intensely savoury result. The base dough is robust enough to accommodate a wide range of additions without losing its structure.
Can I make these gluten-free? Yes. Use a good quality gluten-free self-raising flour blend in the same quantity as the regular self-raising flour. Gluten-free doughs can be slightly stickier and more fragile than their regular counterparts — lightly oiling your hands rather than flouring them makes shaping easier. The texture of the finished breadsticks will be slightly different but still very enjoyable.
Can I freeze these breadsticks? Yes. Allow the baked breadsticks to cool completely, then freeze in a single layer on a tray before transferring to a freezer bag. They will keep for up to one month. Reheat from frozen in the oven at 180°C for 8 to 10 minutes until warmed through and slightly crisped again. They are best consumed on the day of reheating.
Why are my breadsticks coming out too dense? The most common cause is too much flour — either measured too heavily or added during the mixing process to combat stickiness. Use a kitchen scale rather than cup measurements for the most accurate result. A dough that feels slightly sticky is correct — a dry, easy-to-handle dough usually produces denser breadsticks because the flour-to-yoghurt ratio is off.
Final Thoughts
Four Ingredient Olive Breadsticks prove definitively that impressive, flavourful, genuinely satisfying baking does not require a long ingredient list, advanced technique, or hours of preparation. Self-raising flour and Greek yoghurt create a dough that is simple to make and a pleasure to eat, and the combination of briny olives and melted cheese takes the flavour somewhere that feels far more considered and complex than four ingredients should be able to achieve. Whether you are building a grazing board, serving a crowd, looking for a high-protein snack, or simply wanting something warm and golden from the oven without the usual effort of bread making, these breadsticks deliver completely. Make a batch, share them generously, and don’t be surprised when everyone asks you for the recipe.