There are certain recipes that earn a permanent spot in your weekly dinner rotation — the kind that are easy enough to throw together on a Tuesday night but impressive enough to serve when you have guests coming over. Garlic Parmesan Chicken Thighs is exactly that kind of recipe. Golden-brown skin, a crispy parmesan crust, juicy meat that practically falls off the bone, and a garlic butter flavor that fills your entire kitchen with the kind of aroma that makes everyone drift toward the stove asking, “What’s cooking?” If that sounds like your kind of dinner, keep reading.
This recipe has everything going for it: minimal prep, pantry-friendly ingredients, and a result that looks and tastes like something you’d order at a proper restaurant. Whether you’re feeding a family on a busy weeknight or putting something special together for company, this dish delivers every single time.
Why Chicken Thighs Are the Right Choice
Before we get into the recipe itself, it’s worth talking about the star of the show — the chicken thigh. A lot of home cooks default to chicken breasts out of habit, but thighs are genuinely the superior cut for this type of dish, and here’s why.
Chicken thighs have a higher fat content than breasts, which means they stay moist and juicy even if they spend a few extra minutes in the oven. If you’ve ever pulled a dry, chalky chicken breast out of the oven, you know the frustration. Thighs are far more forgiving. They can handle high heat, they develop better color and flavor, and the skin — when cooked properly — crisps up into something absolutely irresistible.
Bone-in, skin-on thighs are specifically the best option here. The bone conducts heat from the inside and helps the meat cook evenly, while the skin acts as a natural barrier that keeps the meat underneath moist throughout the baking process. And when that skin is coated with a garlic parmesan paste and roasted at high heat? You get a crust that crackles when you cut into it and delivers flavor in every single bite.
The Garlic Parmesan Crust: What Makes It Work
The real magic of this dish comes from the topping. It’s not just a seasoning — it’s a proper paste made from melted butter, freshly minced garlic, grated Parmesan, and a squeeze of lemon juice. These four ingredients, when combined and spread over the skin of the chicken, transform during baking into a deeply savory, slightly nutty, golden crust that locks in all the juices below.
Parmesan is a low-moisture, hard cheese with a naturally salty and umami-forward flavor profile. When it hits high oven heat, it melts and then sets into a crispy, almost caramelized coating. The butter helps it adhere and adds richness. The garlic becomes sweet and roasted rather than sharp. And the lemon juice cuts through the fat just enough to keep the entire dish bright and balanced.
It’s a combination that sounds simple, but the outcome is far greater than the sum of its parts.
Recipe at a Glance
| Detail | Info |
|---|---|
| Recipe Name | Garlic Parmesan Chicken Thighs |
| Cuisine | American |
| Course | Main Dish |
| Difficulty | Easy |
| Servings | 8 pieces |
| Prep Time | 10 minutes |
| Cook Time | 35–40 minutes |
| Oven Temperature | 425°F (220°C) |
| Calories per Serving | Approximately 420–480 kcal |
Ingredients
For the Chicken
- 8 bone-in, skin-on chicken thighs
- 2 tablespoons olive oil
- 1 teaspoon salt
- ½ teaspoon black pepper
- 1 teaspoon Italian seasoning
- ½ teaspoon smoked paprika
For the Garlic Parmesan Topping
- 3 tablespoons butter, melted
- 6 garlic cloves, minced
- ¾ cup + 1 tablespoon grated Parmesan cheese (approximately 0.8 cups)
- 1 tablespoon lemon juice
For Garnish
- 2 tablespoons fresh parsley, chopped
Step-by-Step Instructions

Step 1: Preheat Your Oven
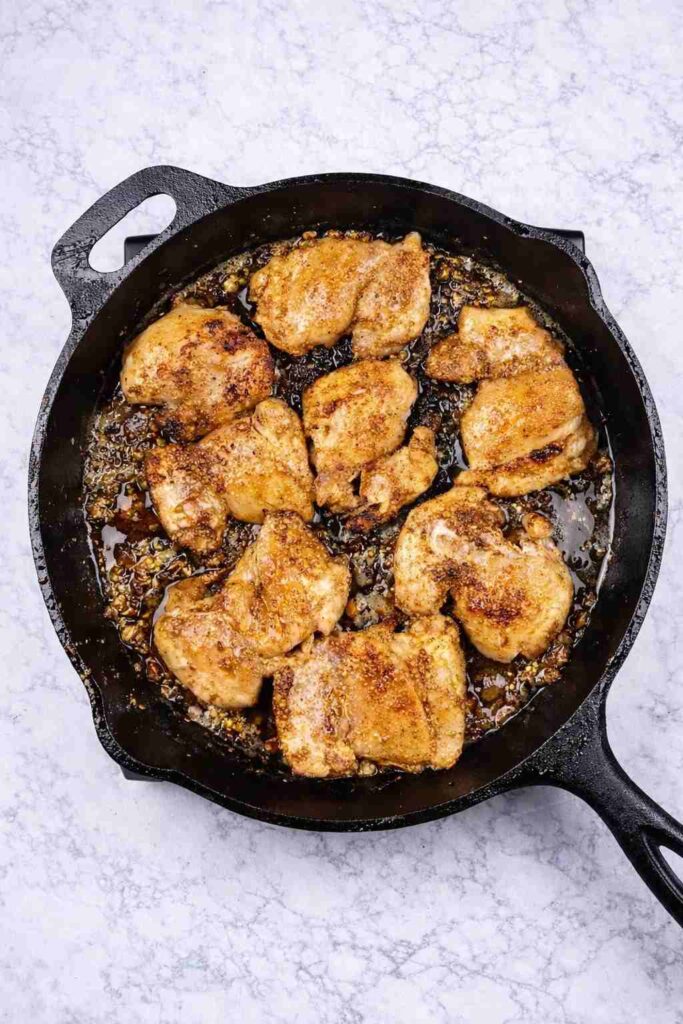
Set your oven to 425°F (220°C) and allow it to fully preheat before the chicken goes in. High heat is essential for this recipe — it’s what gives you the crispy skin and the golden parmesan crust. Line a large baking sheet with parchment paper or give it a light greasing. A rimmed baking sheet works best as it catches any juices that run off during cooking.
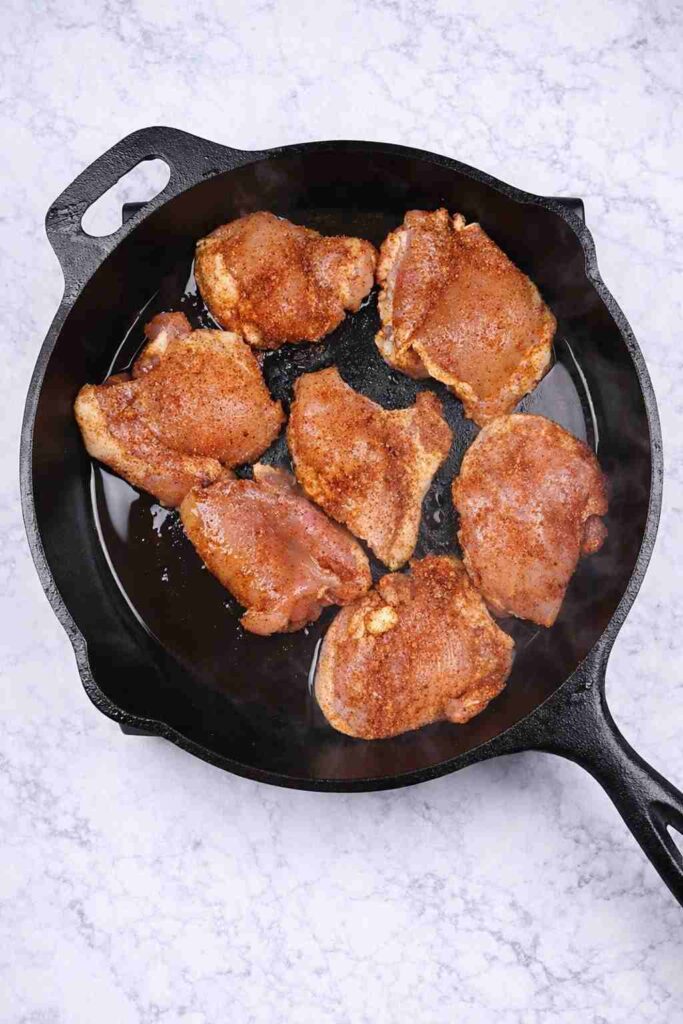
Step 2: Season the Chicken
Pat the chicken thighs completely dry with paper towels. This step is more important than most people realize. Moisture on the surface of the skin is the enemy of crispiness — it creates steam in the oven, which leads to soft, rubbery skin rather than the golden crunch you’re going for. Take your time here and make sure every thigh is as dry as possible before you do anything else.
Once dry, drizzle the olive oil over the thighs and use your hands to coat them evenly. Season all sides with salt, black pepper, Italian seasoning, and smoked paprika. The smoked paprika in particular adds a subtle warmth and depth that works beautifully with the garlic parmesan topping — don’t skip it.
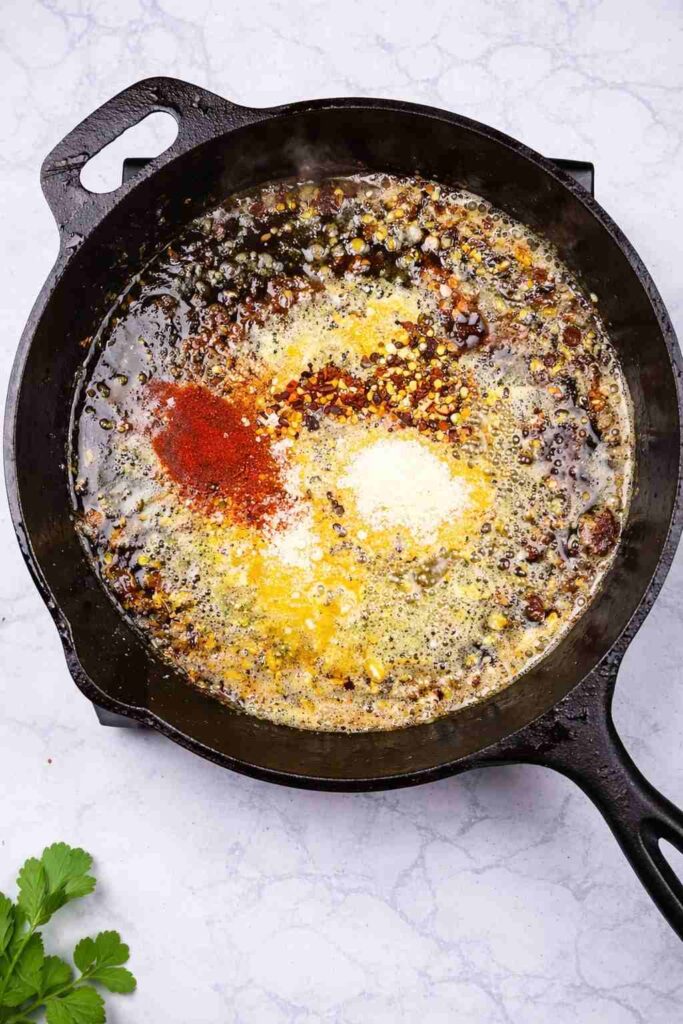
Step 3: Make the Garlic Parmesan Paste
In a small bowl, combine the melted butter, minced garlic, grated Parmesan cheese, and lemon juice. Stir everything together until it forms a thick, spreadable paste. It should hold together and be easy to coat onto the chicken without sliding off. If it feels too loose, a small amount of additional Parmesan will bring it together. This is the flavor powerhouse of the entire dish, so use freshly minced garlic if you can — it makes a noticeable difference compared to pre-minced garlic from a jar.
A note on the Parmesan: always grate your own from a block when possible. Pre-grated Parmesan from a shaker bottle contains anti-caking agents that affect how it melts and browns. Freshly grated Parmesan melts cleanly and crisps up far more beautifully in the oven.
Step 4: Coat the Chicken
Place the seasoned chicken thighs skin-side up on your prepared baking sheet, spaced apart so they’re not touching. Take the garlic parmesan paste and spread it generously and evenly over the top and skin of each thigh, pressing it gently so it adheres well. Don’t be shy with the coating — you want a full, thick layer on each piece. This is your crust, and it should be substantial.
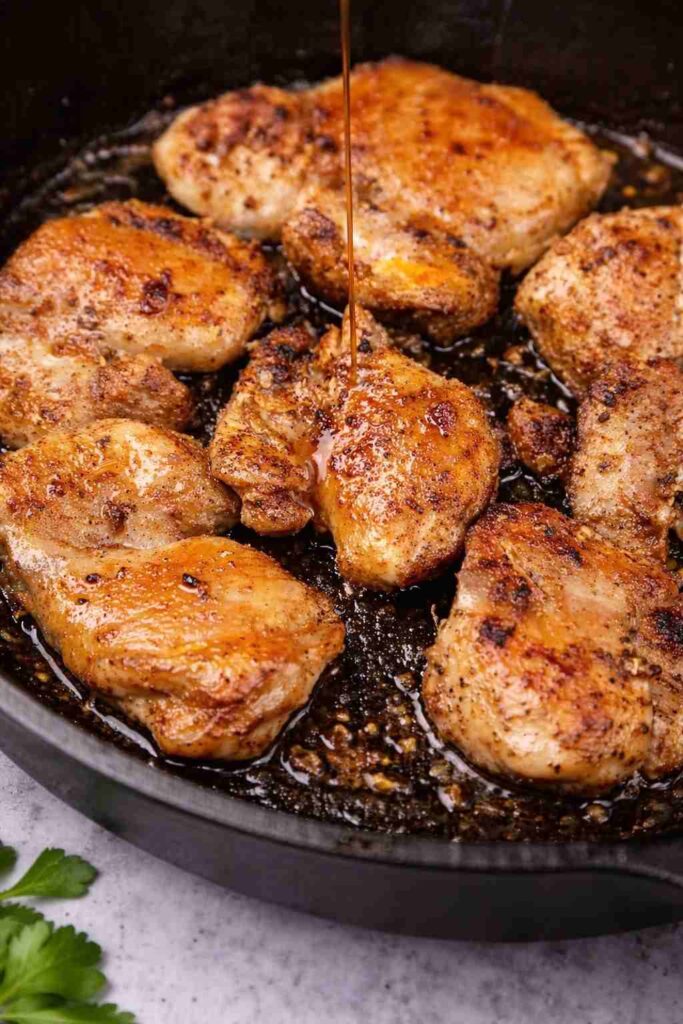
Step 5: Bake the Chicken
Slide the baking sheet into the center of your preheated oven and bake for 35 to 40 minutes, or until the internal temperature of the thickest part of each thigh reads 165°F (74°C) on an instant-read thermometer. The parmesan topping should be deeply golden and visibly crispy, and the skin around the edges should have rendered and crisped beautifully.
For extra-crispy skin — and this is a tip worth following — switch your oven to broil on high for the final 2 to 3 minutes of cooking. Watch the chicken closely during this step. The parmesan can go from golden to burnt very quickly under a broiler, so don’t walk away. The reward is a crust that is deeply caramelized and impossibly crispy, worth the extra attention.
Step 6: Rest and Serve
Once out of the oven, resist the urge to cut straight into the chicken. Let it rest on the baking sheet for 5 minutes. Resting allows the juices that have been pushed to the center of the meat during cooking to redistribute back through the entire thigh. Skip this step and you’ll lose a lot of that moisture the moment you cut in. After resting, scatter the freshly chopped parsley over the top and serve immediately.
What to Serve With Garlic Parmesan Chicken Thighs
This dish is versatile enough to pair with just about anything, but a few sides work particularly well with the rich garlic butter flavor profile.
Roasted vegetables are a natural match — the oven is already running at high heat, so toss some broccoli, asparagus, zucchini, or cherry tomatoes in olive oil, salt, and pepper and roast them on a separate tray alongside the chicken. Everything is ready at the same time, and cleanup is minimal.
Mashed potatoes are the ultimate comfort food companion here. The garlic parmesan chicken produces delicious pan juices that double as a sauce — spoon them over a bed of creamy mashed potatoes and dinner is nothing short of spectacular.
A simple green salad dressed with lemon vinaigrette provides a bright, fresh contrast to the richness of the chicken. The acidity cuts through the butter and cheese beautifully and keeps the meal feeling balanced.
Pasta or rice also work wonderfully as a base, especially if you want to stretch the dish to feed a larger group.
Helpful Tips and Variations
Use a meat thermometer. The single most reliable way to ensure your chicken is perfectly cooked — not underdone, not dried out — is to use an instant-read thermometer. Target 165°F (74°C) at the thickest point, away from the bone.
Boneless, skinless thighs work too. If that’s what you have on hand, the recipe adapts easily. Simply reduce the baking time to 20 to 25 minutes and check the internal temperature earlier. You won’t get the same crispy skin, but the garlic parmesan topping will still form a lovely golden crust and the meat will be just as juicy.
Make it ahead. You can season the chicken and prepare the garlic parmesan paste a day in advance. Store them separately in the fridge and assemble right before baking. This makes it an ideal recipe for meal prep or hosting, when you want to minimize day-of effort.
Add a little heat. If you like spice, a pinch of red pepper flakes added to the garlic parmesan paste introduces a gentle heat that plays really nicely against the richness of the butter and cheese.
Don’t overcrowd the pan. Chicken pieces that are too close together will steam rather than roast. Give each thigh its own space on the baking sheet so the heat circulates properly and every piece develops that golden, caramelized exterior.
Storage and Reheating
Leftover Garlic Parmesan Chicken Thighs keep well in an airtight container in the refrigerator for up to 4 days. To reheat, place them on a baking sheet and warm in a 375°F (190°C) oven for 10 to 15 minutes. This method preserves much of the crispiness of the crust, far better than the microwave, which tends to make the skin soft and the coating gummy. For longer storage, the cooked chicken can be frozen for up to 3 months — thaw overnight in the refrigerator before reheating.
Final Thoughts
Garlic Parmesan Chicken Thighs are the kind of recipe that makes you feel like a genuinely good cook without requiring any advanced technique or hard-to-find ingredients. Everything you need is likely already in your kitchen, and the method is straightforward enough that even a beginner can nail it on the first try. Yet the result — that shatteringly crispy, golden parmesan crust over juicy, tender chicken — looks and tastes like something that took real effort and skill.
That’s the beauty of a great recipe. It does all the hard work for you. All you have to do is follow the steps, trust the process, and get ready to hear someone around your dinner table say, “Can you make this again next week?”
The answer, of course, is yes.
🍽️ Explore More Recipes
Browse our collection by category