
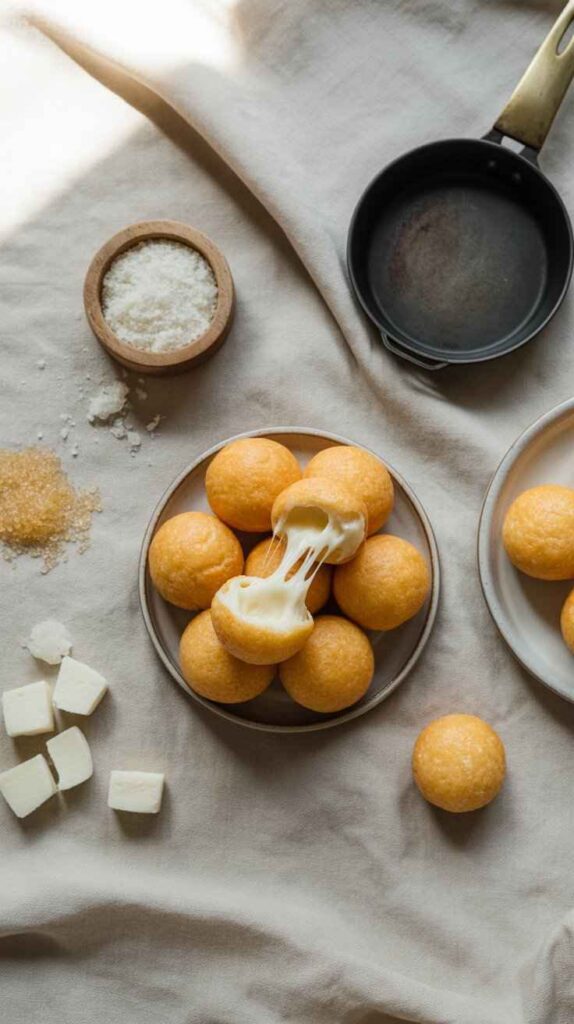
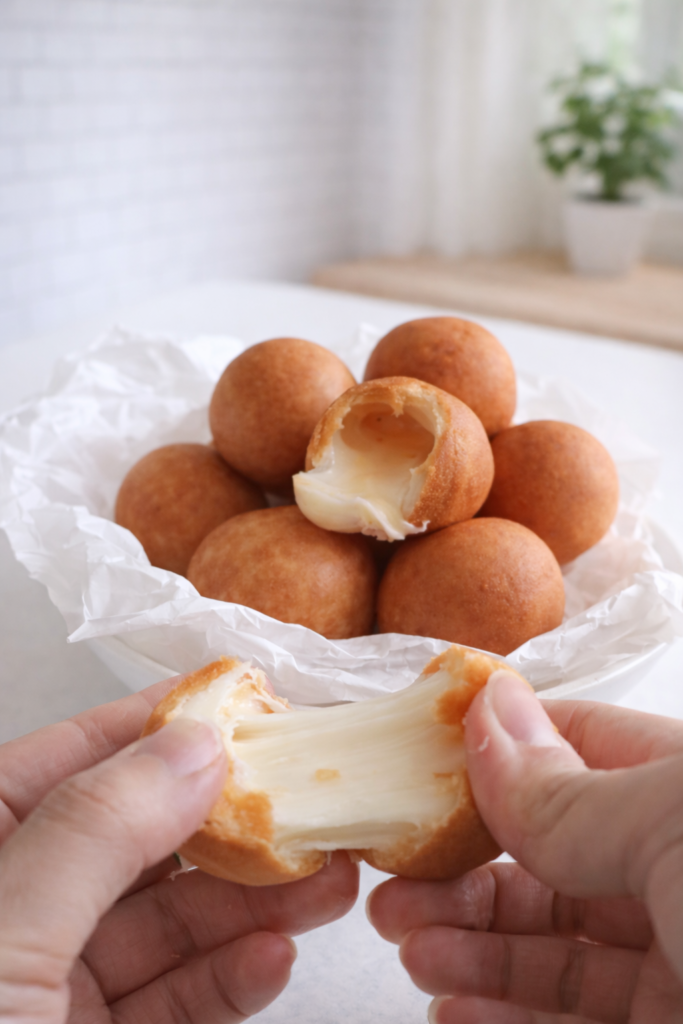
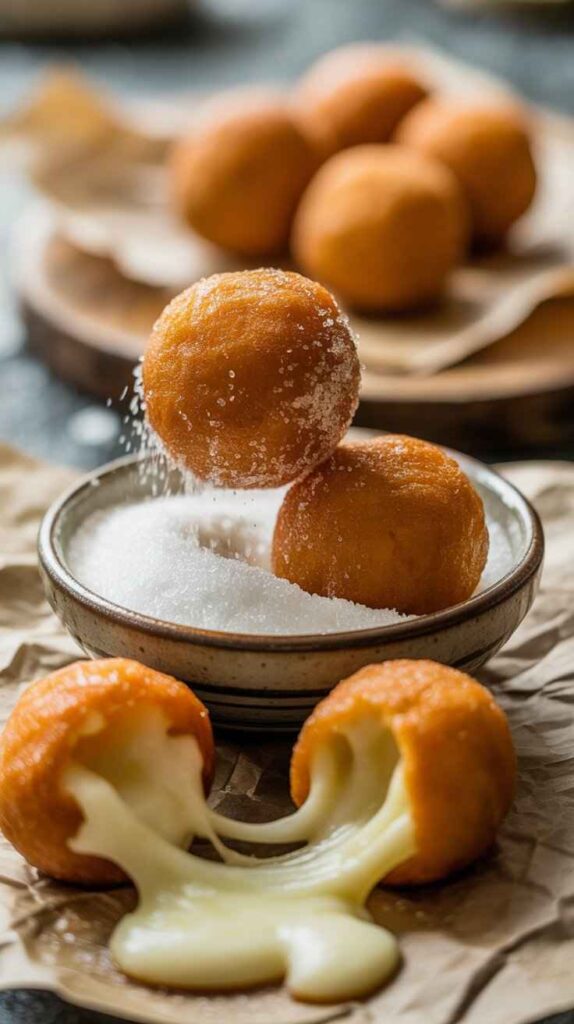
If you have ever watched a Korean street food video and found yourself completely hypnotized by that moment when someone pulls apart a golden, crispy ball and a long, dramatic stretch of molten mozzarella follows — you already understand the appeal of Korean cheese balls. That pull. That stretch. That contrast between the shatteringly crispy exterior and the soft, chewy, glutinous rice dough beneath it, and then the molten cheese at the very center. It is one of the most satisfying food experiences you can have, and the fact that you can recreate it at home with a handful of pantry ingredients and no specialized equipment is something that still feels slightly miraculous every time.
Korean cheese balls — sometimes called cheese bread balls or just cheese balls in Korean street food culture — became a viral sensation for very good reason. They are visually dramatic, texturally extraordinary, and flavored in a way that hits every single pleasure point simultaneously. The dough is made primarily from glutinous rice flour, which is the same ingredient behind mochi, tteok, and countless other beloved East Asian confections. It gives the outer layer of the fried ball a chewiness that regular wheat dough simply cannot replicate — a satisfying, yielding resistance that makes every bite feel substantial and deeply satisfying.
What makes this recipe particularly wonderful is how genuinely approachable it is. The dough comes together in minutes with a handful of ingredients. The shaping is straightforward once you get the feel of it. The frying requires attention but no specialized skill. And the payoff — those golden, sugar-dusted spheres with their molten mozzarella centers — is completely disproportionate to the effort involved. This is the kind of recipe that makes you look like you spent hours in the kitchen when the reality is that you had hot cheese balls on the table in under an hour from start to finish.
Make these for a weekend snack, for a party, for a K-drama watching session, or simply because you saw the cheese pull and you needed to experience it for yourself. You will not be disappointed.
Recipe at a Glance
| Feature | Details |
|---|---|
| Cuisine | Korean / Korean Street Food |
| Course | Snack / Appetizer / Street Food |
| Difficulty | Easy to Medium |
| Servings | Approximately 12–15 cheese balls |
| Prep Time | 15 Minutes (plus 30 minutes resting time) |
| Cook Time | 15–20 Minutes |
| Total Time | ~60–65 Minutes |
| Calories per Serving | ~110–130 kcal per ball |
What Makes Korean Cheese Balls So Special?
Before diving into the recipe, it’s worth understanding what sets these apart from other fried cheese snacks you might have encountered.
The magic is almost entirely in the dough, and more specifically in the primary ingredient: glutinous rice flour. Despite the name, glutinous rice flour contains no gluten — the word “glutinous” refers to its sticky, glue-like texture when cooked, which comes from a particular type of starch called amylopectin. When this starch is fried, it creates a crust that behaves differently from any wheat-based crust. It is simultaneously crispy and chewy — a textural combination that is genuinely unlike anything else. The outside shatters slightly when you bite through it, then immediately gives way to a layer of soft, stretchy dough, and then the melted mozzarella.
The small addition of all-purpose flour moderates this texture slightly — pure glutinous rice flour produces a very dense, almost rubbery dough that is too challenging to work with and too heavy after frying. The all-purpose flour lightens the structure and gives the dough more workability and a better rise. Baking powder contributes to this lightness as well, creating small pockets of air that make the fried ball feel less dense.
The butter is the final structural secret. Incorporating a tablespoon of unsalted butter into the dough adds richness, improves the elasticity, and contributes to the golden color and slight flavor depth of the fried exterior. It’s a small amount, but the difference it makes is noticeable.
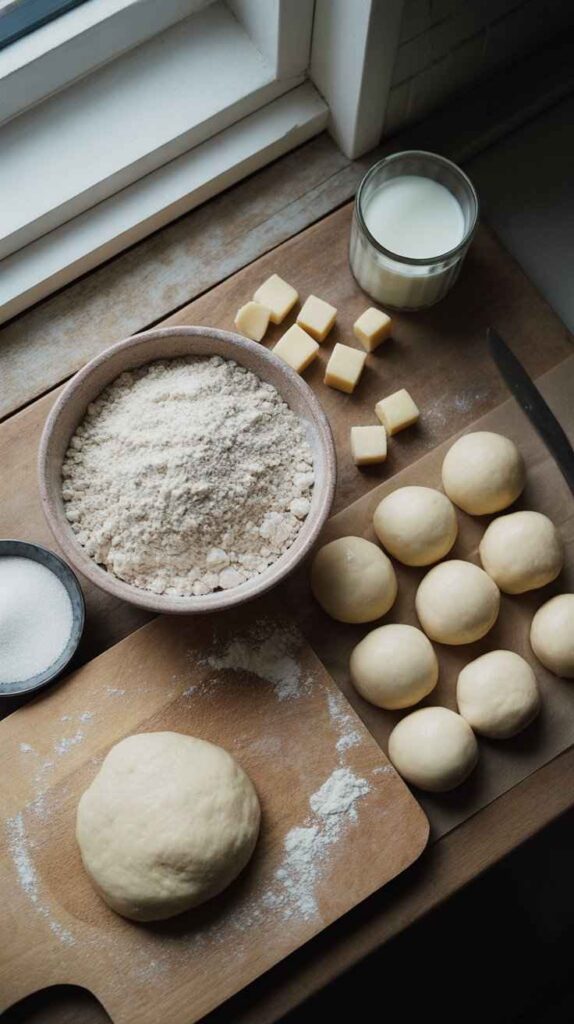
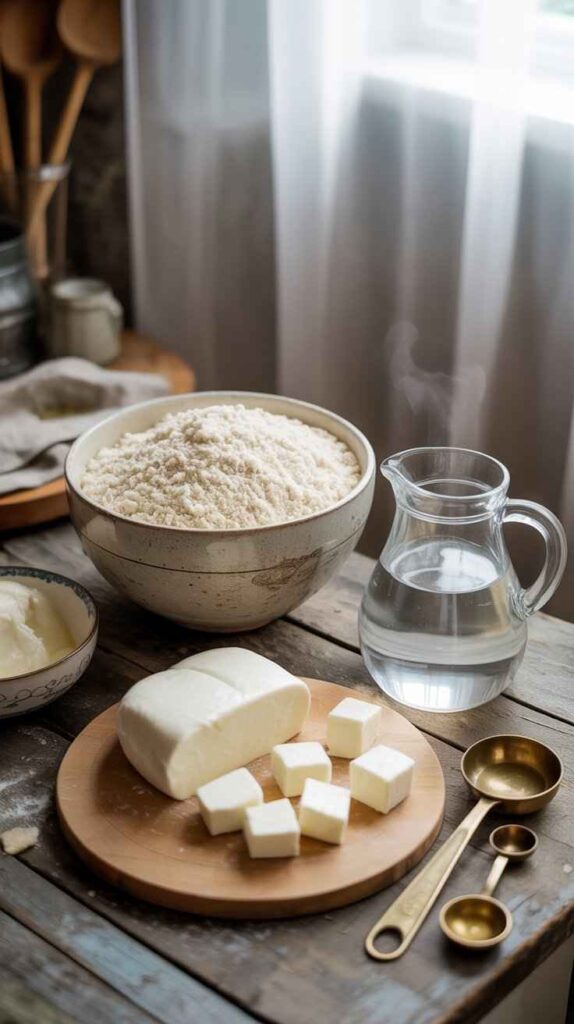
Ingredients
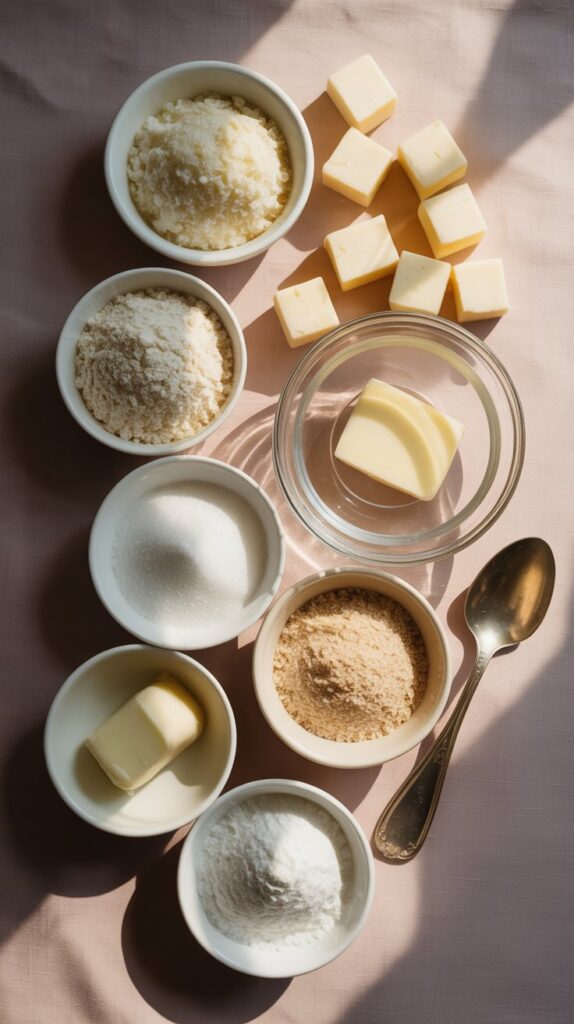
For the Dough
- 100g glutinous rice flour (also sold as sweet rice flour or mochiko)
- 25g all-purpose flour
- 1 tablespoon sugar
- ⅛ teaspoon baking powder
- ¼ teaspoon salt
- ⅓ cup hot water (freshly boiled or just off the boil — temperature matters here)
- 1 tablespoon unsalted butter, at room temperature
For the Filling
- Mozzarella cheese, cubed into approximately 2 cm pieces (or use small fresh mozzarella balls — bocconcini or ciliegine work perfectly)
For Frying and Finishing
- Cooking oil, enough for deep frying (a neutral oil with a high smoke point — sunflower, vegetable, or canola oil all work well)
- Extra sugar for coating (optional but highly recommended — this is how they are traditionally served as Korean street food)
A Note on the Key Ingredients
Glutinous Rice Flour
This is the ingredient most people are unfamiliar with if they haven’t cooked Korean or Japanese sweets before. It is available at Asian grocery stores, Korean supermarkets, and increasingly in the international aisle of mainstream supermarkets. It is also widely available online. Common brand names include Mochiko (a Japanese brand very commonly found in the US) and Erawan (a Thai brand common in the UK and Australia). Do not confuse it with regular rice flour — they behave completely differently. Regular rice flour is gritty and does not produce the characteristic chewy texture that makes these cheese balls what they are.
Mozzarella Cheese
Low-moisture block mozzarella (the kind sold in rectangular blocks, not fresh mozzarella packed in water) is ideal for this recipe because it has less water content. Fresh mozzarella packed in water is too wet — the excess moisture steams aggressively inside the dough during frying, which can cause the balls to burst open. If you can only find fresh mozzarella, drain it thoroughly and pat it dry with paper towels, then freeze the cubed pieces for 20 to 30 minutes before wrapping them in the dough. This slows the melting process slightly and gives the outer dough more time to set before the cheese becomes liquid.
Hot Water
The hot water is not optional and not interchangeable with cold water. Hot water partially gelatinizes the starches in the glutinous rice flour on contact, which is what makes the dough cohesive, pliable, and workable. Cold water would leave the flour granules largely ungelatinized and the dough would be crumbly and impossible to shape. Use water that is freshly boiled or as close to boiling as possible.
Step-by-Step Instructions
Step 1: Make the Dough
In a large mixing bowl, combine the glutinous rice flour, all-purpose flour, sugar, baking powder, and salt. Whisk these dry ingredients together briefly to distribute them evenly — this ensures the baking powder and salt don’t end up concentrated in one spot in the finished dough.
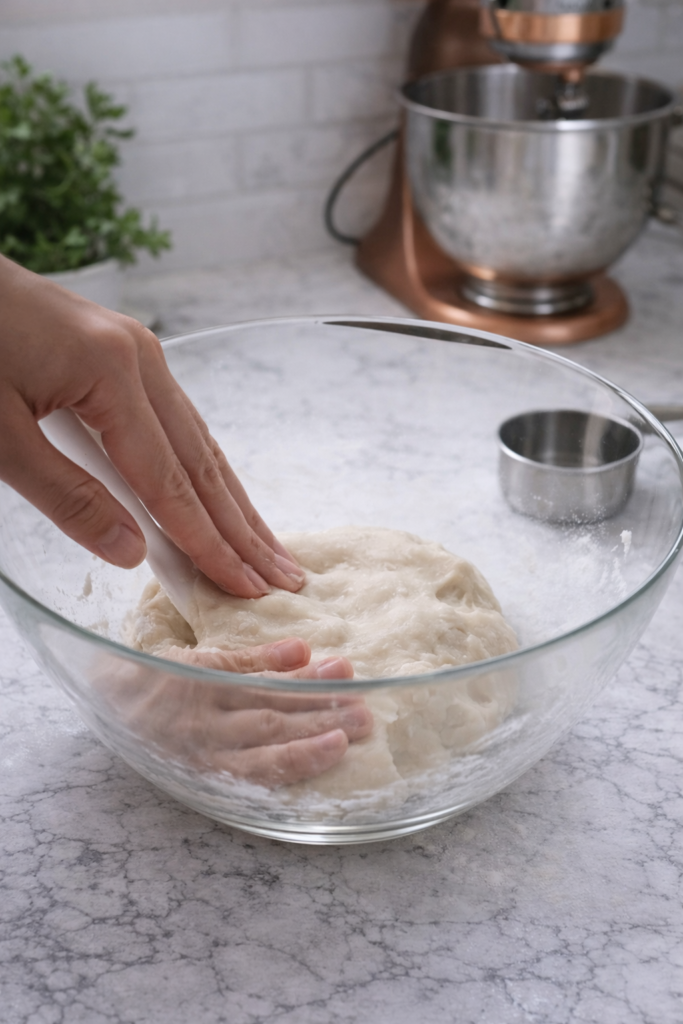
Now add the hot water all at once. Use a heat-resistant spatula or a wooden spoon to mix the ingredients together immediately. You’ll notice the dough coming together quite rapidly — the hot water works fast on the glutinous rice flour. Mix until there are no dry pockets of flour remaining and the mixture looks shaggy and rough but unified.
At this stage, add the tablespoon of room-temperature unsalted butter. Now switch from the spatula to your hands. Knead the butter into the warm dough by pressing, folding, and working it repeatedly. The butter will feel like it’s not incorporating at first — it will seem slippery and separate. Keep kneading. After 2 to 3 minutes of steady hand-kneading, the butter will fully incorporate and the dough will transform into something smooth, slightly shiny, and pliable. It should feel soft and slightly tacky but not sticky enough to leave residue on clean dry hands.
Once the dough is smooth, cover the bowl tightly with plastic wrap or a clean damp cloth and let it rest at room temperature for 30 minutes. This resting period is important — it allows the starches to fully hydrate from the residual heat and moisture in the dough, making the final texture more cohesive and the dough easier to work with during shaping.
Step 2: Prepare the Mozzarella Filling
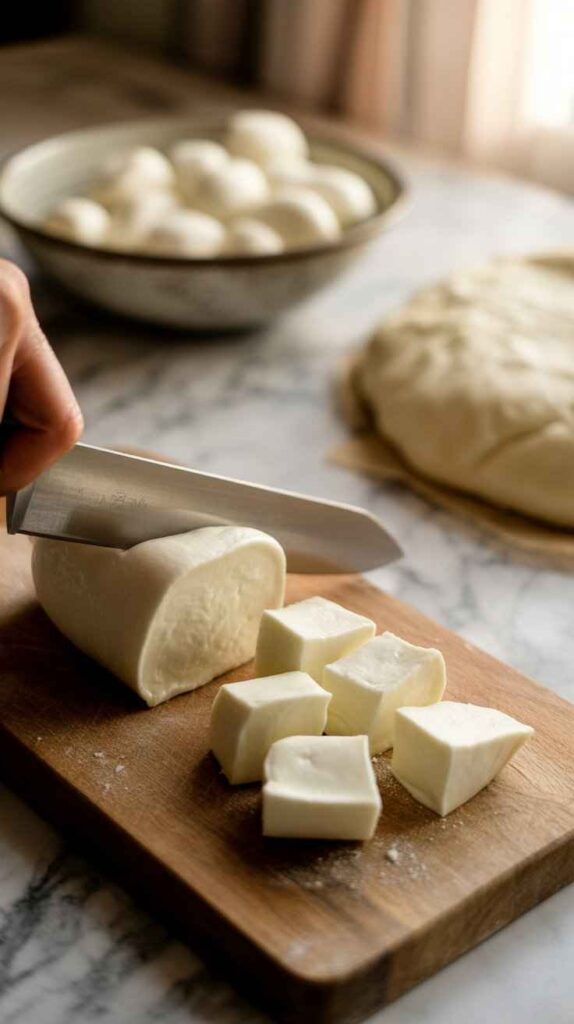
While the dough is resting, prepare your mozzarella. Cut your block mozzarella into cubes of approximately 2 cm — roughly the size of a large sugar cube. You want each piece to be substantial enough to provide a generous cheese pull when the ball is bitten into, but not so large that it overwhelms the dough and causes the ball to burst during frying.
If you’re using small fresh mozzarella balls (bocconcini or ciliegine), drain them and pat them very thoroughly dry. As mentioned above, freezing the cheese pieces for 20 to 30 minutes before wrapping significantly reduces the risk of the balls bursting during frying, particularly if you’re using fresh mozzarella. This step is optional but recommended for first-time makers.
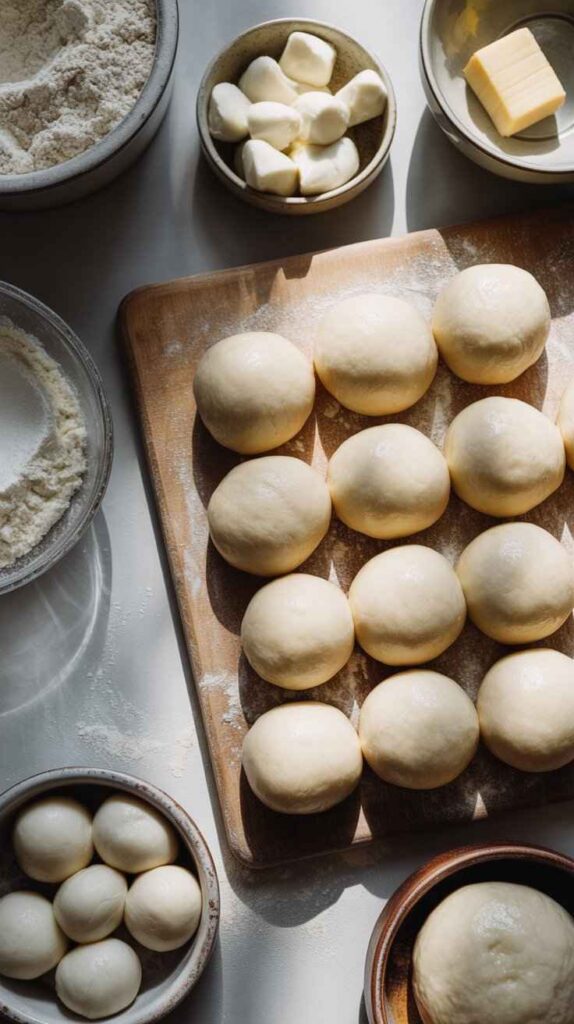
Step 3: Shape the Cheese Balls
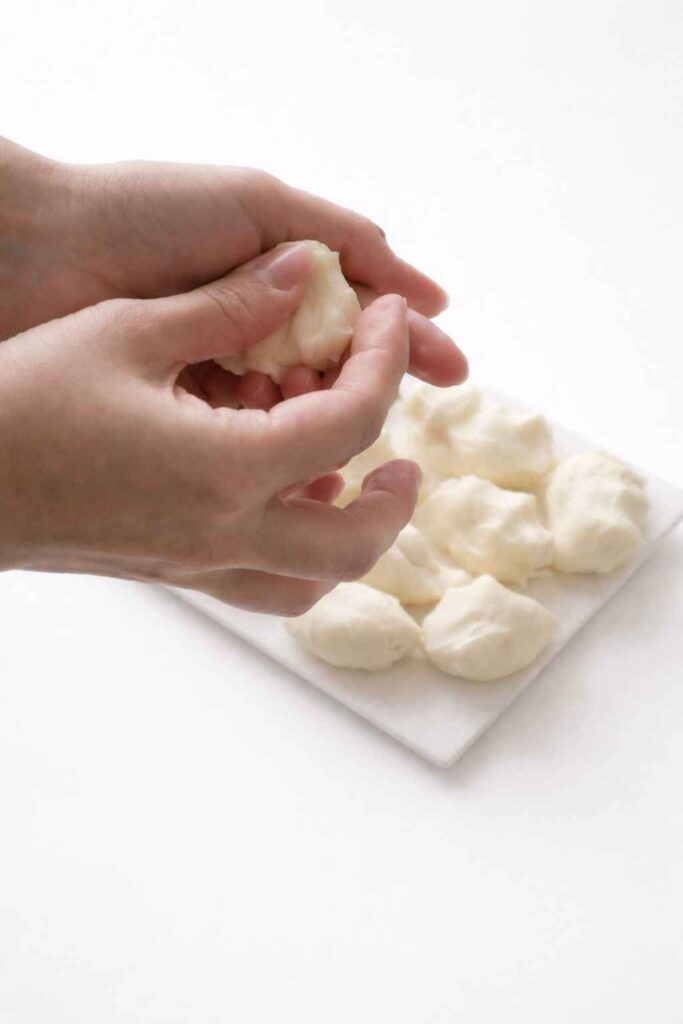
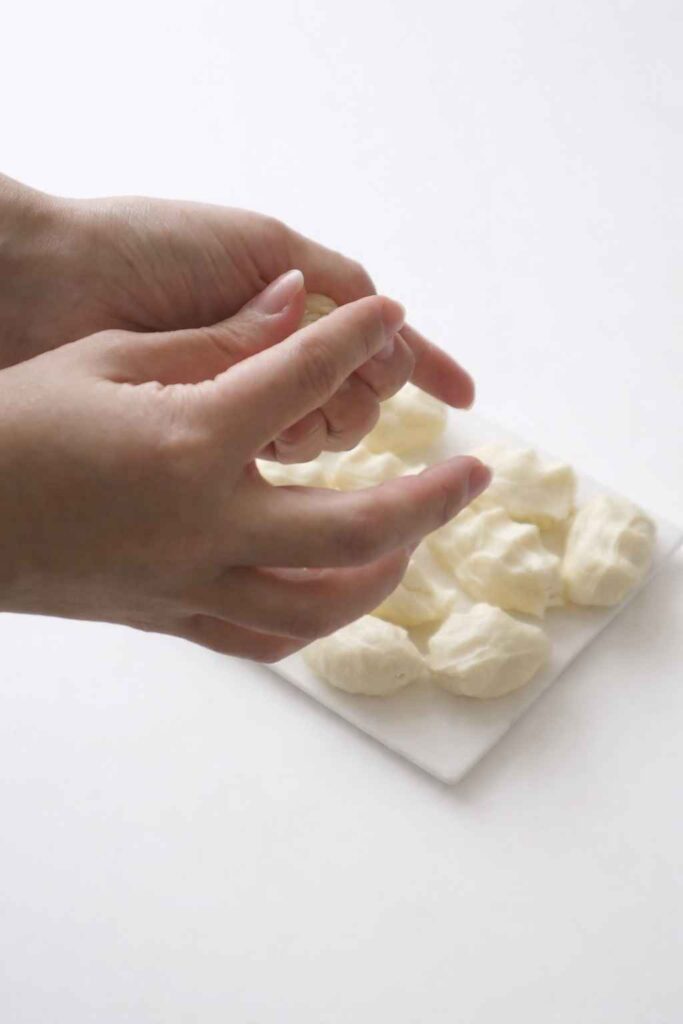
Divide the rested dough into equal portions. Depending on the size of cheese cube you’re using, each dough portion should be roughly the size of a large marble or a small walnut — about 20 to 25 grams per piece. Consistency in sizing is important for even frying. Uneven sizes mean some balls will be perfectly golden when others are either underdone or overdone.
Take one piece of dough and flatten it between your palms into a disc about 6 to 7 cm in diameter. The dough should be pliable enough to flatten without cracking — if it cracks at the edges, the dough may be slightly too dry, in which case you can dampen your hands very lightly with water.
Place a cube of mozzarella in the center of the flattened disc. Now bring the edges of the disc up and over the cheese, pinching them together firmly at the top to seal the cheese completely inside. This sealing is critical — any gap or weakness in the seal is where hot oil will penetrate during frying, which can cause the cheese to leak out and the ball to collapse or burst.
Once sealed, place the ball seam-side down in your palm and roll it between both palms in a smooth, circular motion to create a perfectly round ball. Apply gentle but consistent pressure as you roll. Place the finished ball on a clean plate or tray while you shape the remaining pieces. Do not stack or crowd the balls before frying — they may stick together.
Step 4: Fry the Cheese Balls
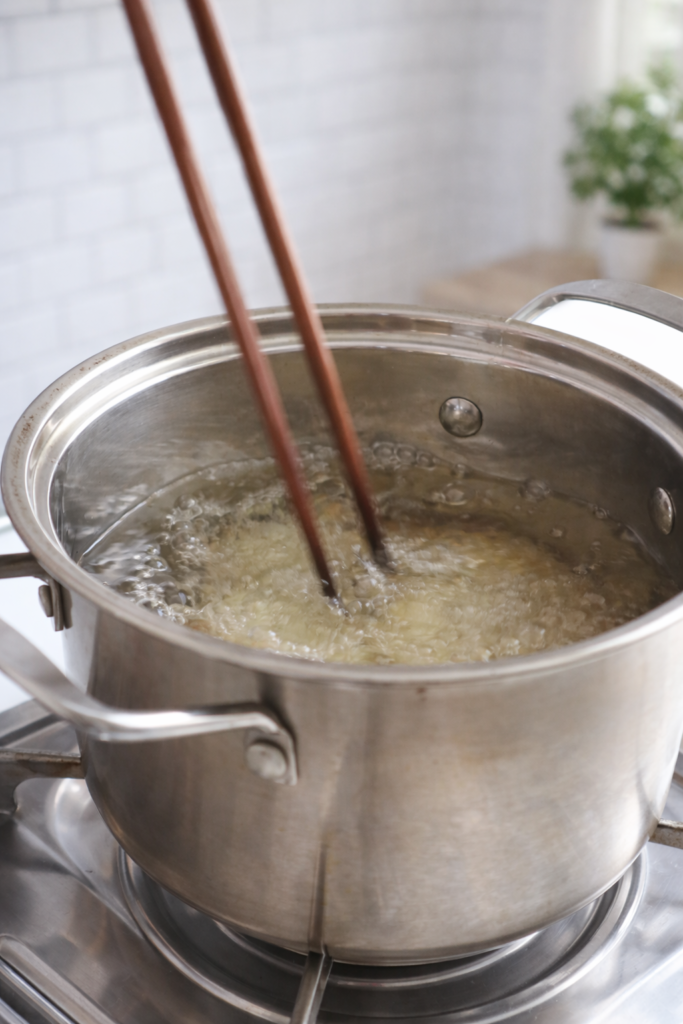
Pour enough cooking oil into a heavy-bottomed pot or deep saucepan to allow the cheese balls to float freely — at least 3 to 4 inches of oil depth. Heat the oil over medium heat until it reaches 160°C to 170°C (320°F to 340°F). This temperature range is lower than typical deep-frying temperatures, and this is deliberate and important.
The lower temperature serves two critical purposes. First, it gives the glutinous rice dough time to cook through completely before the outside over-browns — rice flour dough needs longer to set than wheat dough. Second, it gives the mozzarella inside time to melt fully and evenly without the cheese becoming too liquid too quickly and bursting through the dough. Frying at too high a temperature is the primary reason cheese balls burst — the cheese liquefies and expands faster than the dough can set around it.
Use a kitchen thermometer for accuracy if you have one. If you don’t, test the oil by dropping a tiny pinch of dough into it — at the right temperature, it should sink briefly, then rise to the surface within 3 to 4 seconds and sizzle steadily without browning immediately.
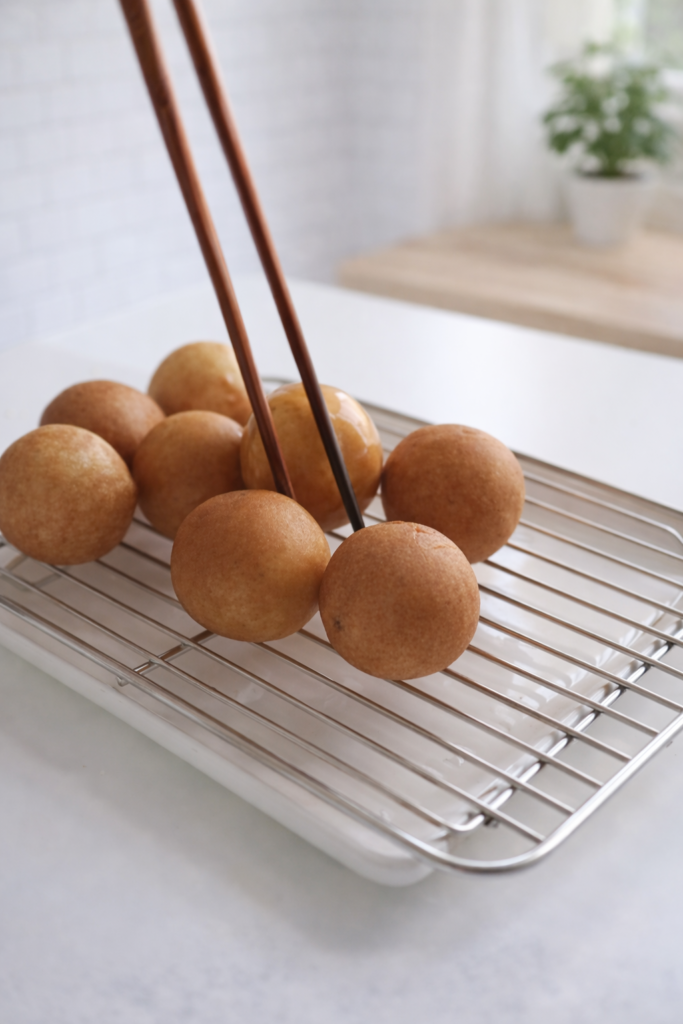
Gently lower the cheese balls into the oil — work in batches of 4 to 5 at most, never crowding the pot. As soon as the balls are in the oil, begin rolling them constantly using a slotted spoon or chopsticks. This continuous rolling is the signature technique of Korean cheese ball frying, and it serves two essential purposes: it ensures even, uniform browning on all sides, and it maintains the round shape of the balls as the dough sets. A ball left sitting on one side against the bottom of the pot will develop a flat spot and cook unevenly.
Continue rolling the balls constantly throughout the entire frying time of approximately 5 to 7 minutes per batch, until they are a deep, even golden brown all over and visibly puffed up from their original size. The puffing is caused by the steam inside the ball and the slight expansion of the baking powder — it is a good sign. Remove with a slotted spoon and transfer to a plate lined with paper towel to drain briefly.
Step 5: Coat in Sugar and Serve
While the cheese balls are still warm and the sugar will adhere easily to their slightly oily surface, transfer them to a bowl of granulated sugar and toss gently to coat evenly. This sugar coating is the traditional Korean street food finish — the combination of sweet coating, savory cheese, and the slightly salty dough creates a flavor profile that is genuinely addictive.
Serve immediately. The window of perfection for these cheese balls is narrow — within the first 5 to 10 minutes of frying, the cheese inside is fully melted and stretchy, the exterior is at maximum crispiness, and everything is exactly as it should be. As they cool, the cheese solidifies again and the exterior softens. They are still edible after cooling, but the experience is fundamentally different.
Bite into one, pull it apart slowly, and appreciate the stretch.
Approximate Nutritional Information (Per Cheese Ball)
| Nutrient | Amount (Approx.) |
|---|---|
| Calories | ~115–130 kcal |
| Total Fat | ~5–7g |
| Saturated Fat | ~2.5g |
| Carbohydrates | ~14g |
| Protein | ~4g |
| Sugar | ~2g (plus coating sugar) |
| Sodium | ~130mg |
Values are estimates based on the ingredients as listed. Oil absorption during frying will vary based on technique and temperature control.
Conclusion
Korean mozzarella cheese balls are one of those recipes that perfectly illustrates everything wonderful about Korean street food culture: bold textural contrasts, deeply satisfying flavors, and a theatrical quality that makes eating them feel like an event rather than just a snack. That cheese pull is not just a visual trick — it is the entire point. It is the promise the cheese ball makes to you the moment you pick it up, and when you pull it apart and that molten mozzarella stretches into a long, dramatic strand, the promise is gloriously kept.
What’s remarkable about this recipe is how honestly achievable it is at home. The ingredient list is short and accessible. The technique — mix, knead, rest, shape, fry, roll constantly — is learnable in one session. The resting step builds patience, the shaping builds confidence, and the moment those golden balls come out of the oil is genuinely exciting no matter how many times you’ve made them. The sugar coating is the final touch that transforms something already good into something that tastes like it came directly from a Korean street market stall, handed to you in a paper bag on a cold evening.
Make these once and they will become a permanent part of your snack repertoire. They work for every occasion — as a party appetizer that creates instant conversation, as a weekend project with kids who will love the shaping stage, as a late-night snack that requires minimal effort for maximum reward, or as the centerpiece of a homemade Korean street food spread alongside tteokbokki and hotteok. However you serve them, make sure you serve them immediately, make sure you have someone to share them with, and make sure there is someone holding a camera when you do the pull.
Common FAQs about Korean Mozzarella Cheese Balls Recipe
What exactly is glutinous rice flour and why is it essential for this recipe?
Glutinous rice flour (also called sweet rice flour or mochiko) is made from short-grain sticky rice. Despite the name, it contains no gluten—the term “glutinous” refers to its sticky, glue-like texture when cooked. This stickiness comes from a starch called amylopectin. When fried, it creates a unique texture that is simultaneously crispy on the outside and chewy underneath, which regular wheat flour cannot replicate. This dual texture is the defining characteristic of Korean cheese balls.
Where can I find glutinous rice flour?
Asian grocery stores and Korean supermarkets reliably stock it. It’s increasingly available in the international aisle of mainstream supermarkets. Online retailers also carry it widely. Common brand names include Mochiko (Japanese, very common in the US), Erawan (Thai, common in UK and Australia), and various Korean brands labeled as “sweet rice flour” or “chapssal garu.”
Why does the recipe specifically require hot water instead of cold or warm water?
Hot water (freshly boiled or just off the boil) partially gelatinizes the starches in glutinous rice flour on contact. This gelatinization is what makes the dough cohesive, pliable, and workable. Cold water would leave the flour granules largely ungelatinized, resulting in a crumbly, impossible-to-shape dough that falls apart.
What happens if I accidentally use lukewarm water?
The dough will be grainy, crumbly, and won’t hold together properly. It won’t have the smooth, pliable texture needed for shaping. If this happens, you cannot fix it by adding more water—you’ll need to start over with properly hot water.
What type of mozzarella works best for this recipe?
Low-moisture block mozzarella (the kind sold in rectangular blocks, not in water) is ideal. It has less water content, which means less aggressive steaming inside the dough during frying. This significantly reduces the risk of the balls bursting open.
What about shredded mozzarella from a bag?
Shredded mozzarella can work but is not ideal. It’s often coated with anti-caking agents (like cellulose) that affect melting quality. If using shredded cheese, compress a small amount into a ball shape before wrapping. The cheese pull won’t be as dramatic as with block mozzarella.
What size should the cheese cubes be?
Cut cubes approximately 2 cm (about ¾ inch)—roughly the size of a large sugar cube. This size provides a generous cheese pull when bitten into but isn’t so large that it overwhelms the dough or causes bursting during frying. Consistency in cube size ensures even melting.
My dough feels too dry and cracks when I try to flatten it. How do I fix this?
Dampen your hands very lightly with water while working with the dough. The moisture transfers to the dough surface and improves pliability. If the dough is severely dry, you may have used too little water initially—a few drops of additional hot water kneaded in can help.
How thin should I flatten the dough disc?
Flatten to approximately 6-7 cm in diameter—thin enough to wrap around the cheese without being too thick, but not so thin that it tears or allows the cheese to poke through. The dough should be uniformly thick across the disc with no thin spots that could become weak points.
How do I check if my seal is secure?
After pinching, gently roll the ball between your palms. If you can see the cheese through any thin spots or if the seams separate during rolling, reshape and reseal. The ball should feel uniformly dense with no soft spots where the cheese is close to the surface.
Browse Every Recipe
The Complete Recipe Collection
From comforting weeknight dinners to elegant cocktails — every recipe from Relish the Recipe, all in one place.
- Beef Bourguignon
- Steak au Poivre
- Perfect Filet Mignon
- Grilled Coffee-Cola Skirt Steak
- Grilled Mojo Beef
- Vietnamese Lemongrass Chicken
- Honey Balsamic Pomegranate Glazed Chicken
- Mushroom Stuffed Chicken Breast
- Zesty Herb Marinated Grilled Chicken Thighs
- Baked French Onion Chicken
- One-Pan Tuscan Orzo with Chicken
- Creamy Peri Peri Chicken Pasta
- One-Pan Chicken Chorizo Orzo
- Jamaican Jerk Chicken & Plantain Skillet
- Pan Seared Pork Tenderloin in Peppercorn Gravy
- Citrus Glazed Roasted Pork Ribs
- Smothered Pork Chops with Mushroom Gravy
- Teriyaki Pork Noodles
- One-Pan Chorizo Rice Skillet
- Greek Lemon Roast Lamb & Potatoes
- Greek Lamb with Orzo
- Classic Greek Beef Stifado
- Sausage Ragù
- Italian Sausage & Lamb Ragù
- Sausage & Pepper Bolognese
- Sausage Ragù with Spinach & Ricotta
- Sausage & Zucchini Rigatoni
- 3 Italian-Style Meatloaves
- Brown Butter & Sage Mezzi Rigatoni
- Red Pesto Gnocchi
- Creamy Chicken Meatball Orzo
- Creamy French Onion Orzo Casserole
- Quick Vegan Lasagna
- Vegan Ramen
- Spicy Maple Tofu Rice Bowl
- Oven-Baked Potatoes with Meatballs & Cheese
- Oven-Roasted Crispy Potatoes
- Crispy Potato Tacos
- Korean Sweet & Spicy Beef Meatballs
- Lean Jalapeño Beef Burger
- Vegan Bulgogi Pinwheels
- Vegan Cabbage Rolls
- Creamy Broccoli & Garlic Soup
- New England Creamy Clam Chowder
- Manhattan Clam Chowder
- Split Pea Soup
- Ham & Bean Soup
- Hearty Vegetable Barley Soup
- Creamy Asparagus Soup
- French Cream of Chestnut Soup
- Classic Provençal Fish Soup
- Carnival Squash Soup with Turmeric
- Vegan Chicken & Dumpling Soup
- 30-Minute Creamy Shrimp Alfredo
- Crispy Buffalo Chicken Wonton Cups
- Buffalo Chicken Cauliflower Dip
- Buffalo Chicken Garlic Bread
- Crispy Garlic Parmesan Wings
- Garlic Butter Cheese Bombs
- Quick Ham & Cheese Pinwheels
- Philly Cheesesteak Stuffed Rolls
- Bacon Cheeseburger Dip
- Pepperoni Pizza Dip
- Brown Sugar Bacon-Wrapped Smokies
- Chili Crisp Egg Avocado Toast
- Crispy Rice Cake Benedict
- Savory Chicken Salad Cucumber Rolls
- Cabbage & Lentil Rolls
- Shrimp Bruschetta
- Honey Butter Cornbread
- Spinach & Onion Savory Jam
- Ultimate Big Mac Salad
- Chicken & Potato Croquettes
- High-Protein Lentil Crackers
- Blueberry Tiramisu
- Kunafa Tiramisu
- Lighter Eggnog Tiramisu
- Mirror Glaze Raspberry Mousse Cake
- Ombré Heart Buttercream Cake
- Valentine’s Day Mini Cakes
- Molten Mini Chocolate Lava Cakes
- High-Protein Pumpkin Mousse
- No-Bake Oreo Delight
- No-Bake Pistachio Cheesecake
- No-Bake Banana Pudding
- Samoa Brownies
- Cream Cookie Chunk Fudge
- Thin & Chewy Chocolate Chip Cookies
- Red Velvet Cookies
- Valentine Heart Cookies
- Strawberry Cheesecake Tacos
- Healthy Oatmeal Apple Banana Cake
- Sugar-Free Oat Cakes
- Sugar-Free Banana Oat Brownies
- Coconut Cove Baked Oatmeal
- Blueberry Apple Morning Oats Cake
- Sugar-Free Dates, Banana & Chocolate
- Low-Carb Cottage Cheese Ice Cream
- Keto Schnitzel
- Keto Beef Roulades
- Fluffy Keto Cloud Bread
- Keto Muffins
- Keto German Chocolate Cake
- Keto Yogurt Almond Cake
- Keto Spinach & Feta Omelette
- Keto Bacon Cheeseburger Casserole
- Keto Eggplant Parmesan
- 15-Min Keto Creamy Garlic Chicken
- Low-Carb Tuscan Chicken Bake
- One-Pot Zoodle Alfredo
- Keto Garlic & Herb Breadsticks
- Keto Chocolate Chip Banana Bread
- Keto Tortillas
- 3-Ingredient Carnivore Bun
- Mediterranean Stuffed Roasted Peppers
- Red Lentil Bread
- Classic Whiskey Sour
- Old Fashioned
- Manhattan
- Hot Apple Whisky Lime
- Classic Margarita
- Frozen Strawberry Margarita
- Strawberry Coconut Margarita
- Mango Chilli Margarita
- Paloma
- Aperol Spritz
- Moscow Mule
- Strawberry Basil Mule
- Vodka Cranberry
- 3 Ways: Blueberry Vodka Lemonade
- Homemade Piña Colada
- Mermaid Mimosa
- Passion Fruit Martini
- Honolulu Highball
- Angel Face
- Mandarin Sunrise
- Pomegranate Gimlet
- Southside Gin Cocktail
- Paper Plane
- White Lady
- Almond Joy Cocktail
- Green Tea Shot
- Black Grapes Mojito
- 10 Best Rum Cocktails