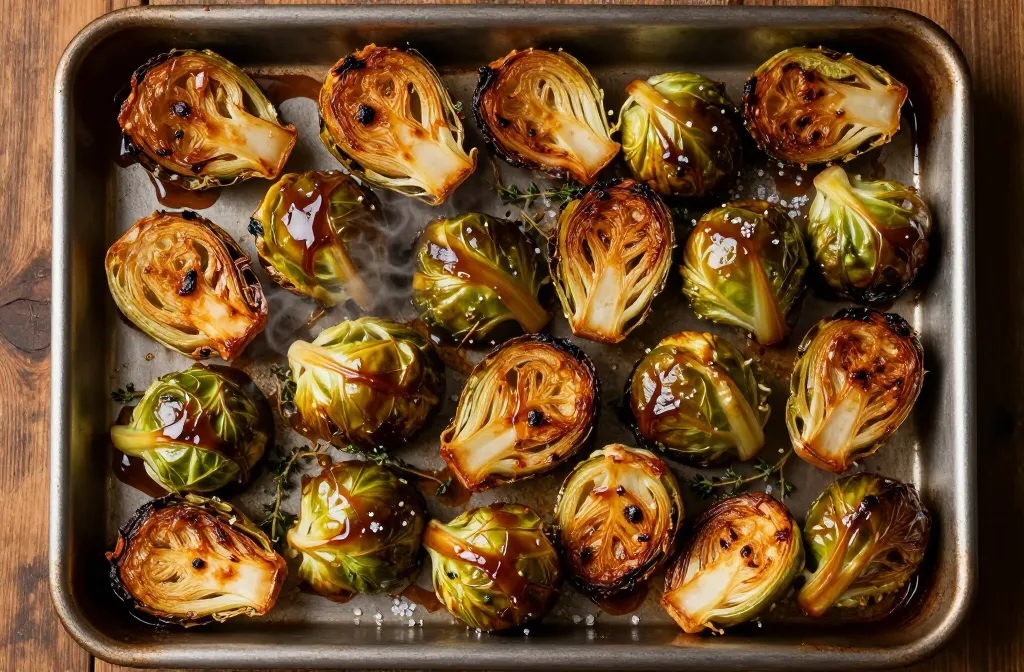
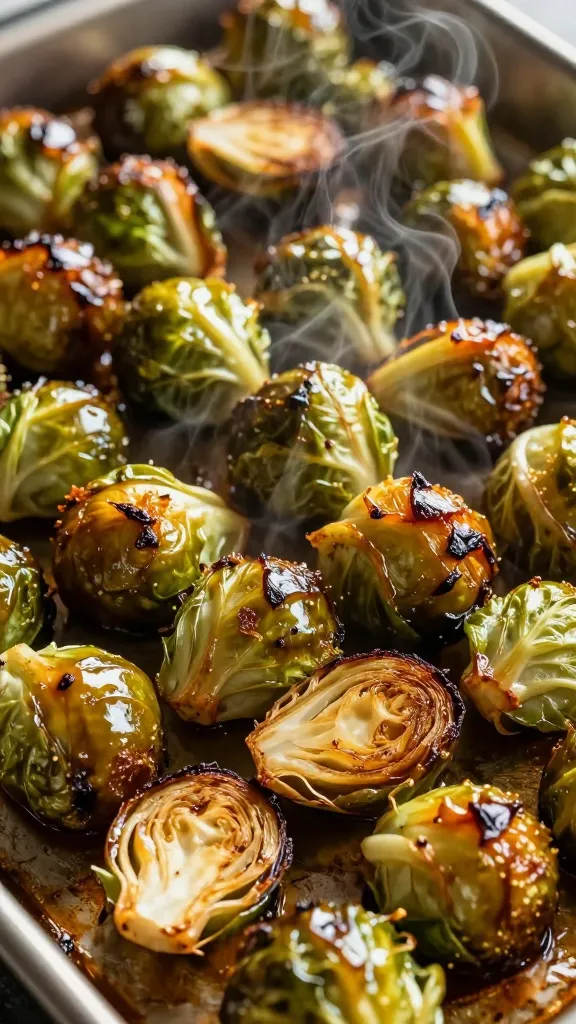
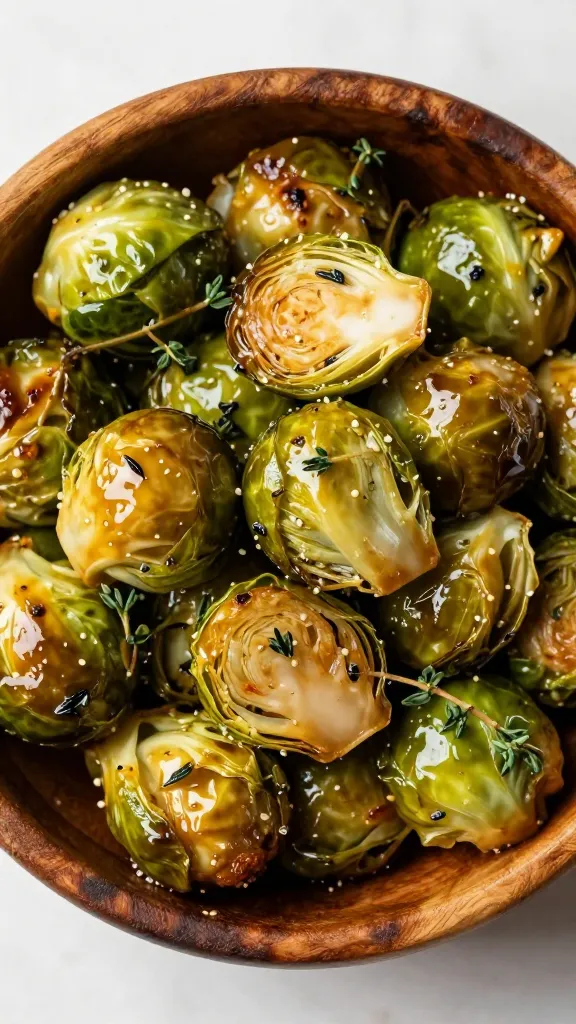
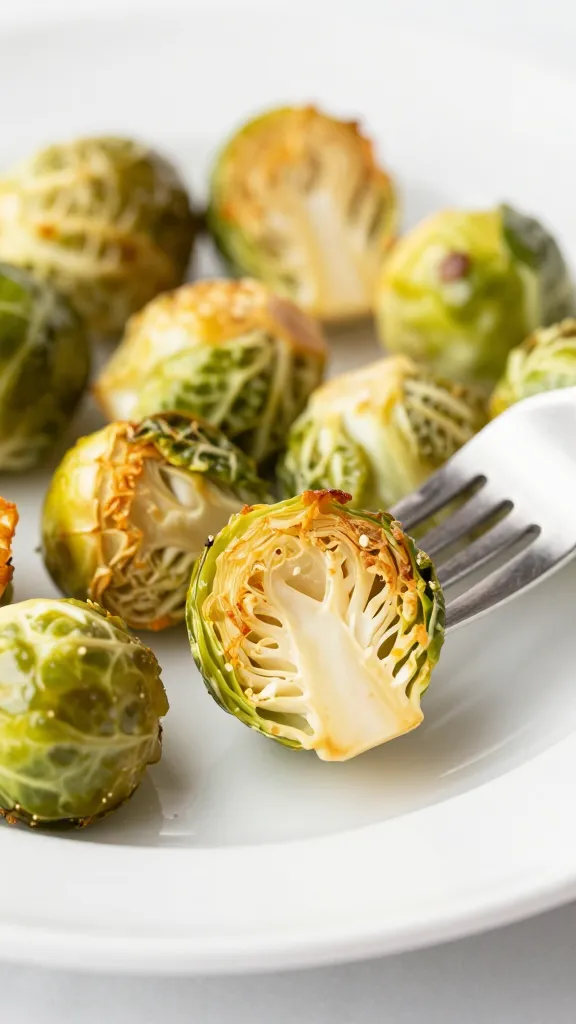
There are vegetables that divide opinion sharply and reliably, and Brussels sprouts have historically sat at the very top of that list — misunderstood, overcooked, and unfairly dismissed by generations of people who encountered them in their worst possible form. But roast them properly, caramelize them until their outer leaves are deeply golden and almost crackling at the edges, and finish them with a glossy, sticky maple glaze that clings to every charred surface and balances their natural bitterness with just the right amount of sweetness — and everything changes completely. These Maple Glazed Brussels Sprouts are the recipe that converts skeptics, silences critics, and turns the most committed Brussels sprout avoider into someone who is quietly going back for a third helping before dinner is even finished. The combination of high-heat roasting and a well-balanced maple glaze creates something genuinely extraordinary — tender and yielding on the inside, caramelized and almost crispy on the outside, with a sweet, savory, slightly sticky coating that makes every single bite deeply satisfying. They work as a side dish for roasted meats, holiday spreads, or a simple weeknight dinner, and they come together with very little effort and very few ingredients. This is the Brussels sprouts recipe that changes everything.
Maple syrup does something magical to Brussels sprouts. It balances their natural bitterness with rich sweetness while helping them crisp up beautifully in the oven. Unlike cloyingly sweet glazes, maple adds depth with its earthy, almost smoky notes.
The Science Behind the Magic
When maple syrup hits hot oven air, its sugars caramelize and create a glossy coating. Meanwhile, the sprouts’ outer leaves dehydrate into crispy perfection. It’s texture heaven—soft centers with shatteringly crisp edges.
How to Pick the Best Brussels Sprouts
Not all sprouts are created equal. Follow these tips:
- Size matters: Choose small to medium sprouts (big ones are often woody)
- Color check: Vibrant green with tight leaves—no yellowing
- Freshness test: They should feel heavy for their size
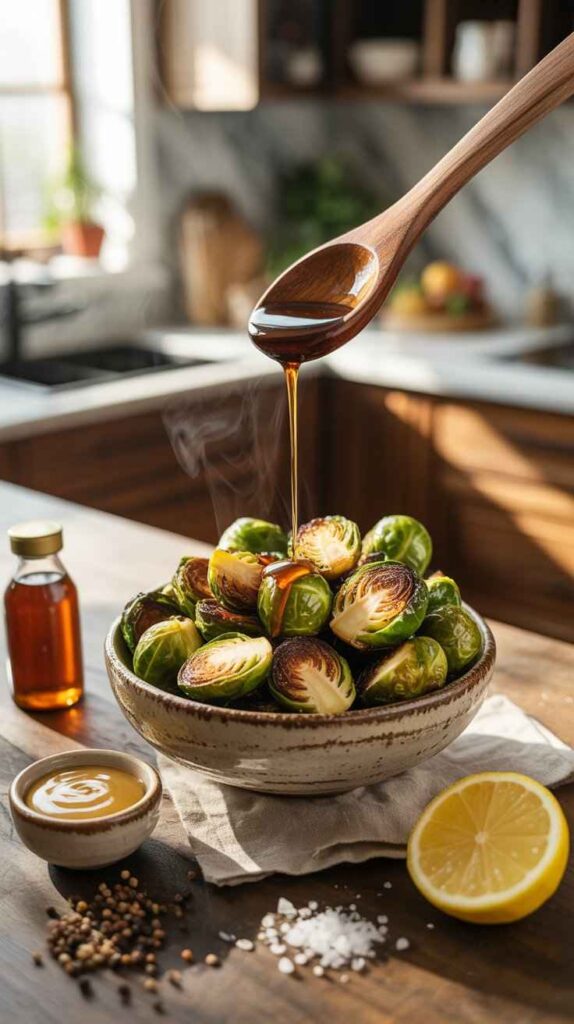
Foolproof Maple Glaze Formula
This 4-ingredient glaze works every time:
- 1/4 cup pure maple syrup (none of that “pancake syrup” nonsense)
- 2 tbsp olive oil or melted butter
- 1 tbsp apple cider vinegar or lemon juice
- 1/2 tsp salt
Pro Tip: The Shake Method
Combine all glaze ingredients in a jar, screw on the lid, and shake violently. No whisking, no mess. Bonus arm workout included.
Roasting vs. Air Frying Showdown
Both methods work, but here’s the breakdown:
- Oven roasting: Better for large batches, more even caramelization
- Air frying: Faster (12-15 mins), extra crispy edges
7 Next-Level Additions (Because Why Not?)
Take your sprouts from great to “OMG what is this sorcery?” with:
- Crispy pancetta or bacon bits
- Toasted pecans or walnuts
- Crumbled goat cheese or feta
- Pomegranate seeds for pop
- Chili flakes for heat
- Orange zest for brightness
- Tahini drizzle because everything’s better with tahini
FAQ: Your Sprout Questions, Answered
Why do my Brussels sprouts turn out soggy instead of caramelized?
The most common culprit is overcrowding the pan — when sprouts are packed too tightly together, they steam rather than roast, which prevents any meaningful caramelization from occurring. Always spread them in a single layer with enough space between each one to allow hot air to circulate freely around every surface. A high oven temperature of at least 200 to 220 degrees Celsius is equally essential, as lower temperatures will not generate the intense heat needed to caramelize the outer leaves properly.
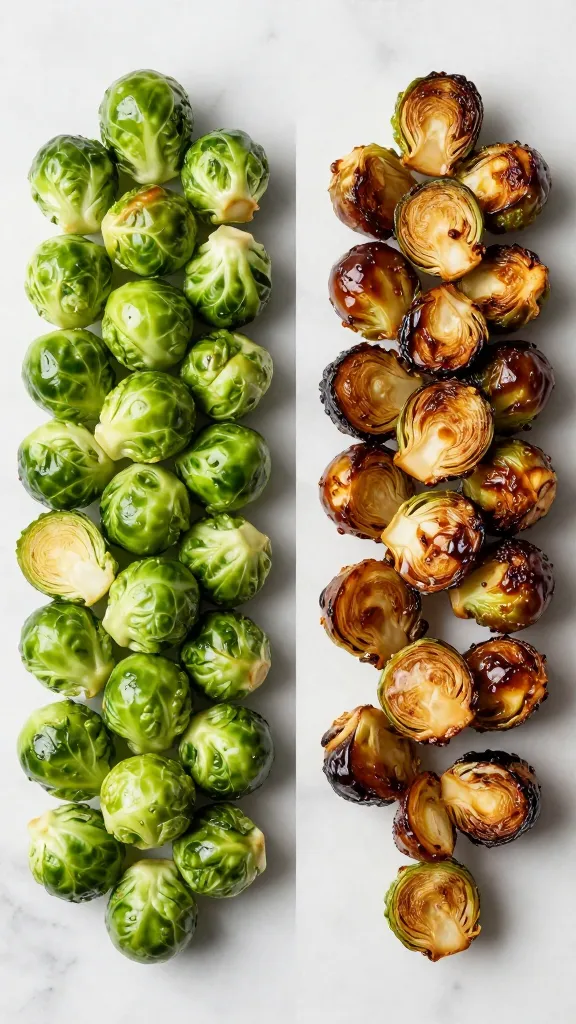
Should I halve the Brussels sprouts or roast them whole?
Halving the sprouts cut-side down is strongly recommended because the flat surface makes direct contact with the hot roasting pan, which is where the deepest, most flavorful caramelization happens. Whole sprouts take longer to cook through and their outer leaves often char before the inside has become properly tender. Halving also increases the overall surface area exposed to heat, giving you more of those irresistible crispy, golden edges in every serving.
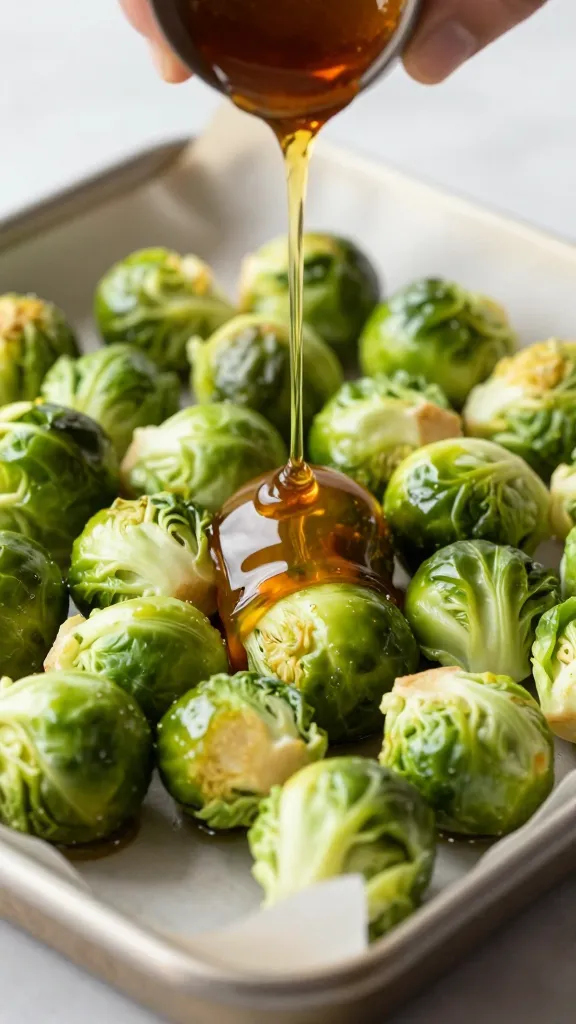
When should I add the maple glaze — before or after roasting?
The most effective technique is a two-stage approach: toss the sprouts lightly with oil and seasoning first and roast until nearly tender and caramelized, then add the maple glaze in the final five to eight minutes of cooking. Adding the glaze too early causes the sugars to burn before the sprouts are properly cooked through, resulting in bitter, overly dark edges and an unpleasant flavor. The final-stage glaze allows the sugars to caramelize beautifully without burning, giving you a sticky, glossy coating rather than a charred one.
What type of maple syrup should I use?
Pure maple syrup is essential — avoid pancake syrup or maple-flavored syrups, which are primarily corn syrup with artificial flavoring and will not deliver the same depth of flavor or caramelize in the same way. Grade A dark maple syrup with its robust, deeply maple flavor works particularly well in this recipe because its intensity holds up against the natural bitterness of the sprouts. The darker the grade, the more pronounced the maple flavor in the finished dish.
How do I prepare Brussels sprouts properly before roasting?
Trim the tough, woody base of each sprout with a sharp knife, remove any yellowed or damaged outer leaves, and halve them through the core. Washing them before roasting is fine, but they must be dried thoroughly — any surface moisture will create steam in the oven and work directly against the caramelization you are trying to achieve. Patting them completely dry with a clean kitchen towel before tossing in oil is one of the most important steps for achieving properly roasted, crispy results.
Can I make maple glazed Brussels sprouts ahead of time?
Brussels sprouts are genuinely best served immediately after roasting while their outer leaves are still crispy and the glaze is warm and sticky, so making them fully ahead is not ideal. However, you can trim, halve, and dry the sprouts up to 24 hours in advance and store them uncovered in the refrigerator, which actually helps dry them out further and improves roasting results. The maple glaze can also be mixed in advance and stored at room temperature, meaning the actual cooking time on the day is minimal.
What fat works best for roasting Brussels sprouts?
A neutral oil with a high smoke point — such as avocado oil, refined coconut oil, or a light olive oil — is the best choice for roasting Brussels sprouts at high temperatures. Extra virgin olive oil has a lower smoke point and can turn bitter at the high temperatures required for proper caramelization, though it works acceptably well if a high-smoke-point oil is unavailable. The key is using enough oil to lightly coat every cut surface, as under-oiled sprouts will dry out and char rather than caramelize.
How do I balance the sweetness of the maple glaze so it does not become overpowering?
Balancing maple syrup with an acidic component such as apple cider vinegar or a small squeeze of lemon juice cuts through the sweetness and adds a pleasant sharpness that prevents the glaze from tasting one-dimensional. A good pinch of salt and a hit of black pepper are equally important, as they anchor the sweetness and give the glaze a savory depth that complements rather than competes with the natural flavor of the sprouts. A small amount of Dijon mustard or soy sauce stirred into the glaze adds an additional layer of complexity that makes the finished dish taste considerably more sophisticated.
Final Verdict: Make These Tonight
Maple Glazed Brussels Sprouts are living proof that the difference between a vegetable people tolerate and a vegetable people genuinely crave comes down almost entirely to technique and a little culinary ambition. There is nothing complicated here, nothing that requires specialist equipment or hard-to-source ingredients — just properly prepared sprouts, high heat, and a beautifully balanced glaze that transforms something humble into something genuinely spectacular. This is the dish that rehabilitates reputations, the one that gets served at a dinner table full of self-declared Brussels sprout haters and comes back to the kitchen as an empty bowl. It works for holiday gatherings where you need a side dish impressive enough to hold its own alongside a centrepiece roast, and it works just as well on a quiet weeknight when you want something simple that still feels like a little bit of an occasion. Once you have made them this way — caramelized, sticky, golden, and glossy — no other preparation will ever feel like enough. The sprouts that were once left untouched at the edge of the plate will become the thing people ask about first, reach for fastest, and remember longest. Make them once and you will completely understand why.