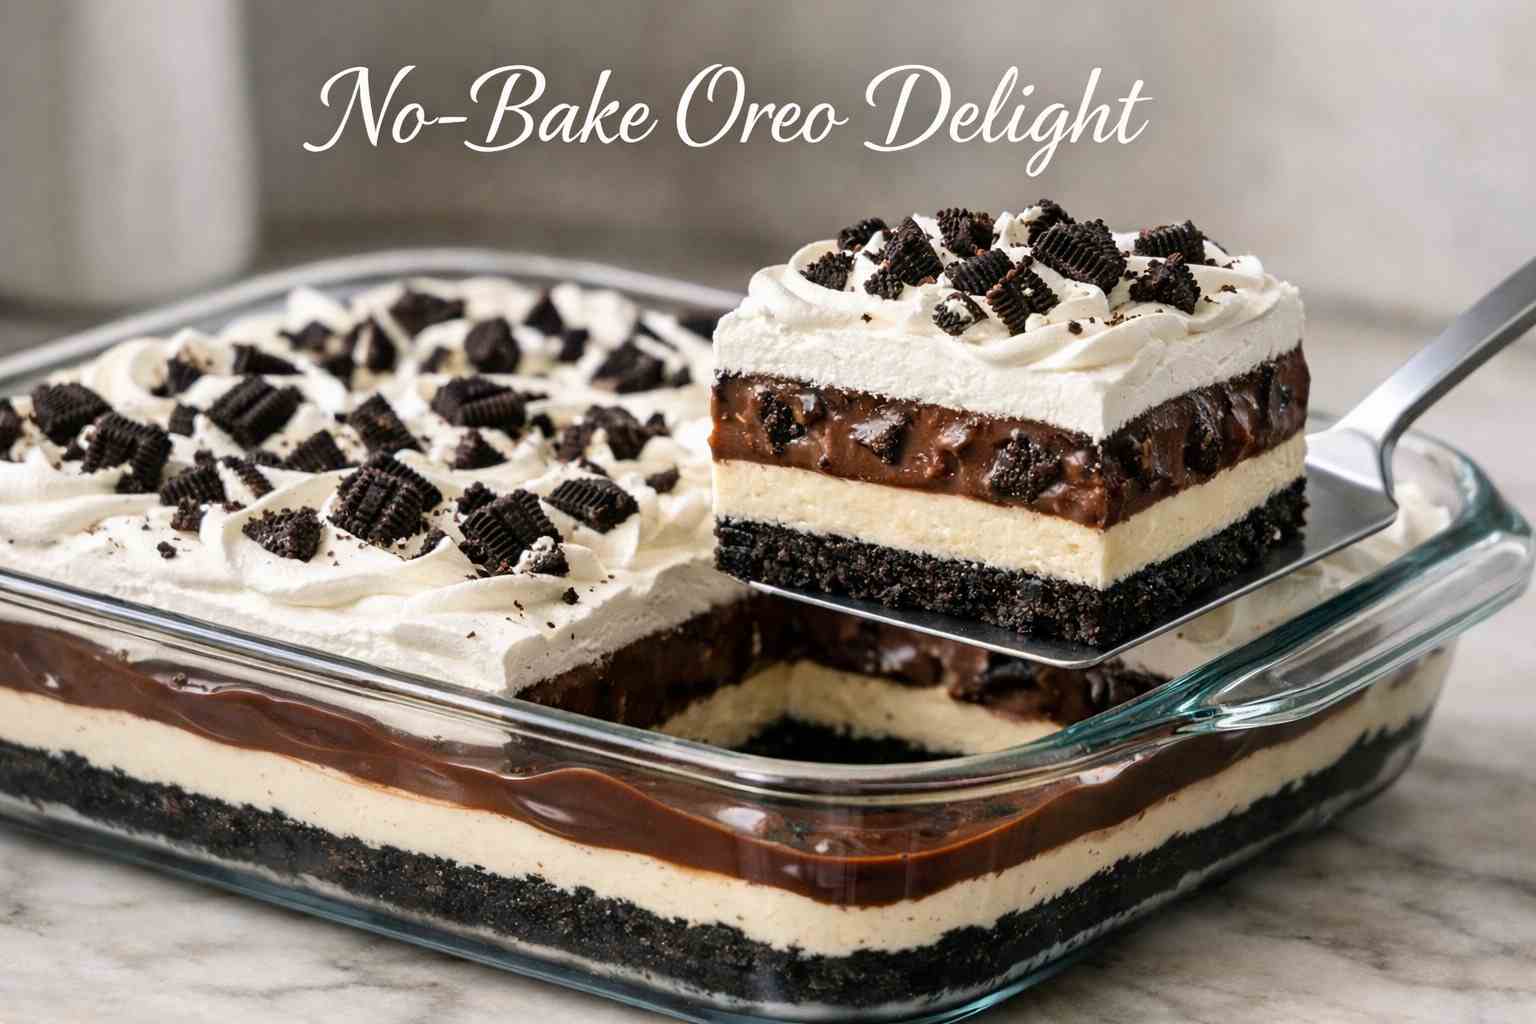
There exists within the universe of desserts a category that operates by different rules than the rest — a category defined not by technical difficulty or exotic ingredients but by the particular kind of pleasure it produces: deep, layered, nostalgic, and completely impossible to resist regardless of the sophistication or the age of the person eating it. The No-Bake Oreo Delight — known variously as “Oreo Lush,” “Dream Dessert,” or simply “that incredible chocolate thing” by the people who have encountered it at a potluck and been unable to stop thinking about it since — belongs squarely and triumphantly to this category. It is a multi-layered masterpiece of complementary textures and perfectly calibrated flavors, and it produces, consistently and reliably, the specific reaction that every home baker most wants from a dessert they bring to a gathering: the moment when the platter is set down and the room collectively stops its various conversations to take a closer look.
What makes this recipe worthy of its reputation is not a single extraordinary element but rather the thoughtful engineering of an entire layered system, in which each component has been selected and prepared specifically to complement, contrast with, and structurally support everything around it. The foundation is an Oreo crust — pressed and briefly baked to transform it from a simple crumb base into a toasted, structurally stable platform that will not go soggy under the weight and moisture of everything above it. On top of that comes the recipe’s most sophisticated element: a genuine chocolate ganache layer, spread over the crust and chilled until firm, providing both a waterproof seal between the crust and the cream layers above and an intense, dark, bittersweet chocolate note that anchors the dessert’s flavor. Then a cream cheese layer — beaten smooth and folded with homemade whipped cream into something that is simultaneously tangy, rich, and airy. Then an Oreo-studded instant chocolate pudding layer. And finally, a cloud of the remaining whipped cream, swirled decoratively and scattered with roughly chopped Oreo pieces for textural contrast.
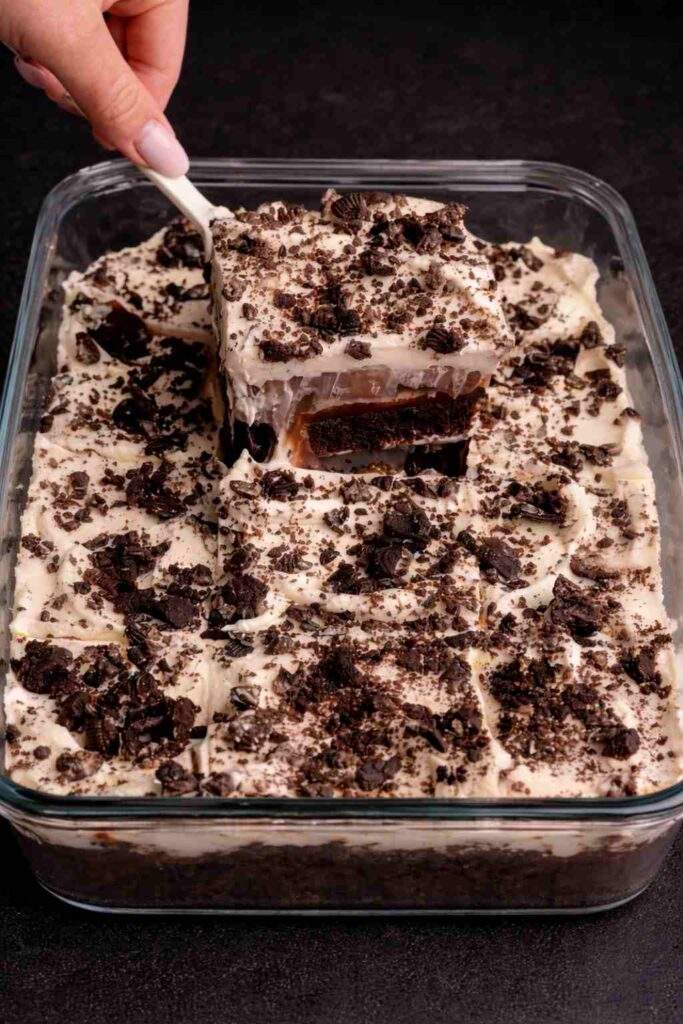
The result, after a minimum of several hours in the refrigerator and preferably an overnight rest, is a chilled, sliceable, visually spectacular dessert with distinct, beautiful layers that reveal themselves in cross-section like geological strata — each one a different color, a different texture, a different flavor contribution to the bite they collectively produce. It is nostalgic enough to delight children and sophisticated enough to impress adults. It requires no oven time for the primary preparation. And it makes ahead brilliantly, getting better with every additional hour the flavors have to marry in the refrigerator. This is the crown jewel of the no-bake dessert world, and here is exactly how to make it properly.
Recipe Overview
| Detail | Info |
|---|---|
| Category | No-Bake Dessert / Layered Dessert |
| Occasion | Potlucks, Holidays, Birthdays, Everyday Indulgence |
| Difficulty | Easy to Moderate |
| Servings | 12–16 Generous Slices |
| Active Prep Time | Approximately 45 Minutes |
| Chilling Time | Minimum 2–4 Hours; Overnight Preferred |
| Pan Size | 9×13-Inch Baking Pan |
Ingredients
Layer 1 — The Oreo Crust:
- 33 Oreo cookies (entire cookie, cream filling included)
- 6 tbsp unsalted butter, melted
Layer 2 — The Chocolate Ganache:
- 6 oz semi-sweet chocolate, finely chopped
- ¾ cup heavy cream
Layer 3 — The Homemade Whipped Cream (used across two layers):
- 3 cups heavy cream, very cold
- ⅔ cup powdered sugar
- 2 tsp pure vanilla extract
Layer 4 — The Cream Cheese Layer:
- Two 8-oz blocks cream cheese, fully softened to room temperature
- 1 cup powdered sugar
- 1 tsp pure vanilla extract
- 1½ cups prepared whipped cream (from Layer 3)
Layer 5 — The Oreo-Studded Pudding:
- One 5.9-oz box instant chocolate pudding mix
- 2½ cups cold whole milk
- 10 Oreo cookies, crushed (not pulverized — coarse crush for texture)
Layer 6 — The Final Topping and Garnish:
- Remaining prepared whipped cream (from Layer 3)
- 4–6 Oreo cookies, coarsely chopped
Step-by-Step Instructions
Layer 1 — The Oreo Crust: Building a Stable Foundation
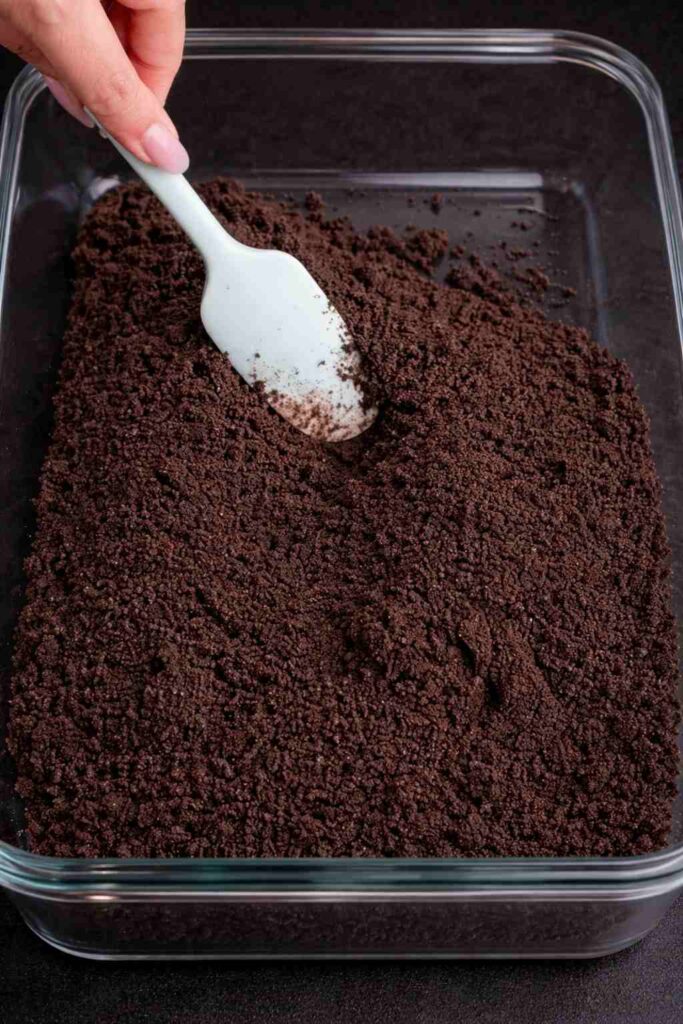
Place 33 Oreo cookies — whole, with their cream filling intact — into a food processor and pulse until the mixture reaches a uniformly fine, sandy crumb texture with no large cookie pieces remaining. The cream filling must be processed with the cookies rather than removed: the cream filling is a fat-based component that contributes to the binding behavior of the crust and adds a subtle sweetness to the cookie’s dark cocoa character. Pour the crumbs into a large bowl and add the 6 tablespoons of melted butter. Toss and stir until the butter is completely distributed through the crumbs and the mixture resembles wet sand — it should hold its shape when squeezed in your palm but crumble again when pressed apart. If the mixture appears too dry to hold shape, add an additional tablespoon of melted butter.
Press the buttered crumb mixture into the bottom of a 9×13-inch baking pan using the flat bottom of a measuring cup or a straight-sided glass, applying firm, even pressure to create a compact, uniformly thick layer that reaches every corner of the pan. Here is the recipe’s most important technique for crust quality: despite this being a “no-bake” dessert, bake this crust at 350°F (175°C) for 10 minutes. This brief baking step achieves something that no amount of chilling can replicate — it toasts the crumbs, developing additional Maillard reaction flavor compounds in the cookie’s cocoa and sugar content, and most critically, it drives off the excess moisture in the crust that would otherwise be drawn out by the moist layers applied above it during refrigeration, causing the crust to become soft, compressed, and soggy over time. A baked, toasted crust maintains its structural crunch against hours of moisture exposure in a way that an unbaked crust simply cannot. Allow the baked crust to cool completely — at least 30 minutes at room temperature — before proceeding. A warm crust will melt the ganache poured over it rather than allowing it to set cleanly.
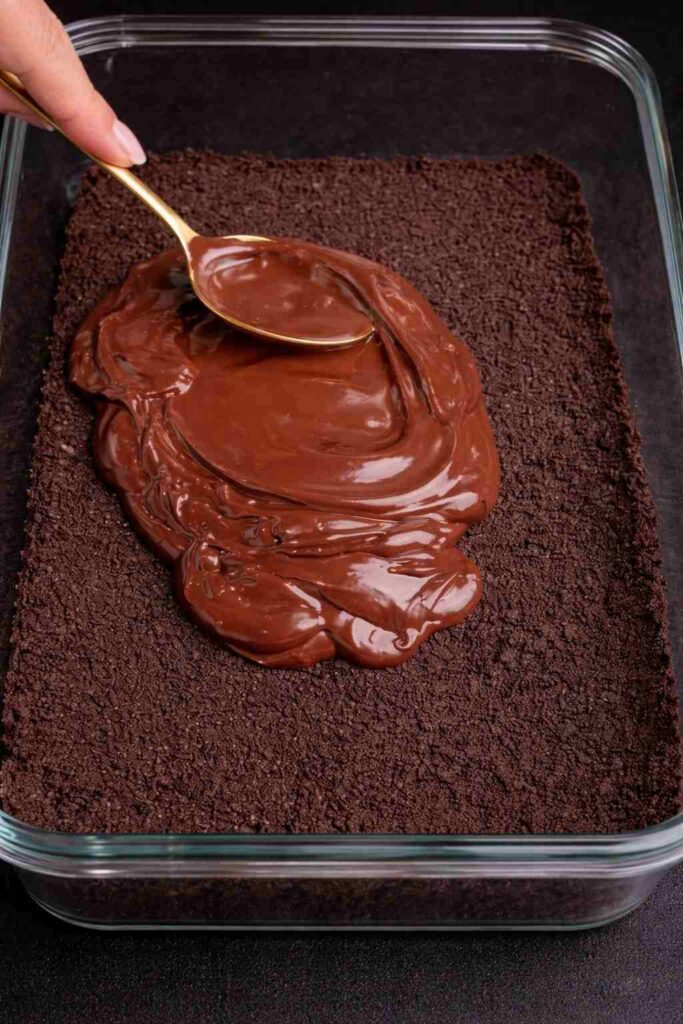
Layer 2 — The Chocolate Ganache: The Seal and the Statement
Finely chop the semi-sweet chocolate and place it in a medium heat-proof bowl — a fine chop is important because smaller pieces have more surface area exposed to the hot cream, facilitating faster, more complete melting. In a small saucepan, heat the heavy cream over medium heat until it just reaches a simmer — visually, this is the moment when small bubbles appear consistently around the perimeter of the pan and steam rises from the surface, but before the cream has reached a rolling boil. Remove from heat immediately at this point: overheated cream above 200°F (93°C) can cause the chocolate’s cocoa butter to separate from the solid cocoa particles rather than emulsifying smoothly with the cream.
Pour the hot cream over the chopped chocolate in a single, confident pour and allow the mixture to sit completely undisturbed for exactly 5 minutes. This resting period is not passive — the cream’s heat is penetrating and melting the chocolate throughout its mass, and disturbing the mixture before this melting is complete produces a grainy result. After 5 minutes, begin stirring from the very center of the bowl in small, tight circles, gradually widening the motion toward the edges as the chocolate and cream integrate into a glossy, smooth, unified emulsion. The ganache is properly made when it is completely smooth, uniformly dark, and carries a glossy, mirror-like sheen on its surface.
Pour the ganache over the completely cooled Oreo crust and use an offset spatula to spread it into an even, thin layer that reaches every edge and corner. Refrigerate for a minimum of 20 minutes, or until the ganache is firm to the touch — it should offer resistance when pressed gently rather than denting and flowing. This firm ganache layer serves a dual structural purpose: it creates a waterproof fat barrier between the moisture-sensitive crust and the cream layers above (preventing sogginess from above just as the baking step prevents sogginess from within), and it provides a stable, firm surface upon which the cream cheese layer can be applied without displacing or disturbing the crust beneath.
Layer 3 — The Homemade Whipped Cream: Preparing the Airy Element
This is the single component in the recipe that will be divided across two separate layers — 1.5 cups for the cream cheese layer and the remainder for the final topping — so it must be prepared in its entirety at this stage. Place a large metal mixing bowl and the beaters of your hand mixer (or the whisk attachment of a stand mixer) in the freezer for 10 to 15 minutes before beginning. Chilled equipment significantly improves the speed and stability of whipped cream: cold temperatures keep the cream’s fat globules in a semi-solid state that holds air more effectively than room-temperature fat, and the cold bowl prevents the friction heat of beating from warming the cream during the whipping process. Pour the cold heavy cream, powdered sugar, and vanilla extract into the chilled bowl. Beat on medium speed initially, then increase to high speed as the cream begins to thicken. Beat to stiff peaks — the point at which the cream holds a firm, upright peak when the beaters are lifted and does not slump or flow. Do not beat beyond stiff peaks: over-whipped cream crosses a threshold into a grainy, butter-adjacent texture that cannot be corrected. Refrigerate the whipped cream immediately and keep it cold until each portion is needed.
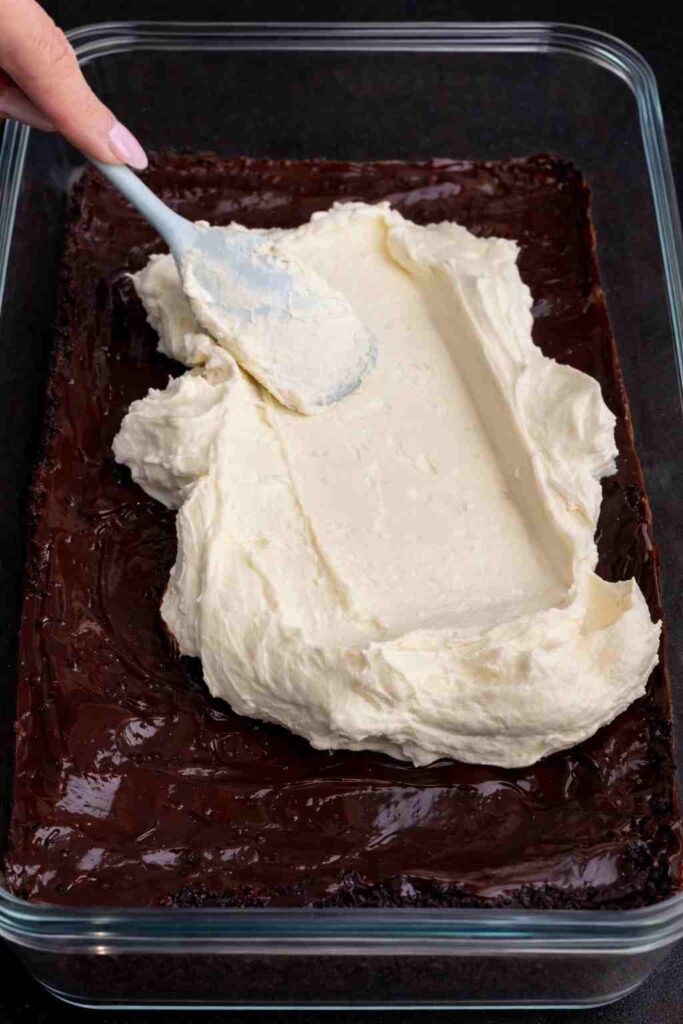
Layer 4 — The Cream Cheese Layer: The Tangy Heart
In a large mixing bowl, beat both blocks of fully room-temperature cream cheese on medium speed until completely smooth — at least 2 minutes of continuous beating. Cold cream cheese, even if it appears soft, will produce a lumpy mixture that cannot be smoothed out by subsequent mixing. Add the powdered sugar and vanilla extract and continue beating until the mixture is silky, unified, and completely lump-free. Remove 1.5 cups of the prepared whipped cream from the refrigerator. Using a silicone spatula, fold the whipped cream into the cream cheese mixture through a specific motion: insert the spatula vertically into the center of the bowl, sweep it along the bowl bottom, and turn the mixture over on itself in a gentle rotation. Repeat this folding motion — never stirring, which would deflate the air bubbles — until the cream cheese and whipped cream are fully integrated into a single, light, airy mixture with a uniform pale color and no visible streaks.
Using an offset spatula, spread the cream cheese mixture over the set ganache layer in an even, consistent layer, applying gentle pressure to reach into the pan’s corners without disturbing the ganache beneath. The offset spatula’s angled blade allows you to spread with precise control while keeping your hand clear of the surface — achieving a flat, even layer is important here because it provides a smooth platform for the pudding layer above and ensures each slice of the finished dessert contains a consistent ratio of cream cheese layer in every bite.
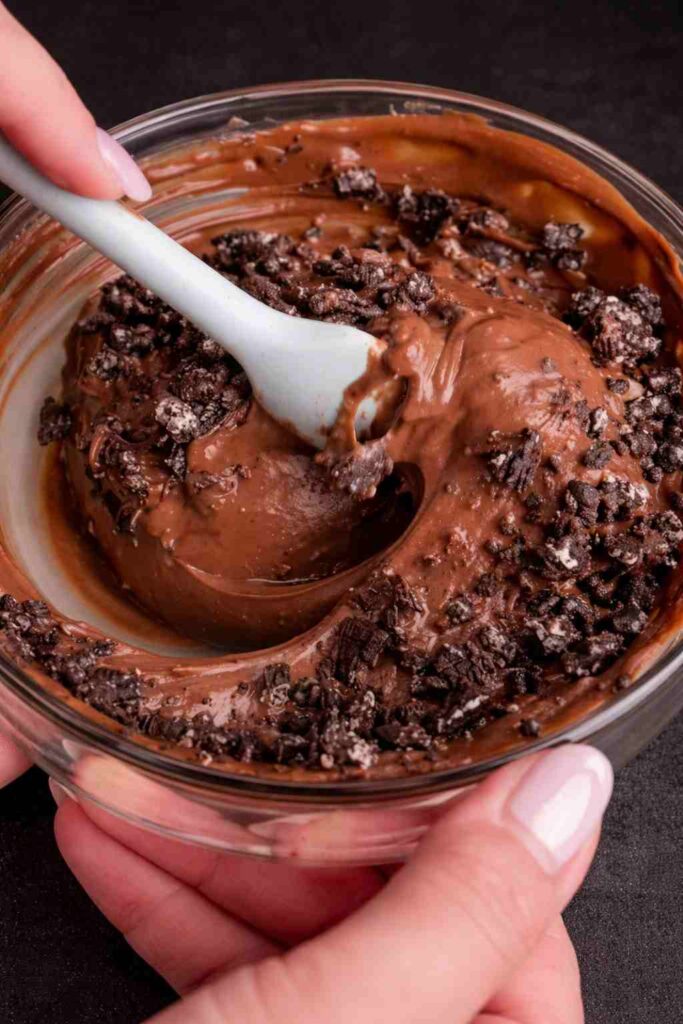
Layer 5 — The Oreo-Studded Pudding Layer
In a large bowl, whisk the instant chocolate pudding mix with the cold milk for a continuous 2 minutes — this extended whisking activates the pudding’s modified starch thickeners and ensures complete hydration of the pudding powder with no dry pockets remaining. Set the bowl aside for 5 minutes to allow the pudding to partially set to a thick, spreadable consistency. While the pudding is setting, place 10 Oreo cookies in a zip-lock bag and crush them with a rolling pin or your palm to produce irregular pieces — some fine crumbs, some larger shards — rather than the uniform fine crumb used for the crust. This irregular texture is intentional: the contrasting sizes of Oreo pieces throughout the pudding layer create moments of different textures and crunch intensities within individual bites, making the pudding layer more interesting and less one-dimensional than uniform pudding alone. Fold the crushed Oreos into the partially set pudding and stir gently to distribute them. Spread the pudding mixture carefully over the cream cheese layer using an offset spatula, using light, spreading strokes rather than pressing down, to avoid pushing the pudding into the cream cheese and disrupting the boundary between layers.
Layer 6 — The Final Topping and Garnish
Remove the remaining whipped cream from the refrigerator. Spread it over the pudding layer in a generous, even cloud, covering the surface completely. For a decorative finish, use the back of a spoon to create gentle swirls and peaks across the whipped cream surface — pressing lightly and lifting quickly to create irregular, organic peaks that will hold their shape during refrigeration and present beautifully when the dish is sliced and served. Scatter the 4 to 6 coarsely chopped Oreo cookies over the whipped cream surface, distributing them evenly across the top for both visual appeal and the textural crunch that the soft whipped cream surface alone cannot provide.
The Critical Final Step — The Long Chill
Cover the pan carefully with plastic wrap, taking care that the wrap does not contact the whipped cream surface — tent it lightly above the cream rather than pressing it flat. Refrigerate for a minimum of 2 to 4 hours, though overnight refrigeration of 8 to 12 hours produces a meaningfully superior result: the ganache firms fully to a cleanly sliceable consistency, the cream cheese layer loses its slight instability from the fresh folded cream and sets into a dense, sliceable layer, and every flavor in every layer has had sufficient time to migrate and meld at the boundaries between layers, producing a more cohesive, integrated flavor experience in each bite than a minimally chilled version can provide.
When ready to serve, cut the dessert with a long, sharp knife. Between every single cut — not every few cuts, but every single one — wipe the blade clean with a warm, damp cloth. This is the technique that separates slices with beautiful, distinct, clearly delineated layers from slices that smear one layer’s color into the adjacent layer and lose the visual drama that the entire preparation was designed to produce. A clean blade cuts through each layer sharply; a blade coated in chocolate from the previous cut drags that chocolate through the white cream cheese and white whipped cream layers on the next cut, muddying both the visual presentation and the individual layer flavors.
Conclusion: Why This Recipe Belongs in Your Permanent Repertoire
The No-Bake Oreo Delight earns its crown jewel status among potluck and party desserts not through a single spectacular ingredient or a single impressive technique but through the accumulated intelligence of every decision made across its six layers. The decision to bake the Oreo crust prevents sogginess that no amount of chilling can reverse. The chocolate ganache seal provides structural separation between the crust and the cream layers that elevates this recipe far above the simpler, less structured versions that lump crumbs, cream cheese, and pudding together without architectural thought. The homemade whipped cream — beaten to stiff peaks and used in two distinct layers — provides a lightness and a clean flavor that no commercial whipped topping can replicate. The cream cheese layer’s powdered sugar and vanilla provide a tangy counterpoint to the surrounding chocolate richness that prevents the dessert from becoming one-dimensionally sweet. And the long chill — the step that the impatient home baker is most tempted to shortcut — is the step that transforms a collection of individual layers into a unified, cohesive, magnificent dessert in which the flavors have married across boundaries and the textures have settled into their cleanest, most sliceable states.
The recipe is also admirably versatile once its structural principles are understood. Vanilla pudding in place of chocolate produces an entirely different visual and flavor character. Golden Oreos in place of standard create a “blonde” version with a warm, vanilla-honey character. Mint-flavored Oreos and mint chocolate chips folded into the ganache produce a holiday peppermint version. A layer of salted caramel sauce poured over the ganache before the cream cheese layer creates a four-flavor profile of chocolate, caramel, cream cheese, and whipped cream that is extraordinary. The structure remains the same — crust, ganache seal, cream cheese layer, pudding layer, whipped cream topping — and within that structure, the possibilities for variation are as broad as your imagination and your guests’ preferences.
This is not merely a recipe. It is a system — a reliable, forgiving, make-ahead, crowd-pleasing dessert system that produces professional-grade results from accessible ingredients and straightforward technique every single time. Make it once and you will understand why everyone who encounters it asks for the recipe before the night is over.
Common FAQs about No-Bake Oreo Delight
What is the specific food safety consideration for a dessert containing cream cheese and heavy cream served at a party?
Cream cheese and heavy cream are classified as high-protein, high-fat, potentially hazardous foods that enter the USDA’s temperature danger zone (40°F–140°F/4°C–60°C) immediately upon being removed from refrigeration. In this danger zone, pathogenic bacteria including Listeria monocytogenes (which can grow even at refrigerator temperatures if the product is contaminated), Staphylococcus aureus, and others multiply at rates that can reach dangerous concentrations within 2 hours at room temperature (approximately 68–72°F/20–22°C). For a party setting, this means the dessert should remain refrigerated until 15 to 20 minutes before serving, and any portion that has been at room temperature for more than 2 hours should be discarded rather than refrigerated and re-served. Using a dish that can be set over ice during outdoor or warm-environment serving extends the safe service window.
What specific flavor compounds in vanilla extract contribute to its enhancing role in both the whipped cream and cream cheese layers?
Pure vanilla extract contains approximately 200 identified flavor compounds, with vanillin (4-hydroxy-3-methoxybenzaldehyde) as the dominant and most recognizable character compound — but the supporting compounds are equally important in this application. Acetaldehyde and other low-molecular-weight aldehydes provide top-note freshness. Para-hydroxybenzaldehyde contributes a woody, phenolic depth beneath the vanillin. Vanillic acid provides mildly tart complexity. In the context of cream cheese and whipped cream — both of which have a slightly flat, fatty character without aromatic support — vanilla’s compounds provide a fragrant, warm, slightly sweet aromatic dimension that makes the dairy components smell and taste more interesting and more complete. This is vanilla’s most important culinary function in cream-based desserts: not to dominate with vanilla flavor, but to lift and animate the dairy’s own character.
What is the food safety rationale for covering the whipped cream with plastic wrap tented above the surface rather than pressed directly against it?
Two practical concerns support the tented plastic wrap technique. First, refrigerator odor absorption: whipped cream is a fat-based surface with significant surface area and high fat content — fat is an effective absorber of volatile aromatic compounds from other refrigerated foods (onions, leftovers, aromatics). A tented cover that seals the pan without contacting the cream prevents air circulation within the covered pan while keeping the cream’s surface free from any condensation drips from the plastic. Second, visual preservation: plastic wrap pressed against soft whipped cream creates impressions and distortions on the cream’s surface that persist when the wrap is removed, destroying the decorative swirls and peaks created during the topping step. The tented technique preserves both cleanliness and presentation.
What is the chemistry of why overnight refrigeration produces a superior dessert compared to the minimum 2-hour chill?
Two distinct processes that improve the dessert’s quality are time-dependent and require extended refrigeration to complete. First, flavor diffusion: the flavor compounds in each layer — cocoa butter aromatics in the ganache, lactic acid and vanilla in the cream cheese, the concentrated cocoa flavors of the pudding, and the vanilla-cream character of the whipped cream — diffuse through the boundary zones between adjacent layers, creating flavor gradients at each layer interface that produce a more integrated, cohesive flavor experience in each bite than sharply distinct layers with no flavor migration produce. Second, structural setting: the cream cheese layer’s whey proteins continue their slow, cold-temperature setting over 8 to 12 hours, developing a firmer, more cleanly sliceable consistency than the 2-hour minimum allows.
Why does the pudding layer need to partially set for 5 minutes before the crushed Oreos are added?
Immediately after whisking, the instant pudding is in a transitional state — the starch is hydrating and the calcium-phosphate reaction is beginning, but the gel network has not yet formed sufficiently to support the weight and density of solid cookie pieces. If the crushed Oreos are added to fully liquid pudding, they sink to the bottom rather than remaining distributed throughout the layer, producing a dense bottom portion of cookie-saturated pudding and a top portion with few or no cookie pieces — exactly the opposite of the uniform distribution intended. After 5 minutes of partial setting, the gel network is developed enough to hold the cookie pieces in suspension throughout the layer, ensuring every portion of the pudding layer contains cookie pieces.
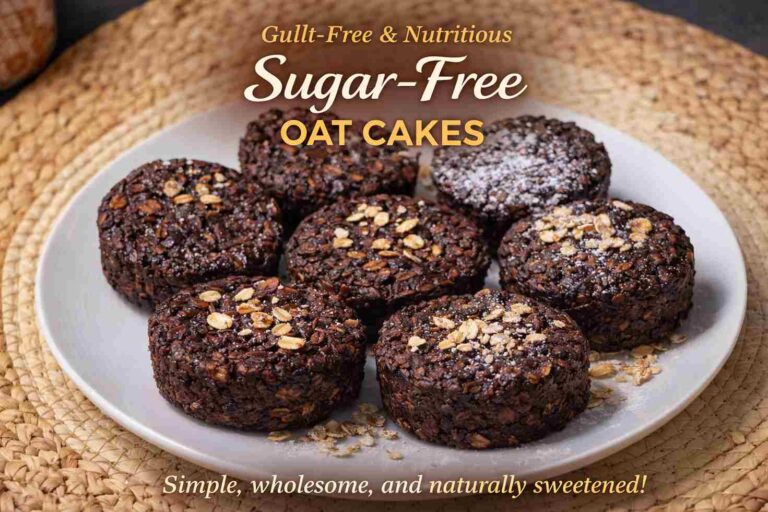
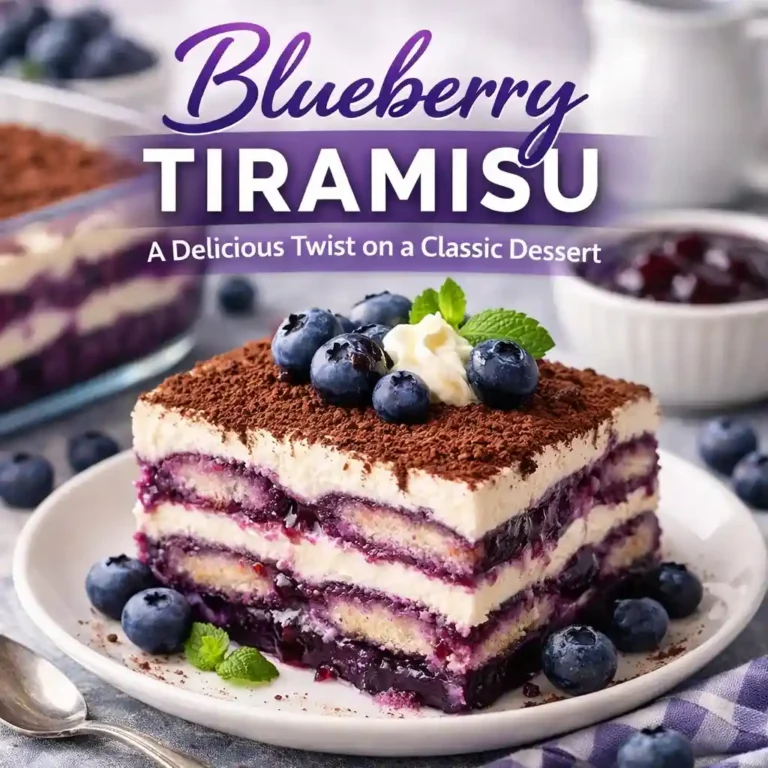
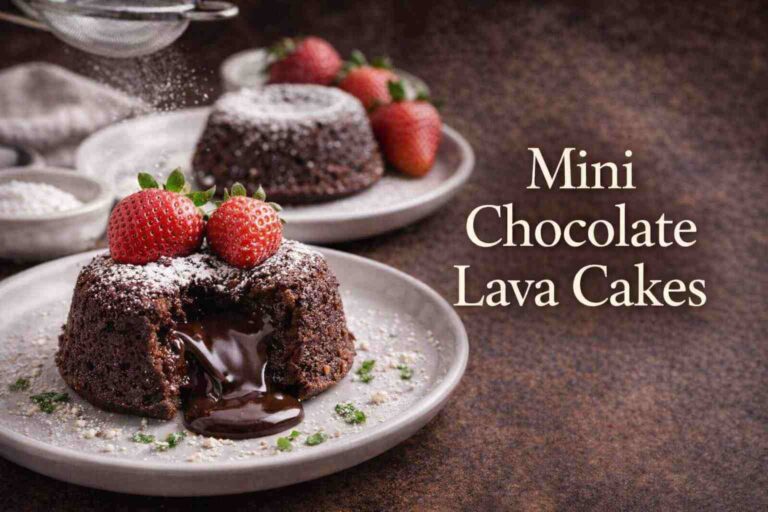
Discover an even more extensive selection of culinary creations spanning every meal and occasion imaginable. Begin your day with our five egg breakfast ideas, chili crisp egg avocado toast, and protein powder cinnamon rolls. For healthier morning choices, try healthy oatmeal apple banana cake, coconut cove baked oatmeal, and blueberry apple morning oats cake. For lunch, savor our ultimate big mac salad, quick ham and cheese pinwheels, crispy potato tacos, and vegan bulgogi pinwheels. Our impressive main courses include Vietnamese lemongrass chicken, honey balsamic pomegranate glazed chicken, mushroom stuffed chicken breast, baked French onion chicken, and low carb Tuscan chicken bake. Meat enthusiasts will delight in three Italian style meatloaves, pan seared pork tenderloin in creamy peppercorn gravy, citrus glazed roasted pork ribs with creamy mushroom potatoes, beef bourguignon, sausage ragu, and Korean sweet spicy beef meatballs. For pasta and seafood lovers, explore shrimp aglio e olio, creamy chicken meatball orzo, red pesto gnocchi, one pan Tuscan orzo with chicken, creamy peri peri chicken pasta, teriyaki pork noodles, one pan chicken chorizo orzo, and brown butter and sage mezzi rigatoni. Our soup collection spans creamy broccoli and garlic soup, carnival squash soup with turmeric, split pea soup, ham bean soup, hearty vegetable barley soup, creamy asparagus soup, French cream of chestnut soup, classic Provençal fish soup, New England creamy clam chowder, and Manhattan clam chowder soup. Vegetarian delights include vegan ramen, quick vegan lasagna, vegan cabbage rolls, spicy maple tofu rice bowl, and vegan chicken and dumpling soup. Side dishes shine with garlic butter cheese bombs, oven baked potatoes with meatballs and cheese, broccoli recipes that taste amazing, oven roasted crispy potato, honey butter cornbread, and 3-ingredient carnivore bun. Appetizers feature the ultimate crispy buffalo chicken wonton cups, the ultimate buffalo chicken cauliflower dip, the ultimate buffalo chicken garlic bread, garlic parmesan wings, brown sugar bacon wrapped smokies, Philly cheesesteak stuffed rolls, bacon cheeseburger dip, and pepperoni pizza dip. Desserts range from blueberry tiramisu and heavenly molten mini chocolate lava cakes to thin and chewy chocolate chip cookies. Special occasion treats include red velvet cookies, Valentine heart cookies, ombre heart buttercream cake, and homemade Valentine’s day mini cake delight. Keto enthusiasts can enjoy keto schnitzel, sugar free keto German chocolate cake, keto yogurt almond cake, keto beef roulades, fluffy keto cloud bread, keto muffins, Korean marinated eggs, and low carb cottage cheese ice cream. Health-conscious options also feature sugar free oat cakes and sugar free banana oat brownies. For cocktail lovers, explore our collection including classic whiskey sour, hot apple whisky lime cocktail, easy margarita, Paloma tequila cocktail, vodka cranberry cocktail, Angel Face cocktail, Mandarin Sunrise cocktail, Aperol Spritz, homemade Piña Colada, virgin Piña Colada mocktail, Moscow Mule, Old Fashioned, Manhattan cocktail, Pomegranate Gimlet, Southside gin cocktail, Paper Plane cocktail, Mango Chilli Margarita, and our ten best rum cocktails. This comprehensive collection ensures there’s a perfect recipe for every craving, celebration, and culinary occasion.