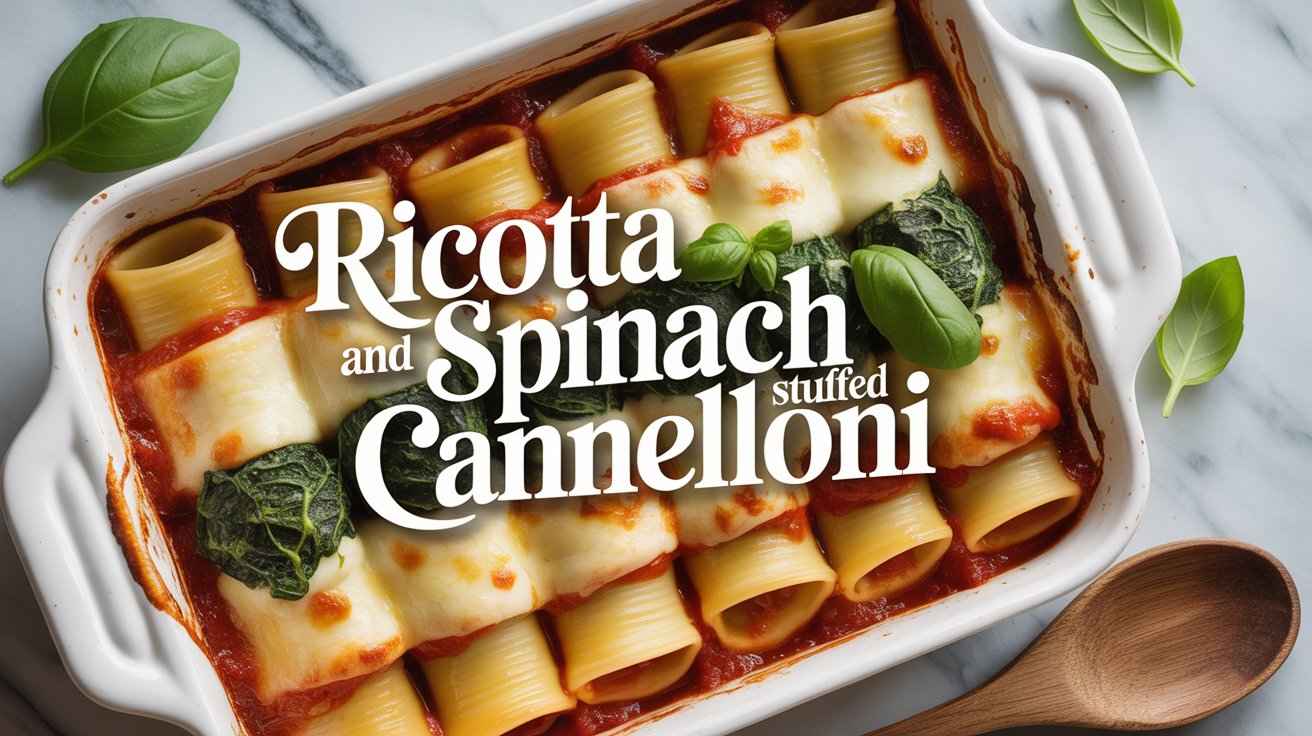
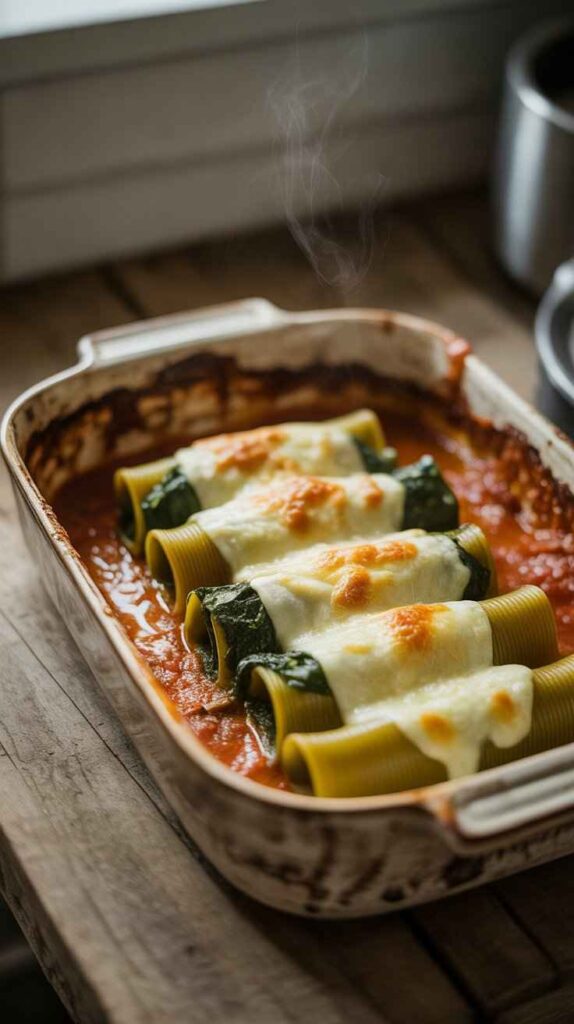
This Ricotta and Spinach Stuffed Cannelloni is one of those rare dishes that manages to be simultaneously impressive enough for a dinner party and comforting enough for a quiet Tuesday night at home — creamy, herb-flecked ricotta and vibrant spinach packed generously into pasta tubes, nestled into a rich, slow-simmered herby tomato sauce, and blanketed under a thick, golden, bubbling layer of shredded mozzarella and freshly grated parmesan that comes out of the oven looking like something from a restaurant kitchen and tastes even better than it looks. What makes this recipe so consistently successful is the care taken at every stage: the spinach is properly squeezed of every last drop of liquid before being folded into the ricotta, ensuring the filling is creamy, firm, and beautifully flavored rather than watery and disappointing; a combination of frozen and fresh spinach brings both body and brightness; and a touch of nutmeg lifts everything in that subtle, unmistakable way that is classic Italian technique at its finest. The tomato sauce, meanwhile, is built properly from scratch — onion softened slowly in olive oil, garlic cooked until fragrant, tomato paste stirred in and cooked off to concentrate its flavor, then crushed tomatoes and broth simmered until rich and slightly loose, intentionally so, because the pasta absorbs liquid as it bakes and a sauce that looks a little thin at assembly will be perfectly reduced and concentrated by the time the dish reaches the table.
This is also one of the most practical recipes you can have in your repertoire when cooking for a crowd, because it can be assembled completely — filled tubes, sauce, cheese topping and all — and refrigerated for up to 24 hours before baking, making it an ideal choice for dinner parties where you want to do all the work well in advance and simply slide the dish into the oven when guests arrive. It reheats beautifully the following day, arguably tasting even better once the flavors have had overnight to deepen and settle, meaning leftovers are something to genuinely look forward to rather than just tolerate. Whether you are feeding family on a weeknight, hosting friends for a relaxed weekend dinner, or simply craving a baked pasta that delivers maximum flavor for a very reasonable amount of effort, this cannelloni will quickly become one of the most requested recipes in your kitchen — Italian comfort food at its very best.
Recipe Details
| Detail | Info |
|---|---|
| Cuisine | Italian |
| Course | Main Course |
| Difficulty | Easy to Intermediate |
| Servings | 4–6 |
| Prep Time | 30 minutes |
| Cook Time | 50–55 minutes |
| Calories Per Serving | ~480–520 kcal |
Ingredients
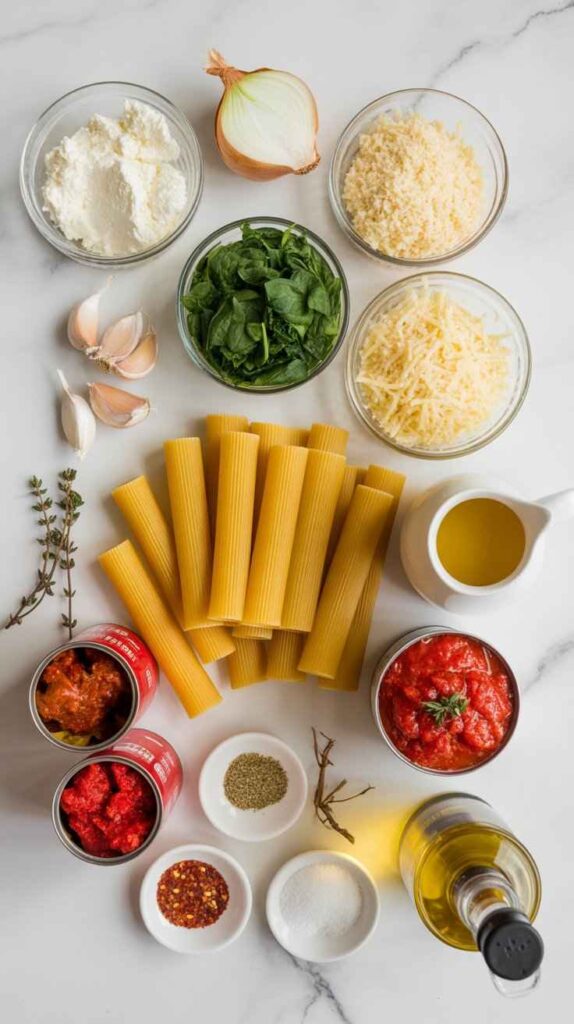
For the Ricotta and Spinach Filling:
- 500 g / 17.5 oz ricotta cheese
- 250 g / 9 oz frozen spinach, thawed and squeezed completely dry
- 70 g / 2.5 oz fresh spinach, finely chopped (optional but recommended)
- 1 egg
- 80 g / ¾ cup freshly grated parmesan
- 150 g / 1½ cups shredded mozzarella
- 2 cloves garlic, minced
- ½ tsp ground nutmeg
- Salt and black pepper, to taste
For the Herby Tomato Sauce:
- 2 tbsp olive oil
- 1 onion, finely chopped
- 3 cloves garlic, minced
- 1 tbsp tomato paste
- 2 cans (400 g / 14 oz each) crushed tomatoes
- 1 tsp dried oregano
- ½ tsp dried thyme
- 1 tsp sugar
- Salt and black pepper, to taste
- 120 to 160 ml / ½ to ⅔ cup chicken or vegetable broth
- Chilli flakes, optional
For the Pasta:
- 250 g / 9 oz dried cannelloni tubes
For the Topping:
- 150 to 200 g / 1½ to 2 cups shredded mozzarella
- 100 g / 1 cup freshly grated parmesan
Step-by-Step Instructions
Step 1: Prepare the Spinach
This first step is deceptively simple but critically important to the success of the entire dish. Place the thawed frozen spinach in the center of a clean kitchen towel or several layers of paper towel and squeeze it as firmly as you possibly can, wringing out as much liquid as you are able to extract. You will likely be surprised at how much water comes out — this is exactly what you want to remove. Excess moisture left in the spinach will make the ricotta filling wet and loose, which means it will not hold its shape inside the cannelloni tubes during baking and will result in a watery, disappointing final dish.
Once the frozen spinach is as dry as you can get it, chop it finely. If you are using the optional fresh spinach — which is strongly recommended — chop it finely as well and combine it with the frozen. The fresh spinach contributes a brighter green color and a livelier, more immediate spinach flavor that complements the earthier, more concentrated frozen spinach beautifully. Together they create a filling that is vibrantly colored, properly flavored, and perfectly balanced.
Step 2: Make the Ricotta Filling
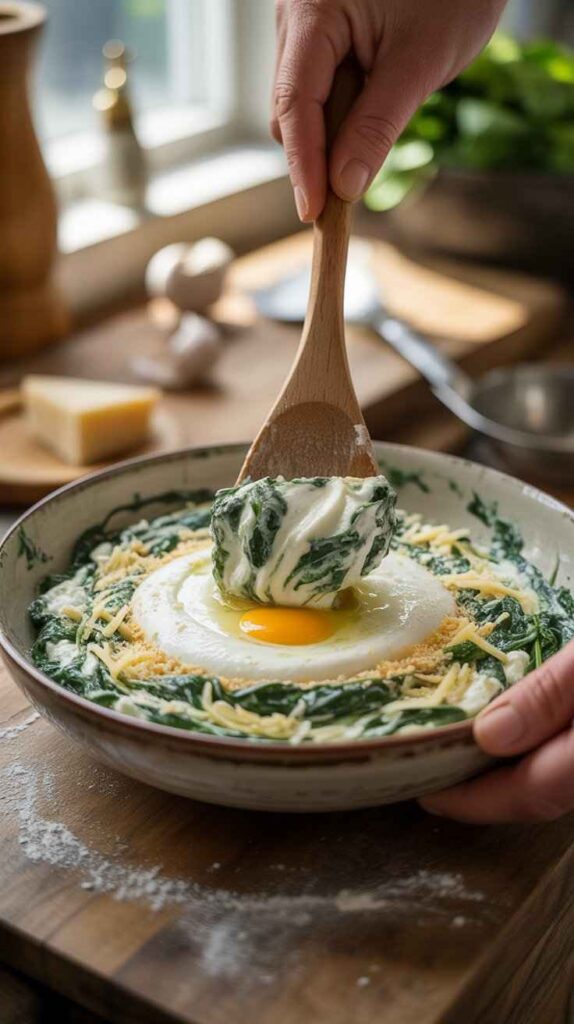
In a large mixing bowl, combine the well-drained and chopped frozen spinach, the fresh spinach if using, the ricotta cheese, the egg, the freshly grated parmesan, the shredded mozzarella, the minced garlic, and the ground nutmeg. Season generously with salt and freshly cracked black pepper.
Mix everything together thoroughly until the filling is completely uniform, creamy, and well combined. Taste it at this stage and adjust the seasoning — the filling should taste well-seasoned, creamy, and delicately spiced with nutmeg. The nutmeg is a classic Italian addition to ricotta-based fillings that you absolutely do not want to skip. It does not make the filling taste noticeably of nutmeg — instead it acts as a flavor enhancer that subtly lifts the richness of the ricotta and the earthiness of the spinach and makes the whole filling taste more complex and rounded.
Set the filling aside while you make the tomato sauce.
Step 3: Make the Herby Tomato Sauce
Heat 2 tablespoons of olive oil in a large, wide pan over medium heat. Add the finely chopped onion and cook, stirring occasionally, for 6 to 8 minutes until the onion is completely soft and translucent. Taking the time to properly soften the onion at this stage is important — rushing it means the onion will still have a slightly sharp, raw quality that carries through into the finished sauce. You want it sweet, soft, and completely cooked before anything else goes into the pan.
Add the minced garlic and cook for a further 30 seconds, stirring continuously, until fragrant. Then add the tablespoon of tomato paste and stir it into the onion and garlic mixture. Cook the tomato paste for approximately 1 minute, stirring constantly. This step — cooking the tomato paste in the oil before adding the liquid — caramelizes the paste and intensifies its flavor significantly, adding a deeper, richer tomato backbone to the finished sauce than you would get by simply stirring it in with the crushed tomatoes.
Pour in both cans of crushed tomatoes, then add the dried oregano, dried thyme, sugar, salt, and black pepper. Stir everything together well, then pour in the chicken or vegetable broth. The broth is an important addition that many recipes omit — it thins the sauce to exactly the right consistency for baking, ensuring there is enough liquid to cook the pasta from the inside out during the time in the oven. If you prefer a little heat in the sauce, add a pinch of chilli flakes at this stage.
Bring the sauce to a gentle simmer and cook for 10 to 15 minutes, stirring occasionally, until it has thickened slightly and is richly flavored. Taste and adjust the seasoning as needed. Remember that the sauce should still be slightly looser than you would want a pasta sauce to be when serving immediately — it will continue to cook and reduce in the oven while the cannelloni bakes.
Step 4: Fill the Cannelloni Tubes

Transfer the ricotta and spinach filling into a piping bag fitted with a wide round tip. If you do not have a piping bag, a large zip-lock bag with one corner snipped off works just as effectively. Filling cannelloni tubes is genuinely much easier with a piping bag than trying to spoon the mixture in — the piping bag allows you to fill each tube quickly, neatly, and completely without gaps or air pockets.
Hold each dry cannelloni tube vertically and pipe the filling in from one end until it reaches the other end. Do not overfill to the point of splitting the tube, but do fill each one generously so there are no empty sections. Place the filled tubes on a clean plate or tray as you go. Work through all the filling and all the tubes systematically until everything is filled and ready for assembly.
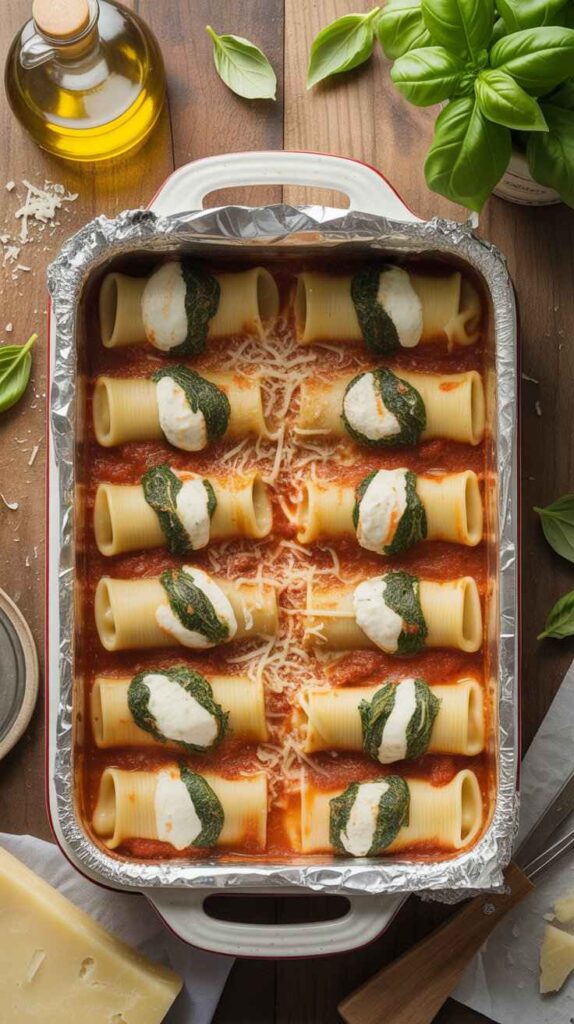
Step 5: Assemble the Dish
Preheat your oven to 180°C / 350°F. Take a large, deep baking dish — a dish approximately 30 x 20 cm works well for this quantity.
Spread approximately one third of the tomato sauce evenly across the bottom of the baking dish. This bottom layer of sauce serves a crucial function: it prevents the cannelloni tubes from sticking to the dish and scorching on the base, and it provides moisture that the bottom of the pasta tubes can absorb while baking. Do not be tempted to skip or reduce this layer.
Arrange the filled cannelloni tubes in a single, neat layer across the sauce. Depending on the size of your baking dish, they can be placed side by side or slightly touching — just ensure they are all in a single layer rather than stacked, as stacking means the top layer will cook and brown while the bottom layer remains undercooked.
Pour the remaining tomato sauce over and around the cannelloni tubes, making sure the majority of each tube is covered in sauce. Any sections of tube that are exposed above the sauce line will dry out and harden during baking rather than cooking through to a tender finish. Use a spoon to spread the sauce if needed and ensure good coverage.
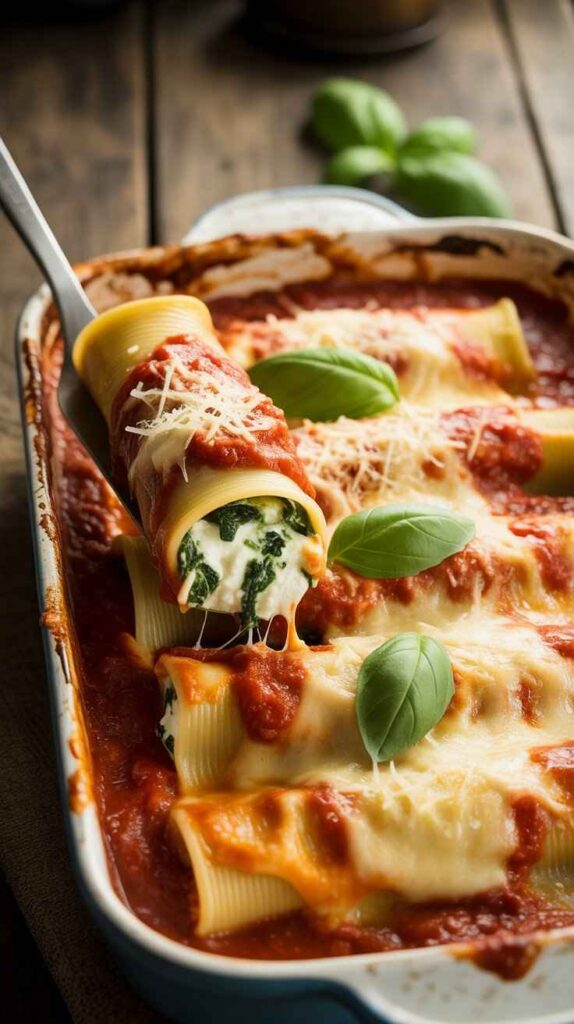
Scatter the shredded mozzarella generously and evenly across the entire top of the dish, then finish with a thorough covering of freshly grated parmesan. Be generous with both — the thick cheese topping is what creates that gorgeous golden, bubbling crust that makes this dish so visually spectacular and so deeply satisfying to eat.
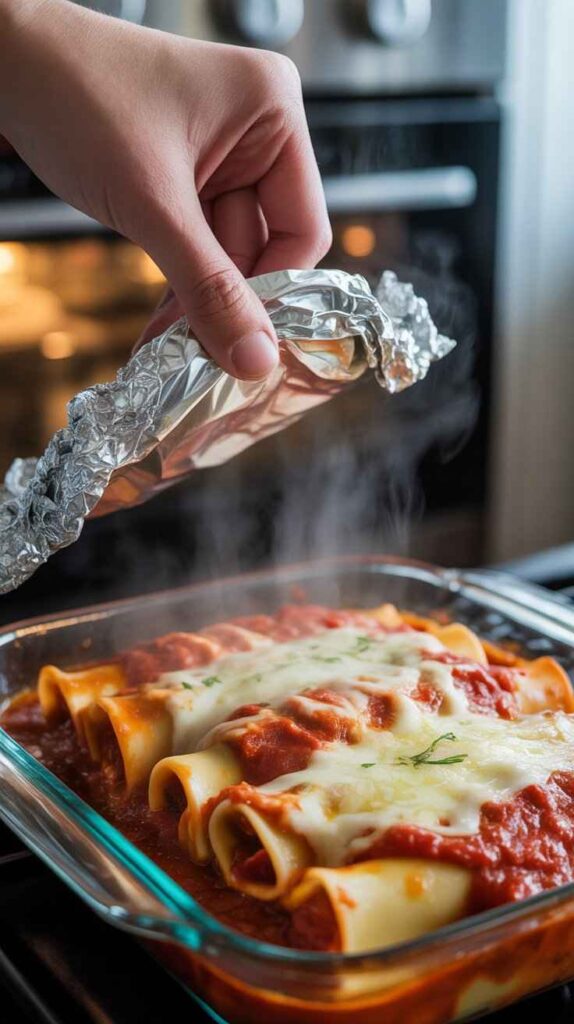
Step 6: Bake to Golden Perfection
Cover the baking dish tightly with aluminum foil and place it in the preheated oven. Bake covered at 180°C for 35 minutes — the foil traps steam during this first phase of baking, which cooks the pasta tubes through from the moisture of the sauce and filling without drying out the top.
After 35 minutes, remove the foil carefully — there will be a significant amount of steam trapped inside, so lift the foil away from you to avoid burning yourself. Return the dish to the oven uncovered and bake for a further 15 to 20 minutes until the cheese topping is deeply golden brown, bubbling enthusiastically at the edges, and gloriously caramelized in patches across the surface.
Remove from the oven and allow the cannelloni to rest for a full 10 minutes before serving. This resting time is genuinely important — it allows the filling and sauce to settle and firm up slightly, making the cannelloni much easier to portion and serve cleanly. Cutting into it immediately will result in a messy, collapsing dish. Ten minutes of patience produces neat, beautiful portions.
Tips for the Best Stuffed Cannelloni
Squeeze the spinach as dry as humanly possible. This cannot be overstated. The single biggest cause of a watery, disappointing cannelloni filling is under-squeezed spinach. Squeeze it once, then squeeze it again. The drier the spinach, the creamier and more cohesive your filling will be.
Always use freshly grated parmesan. Pre-grated parmesan from a bag contains anti-caking agents that prevent it from melting smoothly, giving the topping a grainy rather than silky finish. A block of good parmesan grated fresh makes a very noticeable difference to both the flavor and the texture of the finished dish.
Do not cook the cannelloni tubes before filling. This recipe uses dry, uncooked cannelloni tubes that cook entirely in the oven from the moisture in the sauce. Pre-cooking them makes them too fragile and slippery to fill without tearing.
Make it vegetarian or keep it flexible. Use vegetable broth instead of chicken broth to make this dish completely vegetarian while keeping all the same rich flavor. The recipe works beautifully either way.
The resting time is non-negotiable. Ten minutes out of the oven before serving is the difference between a beautiful, neat dish and a messy, flowing one. Use the time to set the table, warm the bread, or pour the wine.
Conclusion
This Ricotta and Spinach Stuffed Cannelloni is Italian comfort food at its absolute finest — deeply satisfying, beautifully flavored, and made from ingredients that are wholesome, accessible, and genuinely delicious in combination. The creamy, herb-scented filling, the richly simmered herby tomato sauce, and the thick golden cheese topping create a baked pasta dish that looks spectacular, tastes extraordinary, and makes everyone at the table feel genuinely cared for. Whether you are making it for a relaxed family dinner, a celebratory gathering, or preparing it ahead for a stress-free entertaining option, this cannelloni will consistently deliver one of the most satisfying meals you can put on the table. Make it once, and it will earn a place in your permanent recipe collection without any question whatsoever.
Frequently Asked Questions
Do I need to pre-cook the cannelloni tubes before filling and baking them? No, the cannelloni tubes in this recipe are used completely dry and uncooked. They cook entirely during the baking process, absorbing moisture from the surrounding tomato sauce and from the steam generated inside the covered baking dish. Pre-cooking the tubes would make them too soft and fragile to fill without tearing. Using dry tubes is both simpler and produces a better result — they hold their shape beautifully and cook to a perfectly tender finish in the oven.

Why does the tomato sauce need to be slightly loose before baking? The slightly thin consistency of the sauce before baking is intentional and very important. During the covered baking phase, the dry pasta tubes absorb a significant amount of liquid from the surrounding sauce as they cook through. If the sauce is too thick at the assembly stage, the pasta will not absorb enough moisture to cook evenly, and sections of the tube — particularly the center — may remain hard and undercooked. A sauce that seems a little thin before baking will be perfectly reduced and concentrated by the time the dish is ready to serve.
How do I fill cannelloni tubes without a piping bag? The easiest substitute for a piping bag is a large zip-lock bag or any sturdy plastic bag. Spoon the filling into the bag, press it into one corner, and snip that corner off with scissors to create an opening approximately 1 to 1.5 cm wide. Squeeze the filling steadily through the opening and into the tube. This works just as effectively as a proper piping bag and gives you good control over the flow of the filling. A small spoon can also be used, but this is considerably more time-consuming and tends to leave gaps in the tubes.
Why is it important to squeeze the spinach so thoroughly? Spinach — particularly frozen spinach — retains an enormous amount of water even after it has been thawed. If this water is not removed before mixing the spinach into the ricotta, it will loosen the filling significantly, making it wet and runny rather than creamy and firm. A wet filling does not hold its shape inside the cannelloni tubes during baking, it dilutes the flavor of the ricotta, and it releases excess liquid into the sauce during cooking, making the finished dish watery and disappointing. Squeezing the spinach thoroughly is one of the most important steps in the entire recipe.
Can I use fresh spinach only and skip the frozen? Yes, you can use fresh spinach exclusively if you prefer. You will need to wilt it first — either in a hot pan with a small drop of oil for 1 to 2 minutes, or in a microwave for 30 to 45 seconds — and then squeeze out all the liquid very thoroughly once it has wilted. The quantity of fresh spinach needed will be considerably larger than the frozen weight called for in the recipe, as fresh spinach reduces dramatically when cooked. Use approximately 600 to 700 g of raw fresh spinach to achieve a similar quantity of cooked, squeezed spinach to the 250 g of frozen called for.
Can I make and assemble this dish ahead of time? Yes, this is one of the best things about this recipe from a practical standpoint. The entire dish can be assembled — filled tubes laid in the sauce, cheese topping applied — covered tightly with cling film or foil, and refrigerated for up to 24 hours before baking. When you are ready to cook, remove it from the refrigerator about 20 to 30 minutes before baking to take the chill off, then bake as directed, adding an extra 10 minutes to the covered baking time to account for the cold start. This makes it an ideal make-ahead option for dinner parties and gatherings.
What can I substitute for ricotta if I cannot find it? Cottage cheese that has been drained and blended until smooth is the closest readily available substitute for ricotta and works very well in this recipe. Fresh curd cheese or quark are also good alternatives. Cream cheese can be used but is considerably richer and denser than ricotta, so if using it, blend it with a splash of milk to loosen it before mixing with the other filling ingredients. The flavor profile will be slightly different from authentic ricotta, but the texture and baking properties are similar enough to produce excellent results.
Can I add meat to this cannelloni recipe? Yes. For a meat version, you can add approximately 200 to 300 g of cooked and finely crumbled Italian sausage meat, browned ground beef, or cooked and shredded chicken to the ricotta and spinach filling. Mix it in well with the other filling ingredients. Alternatively, a meat-based bolognese sauce can be used in place of the herby tomato sauce for a richer, heartier result. The baking time and method remain the same.
How do I prevent the cheese topping from burning before the pasta is cooked through? The covered baking phase — the first 35 minutes under foil — is what protects the cheese topping while the pasta cooks through. The foil traps steam and heat, cooking the pasta from the inside without exposing the cheese to direct oven heat. The cheese is only uncovered for the final 15 to 20 minutes, by which point the pasta is already cooked and the cheese simply needs time to melt, bubble, and brown. If your cheese is browning too quickly once uncovered, lower the oven temperature by 10 to 15 degrees and add a few extra minutes to compensate.
Can I freeze this cannelloni? Yes, this dish freezes very well. You can freeze it either before or after baking. To freeze before baking, assemble the dish completely, cover tightly with a double layer of cling film followed by foil, and freeze for up to 3 months. Bake directly from frozen, adding approximately 30 to 40 minutes to the covered baking time. To freeze after baking, allow the dish to cool completely, portion it into individual servings, and freeze in airtight containers for up to 2 months. Reheat in the oven at 180°C covered with foil until piping hot throughout.
What is the purpose of adding nutmeg to the ricotta filling? Nutmeg is a classic Italian seasoning used in ricotta-based fillings for pasta dishes — it is traditional in everything from cannelloni and lasagne to tortellini and ravioli. It does not make the filling taste distinctly of nutmeg; instead it acts as a flavor enhancer that deepens the creaminess of the ricotta, highlights the earthiness of the spinach, and adds a subtle warmth and complexity that makes the overall filling taste more interesting and complete. Omitting it produces a noticeably flatter-tasting filling. Even a small amount makes a significant difference.
Why is sugar added to the tomato sauce? The teaspoon of sugar in the tomato sauce is there to balance the natural acidity of the canned crushed tomatoes. Different brands and varieties of canned tomatoes vary in their acidity level, and without a small amount of sugar to counteract it, the sauce can taste sharp and one-dimensional rather than rich and rounded. The sugar does not make the sauce taste sweet — it simply neutralizes the acidity enough to allow the other flavors of the oregano, thyme, and garlic to come forward more clearly.
Can I use a different pasta shape if I cannot find cannelloni tubes? If cannelloni tubes are unavailable, large pasta shells (conchiglie giganti) are the best substitute — they can be filled with a spoon and work very well in this recipe. Dried lasagne sheets can also be used: spoon filling along one edge of each sheet, roll it up tightly into a tube shape, and place it seam-side down in the baking dish. The method and baking time are the same regardless of which pasta shape you use.
How do I know when the cannelloni is fully cooked? The most reliable test is to insert a sharp knife or skewer into the center of one of the cannelloni tubes and hold it there for a few seconds, then touch the tip to your wrist — it should feel hot all the way through. The pasta tubes should also feel tender when pierced with the tip of the knife rather than offering any resistance. The cheese topping should be deeply golden and bubbling. If there is any doubt, cover the dish again and return it to the oven for an additional 10 minutes before testing again.
What should I serve alongside this cannelloni? This is a rich and substantial main course, so light accompaniments work best. A simple green salad dressed with a sharp, acidic vinaigrette is the ideal counterpoint to the richness of the cheese and tomato. Warm crusty bread or garlic bread is wonderful for mopping up the extra sauce. A glass of Italian red wine — a Chianti or Barbera d’Asti pairs particularly well with the herby tomato sauce. Roasted broccoli or a simple green vegetable are also lovely alongside.
Can I use jarred pasta sauce instead of making the tomato sauce from scratch? Yes, a good-quality jarred pasta sauce can be used as a shortcut when time is limited. Choose an Italian tomato and herb variety with a good flavor that you enjoy. Thin it with ½ cup of broth before using as the sauce needs to be slightly looser than a standard serving consistency to account for the pasta absorbing liquid during baking. Making the sauce from scratch produces a noticeably more flavorful result, but a good jarred sauce is a perfectly acceptable and practical substitute.
Why does the dish need to rest for 10 minutes after baking? The resting time allows the filling, sauce, and melted cheese to firm up and stabilize slightly after the intense heat of the oven. Immediately after baking, everything inside the dish is extremely hot and fluid — the filling is almost molten, the sauce is bubbling, and the pasta tubes are at their softest. If you try to portion the dish immediately, it will collapse, the filling will flow out, and you will not be able to serve clean, intact portions. Ten minutes of resting gives everything time to settle into a structure that portions neatly and presents beautifully.
Can I use dried herbs instead of fresh, and in what quantities? This recipe already calls for dried herbs — oregano and thyme — in the tomato sauce, so there is no substitution needed on that front. If you would like to add fresh herbs for additional brightness, fresh basil leaves stirred into the sauce just before assembling, or scattered over the top of the finished dish at serving time, add a wonderful freshness that dried herbs cannot replicate at that stage. Fresh oregano can replace the dried at a 3:1 ratio (three times as much fresh as dried called for).
Is this recipe suitable for vegetarians? Yes, very easily. Simply substitute vegetable broth for the chicken broth in the tomato sauce — all other ingredients are already vegetarian. The dish is naturally meat-free and relies on the ricotta, mozzarella, parmesan, spinach, and tomato sauce for all of its rich, layered flavor. Ensure that the parmesan you use is a vegetarian-certified variety if strict vegetarian compliance is required, as traditional parmesan is made with animal rennet. Many supermarket parmesan alternatives use vegetarian rennet and work just as well in this recipe.
How do I store and reheat leftover cannelloni? Allow leftover cannelloni to cool completely before covering the baking dish tightly with cling film or transferring individual portions to airtight containers. Store in the refrigerator for up to 3 days. To reheat, place the desired portion in an oven-safe dish, cover tightly with foil, and heat in a preheated oven at 180°C for 20 to 25 minutes until piping hot all the way through. Add a small splash of water or broth before covering if the sauce looks dry. Individual portions can also be reheated in the microwave on medium power for 3 to 4 minutes, checking and turning halfway through.
Printable Recipe Card
Want just the essential recipe details without scrolling through the article? Get our printable recipe card with just the ingredients and instructions.