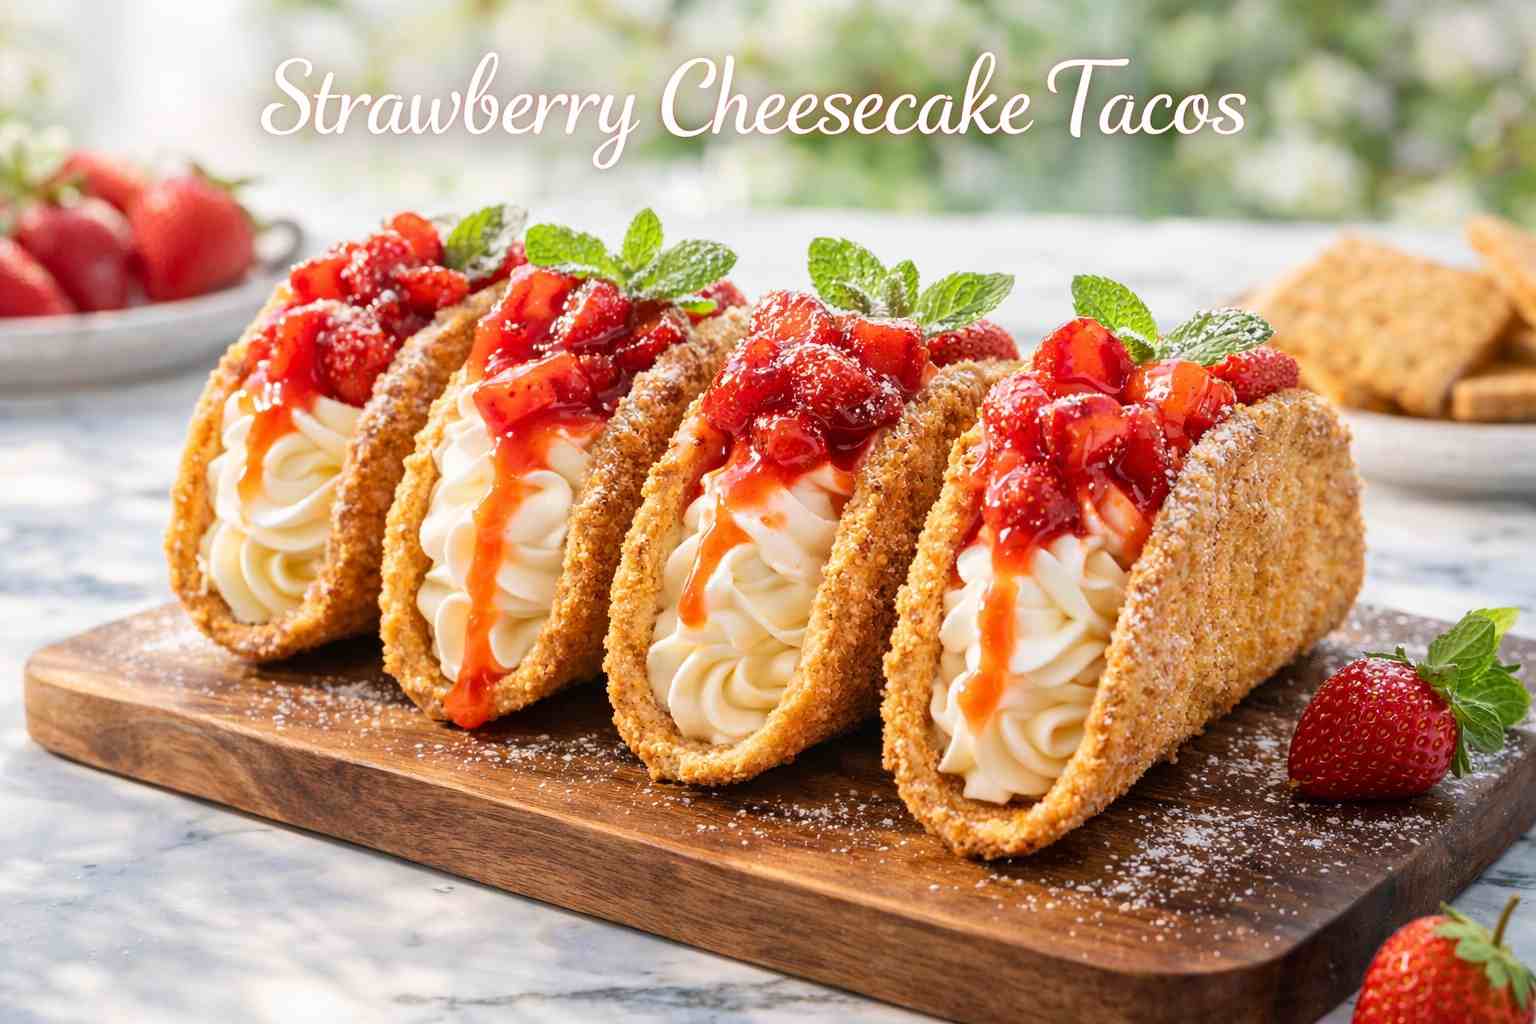
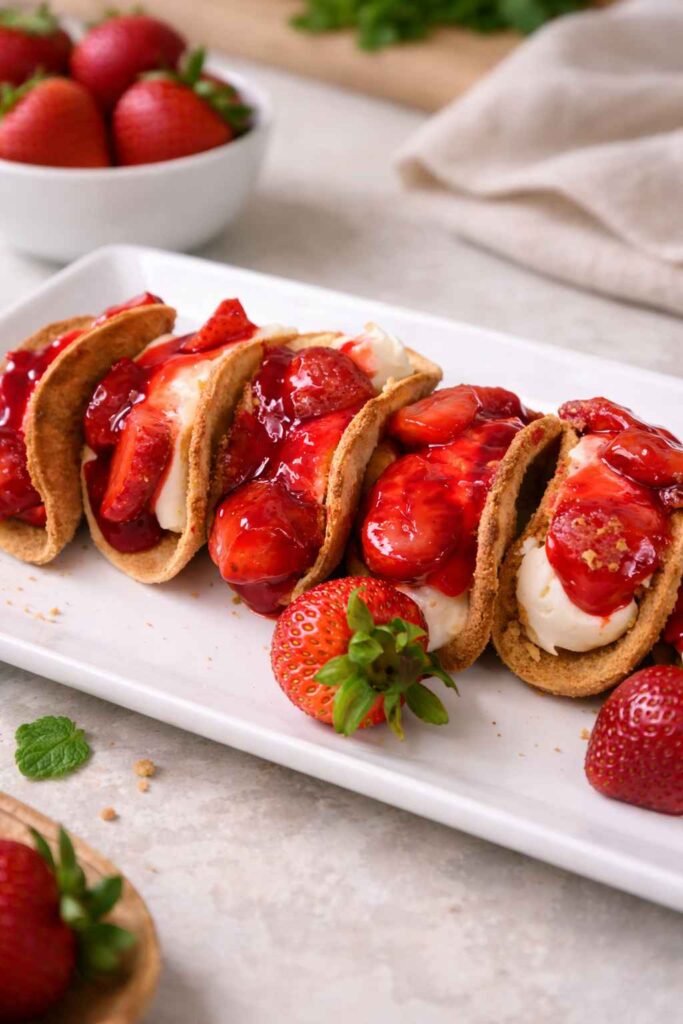
There are desserts that satisfy, and then there are desserts that stop conversations. Strawberry Cheesecake Tacos belong firmly in the second category. This recipe takes two of the most universally beloved foods in existence — the taco and the New York-style cheesecake — and fuses them into something that feels simultaneously playful, sophisticated, and deeply indulgent. At first glance, it sounds almost too clever, the kind of idea that looks better on social media than it tastes in real life. But one bite through that crunchy, golden, graham cracker-coated tortilla shell and into the cloud-like whipped cream cheese filling beneath a glossy crown of macerated strawberries, and you’ll understand immediately why this dessert has become an obsession for home bakers and brunch enthusiasts worldwide. What makes this recipe particularly brilliant is its architecture: every layer has been engineered to deliver a specific sensory experience. The shell delivers crunch. The filling delivers richness and tang. The strawberries deliver brightness and acidity. Together they form a perfectly balanced bite that hits every note on the flavor spectrum simultaneously. Whether you’re closing out a summer dinner party or looking for the most dramatic possible end to a Taco Tuesday, this is the dessert that delivers every single time. Let’s build it from scratch.
Recipe Details
| Detail | Info |
|---|---|
| Cuisine | American Fusion / Dessert |
| Course | Dessert |
| Difficulty | Intermediate |
| Servings | 8 Tacos |
| Prep Time | 20 Minutes |
| Cook Time | 11 Minutes |
| Total Time | 31 Minutes (plus cooling) |
| Calories Per Serving | ~320 kcal (estimated) |
Ingredients
For the Taco Shells:
- 4 Large Flour Tortillas (fajita-style, thin cut)
- ½ Stick (4 Tbsp) Unsalted Butter, melted
- 1 Cup Graham Cracker Crumbs, finely ground
- 1½ Tbsp Granulated White Sugar
For the Cheesecake Filling:
- 8 oz Full-Fat Cream Cheese, softened to room temperature
- ½ Cup Powdered (Confectioners’) Sugar
- 3 Tbsp Instant Cheesecake Pudding Mix
- 1 tsp Pure Vanilla Extract
- Juice of ½ Fresh Lemon
- 1 Cup Heavy Whipping Cream (36% fat or higher)
For the Strawberry Topping:
- ½ Cup Fresh Strawberries, diced or sliced
- Strawberry Glaze (store-bought or homemade), for coating and drizzling
Equipment You’ll Need
- Medium mixing bowl
- Small bowl
- Pastry brush or spoon (for applying butter)
- Round cookie cutter or small bowl/glass (3¾ to 4-inch diameter)
- Standard 12-cup muffin tin
- Baking sheet or oven rack
- Hand mixer or stand mixer with whisk attachment
- Large mixing bowl
- Piping bag or resealable plastic bag
- Rubber spatula
- Oven preheated to 400°F (200°C)
Detailed Step-by-Step Instructions
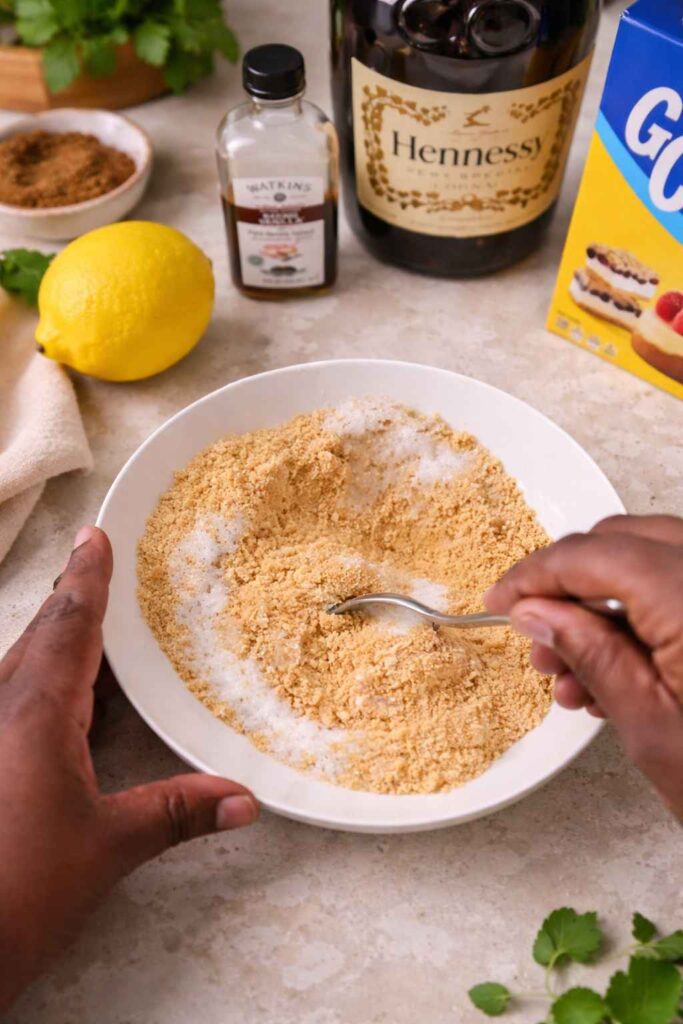

Step 1: Prepare the Graham Cracker Coating
Begin by making the graham cracker coating mixture that will transform your tortilla shells from plain flour rounds into something that tastes and smells unmistakably like a classic cheesecake crust. In a medium mixing bowl, combine 1 cup of finely ground graham cracker crumbs with 1½ tablespoons of granulated white sugar. Using a fork or whisk, mix these two ingredients together thoroughly until the sugar is completely and evenly incorporated throughout the crumbs — you should not see any clumps of sugar sitting separately in the bowl. The fineness of your graham cracker grind matters here: if the crumbs are too coarse, they won’t adhere well to the butter-coated tortilla and will fall off during baking, leaving bare patches on your shell. For best results, process the graham crackers in a food processor until the texture resembles fine, uniform sand. Set this mixture aside in a wide, flat-bottomed bowl or plate — you’ll want enough surface area to easily press the tortilla circles into the coating from both sides.
Step 2: Cut the Tortilla Circles
Take your large flour tortillas and, using a 3¾ to 4-inch circular cookie cutter, a sharp-edged metal ring mold, or even the rim of a small bowl or drinking glass as a guide, cut out circular portions from each tortilla. Press the cutter down firmly and twist slightly to ensure a clean, decisive cut through the dough. From each large fajita-style tortilla you should be able to cut two to three circles depending on the tortilla’s diameter, yielding approximately 8 circles total from 4 tortillas. Work efficiently and minimize waste by planning your cuts strategically across the surface of each tortilla before committing. The circular shape is not merely aesthetic — it ensures even cooking on all edges and creates the proper taco-shell curvature once formed in the muffin tin. Stack the cut tortilla circles on a plate and set the remaining scraps aside; they can be baked separately with leftover butter and sugar for a snacker’s treat. Discard or repurpose any uneven or torn pieces.
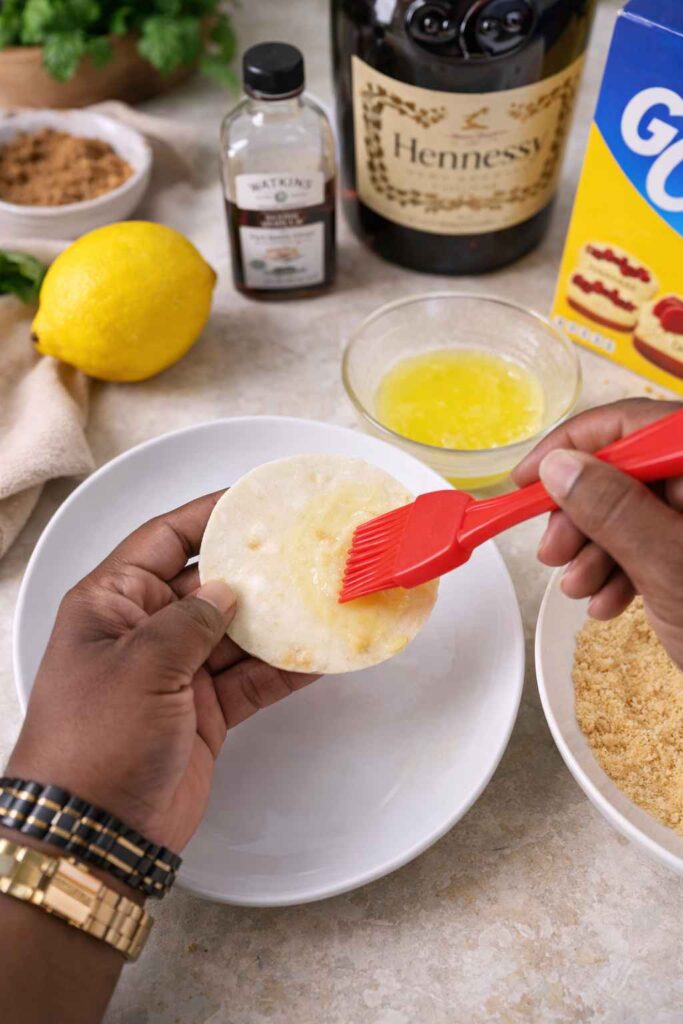
Step 3: Butter the Tortilla Circles
Melt half a stick (4 tablespoons) of unsalted butter in a small saucepan over low heat or in the microwave in 20-second intervals until completely liquid. Using a pastry brush — or the back of a spoon if a brush is unavailable — coat each tortilla circle generously and evenly with the melted butter on both sides. Do not be shy with this step: the butter serves two critical functions simultaneously. First, it acts as the adhesive that allows the graham cracker coating to stick to the entire surface of the tortilla without falling off during baking. Second, it conducts heat during baking, promoting even, uniform browning and crispness across both faces of the shell. Any unbuttered or under-buttered patches will remain pale and soft after baking, creating weak spots in your finished shell. Brush methodically from the center outward on each side and hold the circle up to the light briefly to ensure you have full, glistening coverage.
Step 4: Coat in the Graham Cracker Mixture
Working one circle at a time, press each buttered tortilla firmly and decisively into your graham cracker and sugar mixture. Lay the circle flat on top of the mixture, press down with your palm for 2–3 seconds, then flip and repeat on the other side. After flipping, press once more and gently pat the edges into any remaining crumbs to ensure full perimeter coverage. Lift the coated circle and shake it very gently to dislodge any loose crumbs that haven’t adhered. The finished circle should be uniformly coated on both sides with a sandy, sweet layer of graham cracker crumbs with no bare patches of tortilla visible. Repeat this process for all 8 circles, pressing the remaining crumbs into any subsequent circles that need a little extra coating. If you run low on the coating mixture partway through, simply grind a few more graham crackers and add them to the bowl — it’s better to have slightly too much coating than too little.
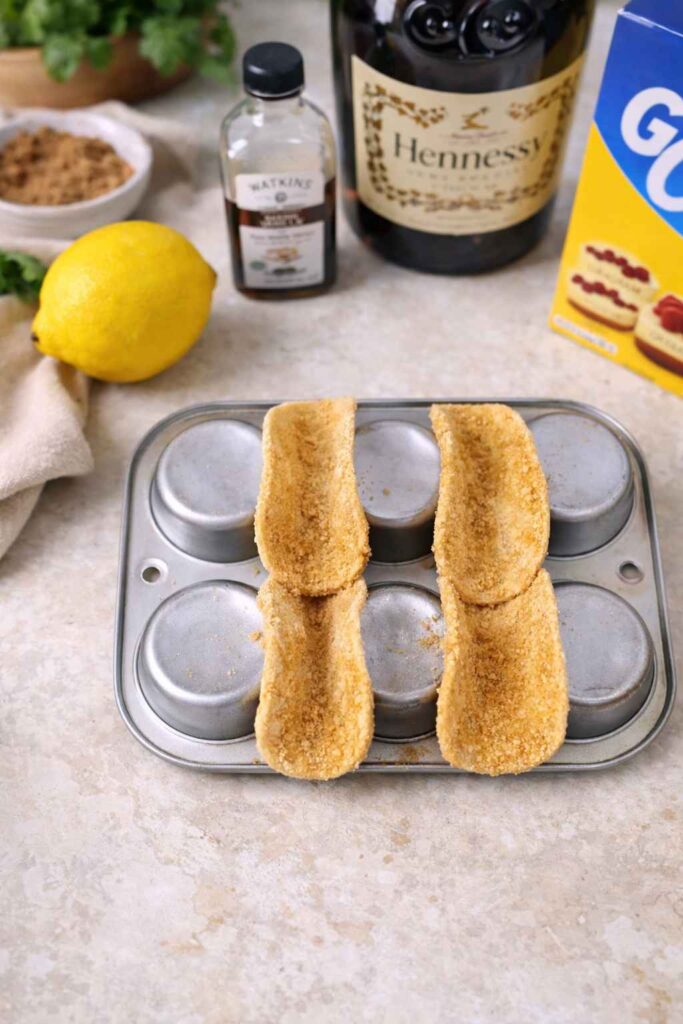
Step 5: Shape and Bake the Taco Shells
This step is the defining kitchen hack that elevates this recipe from a flat, mediocre round to a proper taco vessel. Take a standard 12-cup muffin tin and flip it completely upside down on a baking sheet so that the raised bottoms of the muffin cups are now pointing upward. Take each graham-cracker-coated tortilla circle and drape it into the channel — the gap between two adjacent upturned muffin cups — pressing gently so the sides of the tortilla fall naturally downward on either side, creating a shallow U-shape or taco shell curve. The upturned cups act as a mold, holding the tortilla in the perfect arc during baking. Nestle each tortilla circle securely into its own channel, ensuring it won’t slip or flatten during baking. You should be able to fit 4 to 6 shells on a single inverted muffin tin. Place the muffin tin carefully into your preheated 400°F (200°C) oven and bake for approximately 11 minutes, checking at the 8-minute mark, until the shells are uniformly deep golden brown, fully rigid, and visibly crisp at the edges. Remove from the oven and allow the shells to cool on the inverted tin for a full 5 minutes before handling. This resting period is non-negotiable — the sugar in the coating needs time to cool and re-solidify into a rigid, glass-like layer that gives the shell its structural integrity.
Step 6: Make the Cheesecake Filling
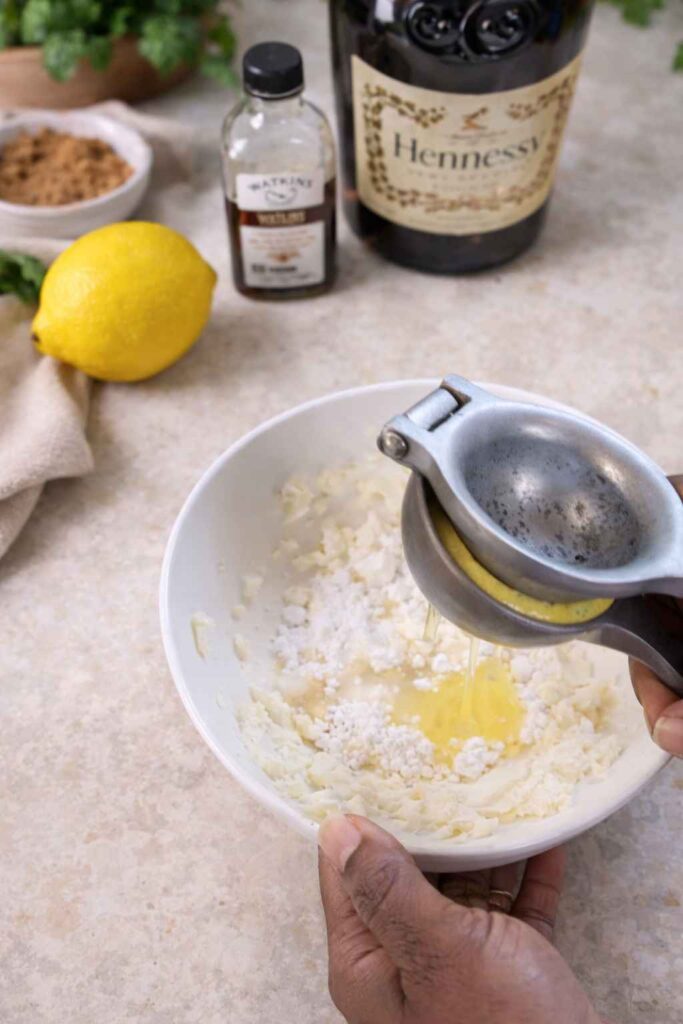
Remove your cream cheese from the refrigerator at least 30 to 45 minutes before you plan to make the filling and allow it to come fully to room temperature. This is not merely a convenience step — cold cream cheese contains fat in a semi-crystalline state that resists smooth incorporation and creates small, stubborn lumps in the finished filling that no amount of mixing will fully eliminate. Room-temperature cream cheese has fat in a fluid, plastic state that beats smoothly and evenly. In a large mixing bowl, use a hand mixer on medium-high speed to beat the softened cream cheese alone for about 60 to 90 seconds until it is completely smooth, lump-free, and slightly fluffy. Add the powdered sugar and beat again on medium speed for another 30 seconds. Add the instant cheesecake pudding mix and beat until fully incorporated. Add the teaspoon of pure vanilla extract, then squeeze in the juice of half a lemon directly into the bowl, catching any seeds with your other hand. Beat briefly to combine all these ingredients into a uniform mixture. The filling at this point should be dense, very smooth, and pleasantly tangy from the lemon and cream cheese combination.
Step 7: Whip in the Heavy Cream
With the hand mixer running on low speed, begin pouring the heavy whipping cream into the cream cheese mixture in a slow, steady stream. Once all the cream has been added, increase the mixer speed to medium-high and whip the entire mixture together continuously. As you whip, you will notice the filling begin to lighten in color, increase significantly in volume, and develop a noticeably fluffier, airier texture. Continue whipping until the filling holds firm, defined stiff peaks — meaning when you lift the beaters out of the bowl, the peaks that form in the filling stand straight up without drooping or curling over. This typically takes 2 to 4 minutes of continuous whipping at medium-high speed depending on the fat content of your cream and the ambient temperature of your kitchen. Be vigilant as you approach stiff peaks: over-whipping cream cheese-based fillings past this stage causes the fat to begin separating, resulting in a grainy, curdled texture that cannot be recovered. Stop the moment you achieve firm, glossy, stable peaks.
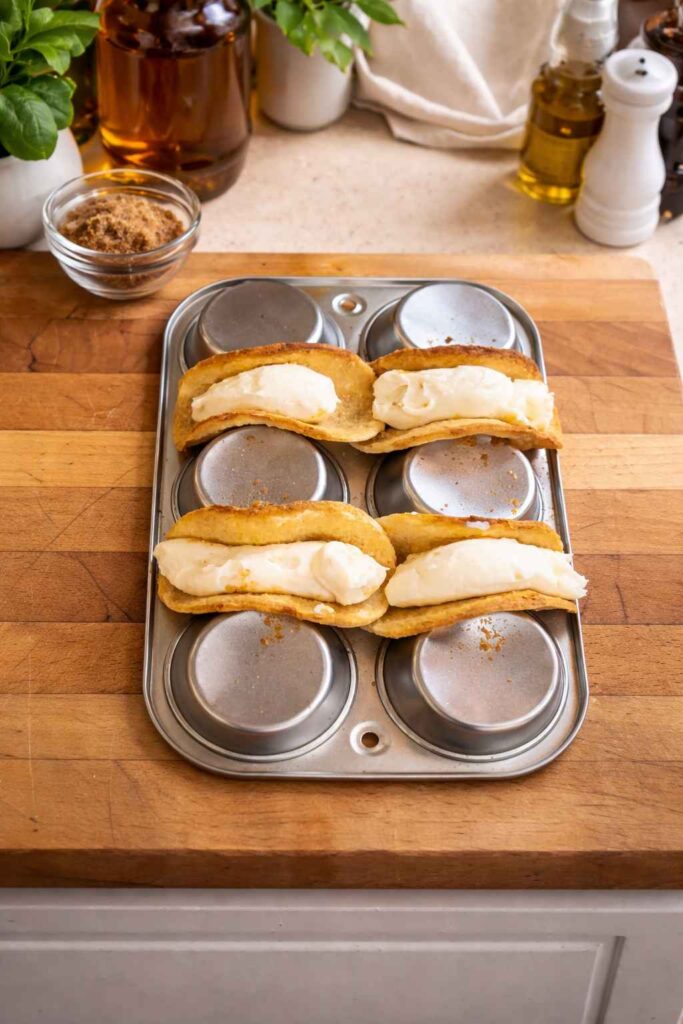
Step 8: Pipe the Filling Into the Shells
Transfer the finished cheesecake filling into a piping bag fitted with a large round or star tip, or alternatively into a clean resealable plastic bag with one bottom corner snipped off at a diagonal to create a makeshift piping tip. The size of the opening you cut will determine the flow rate — a ½-inch opening is ideal for generous, controlled piping. Hold each cooled taco shell firmly in one hand with the opening facing upward. Insert the piping bag tip into one end of the shell and pipe with steady, even pressure as you draw the bag slowly toward the opposite end, filling the entire interior of the shell from bottom to top in a single, continuous movement. Finish with a slight flourish at the end to create a rounded, attractive mound of filling that sits just above the rim of the shell. Repeat for all 8 shells. Do not overfill to the point where the filling spills over the sides, as this makes the shells difficult to handle and the filling will compress the fragile edges. Set all filled shells on a serving plate or tray.
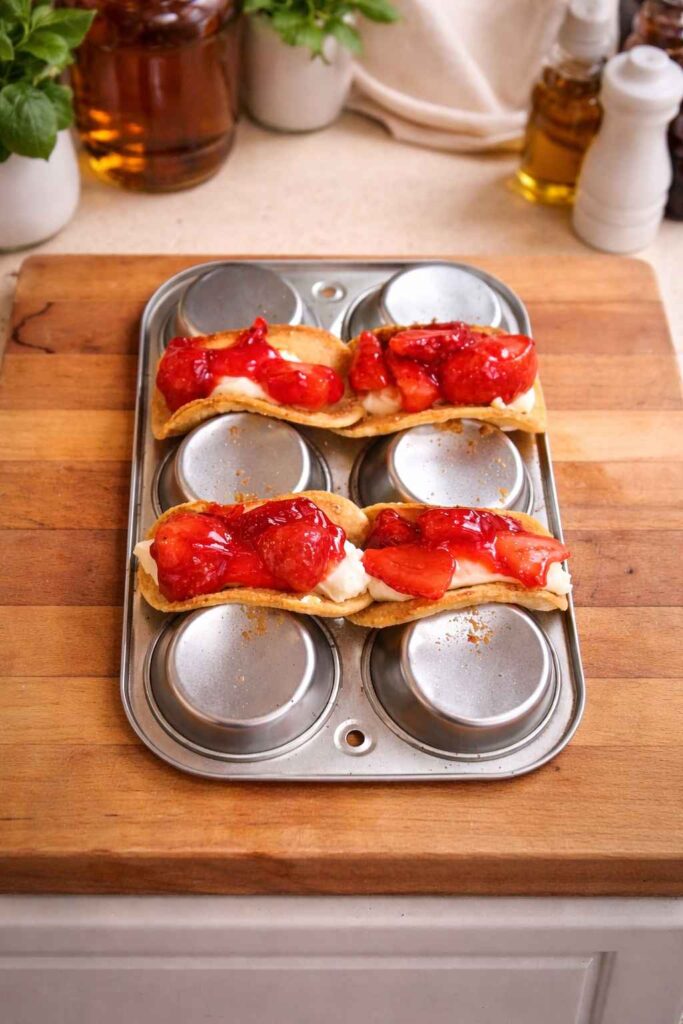
Step 9: Prepare and Add the Strawberry Topping
Wash, hull, and dice or slice your fresh strawberries into pieces small enough to sit neatly on top of the piped filling without rolling off. In a small bowl, toss the strawberry pieces gently with your strawberry glaze — just enough to coat each piece in a thin, glossy layer that adds shine, sweetness, and a jammy depth of flavor to the fresh fruit. Do not over-glaze; you want the natural strawberry color to remain visible beneath a translucent coating, not submerge it in an opaque layer of red gel. Using a small spoon, carefully place and arrange the glazed strawberry pieces along the top of the cheesecake filling on each shell, pressing them very gently into the surface of the cream so they “seat” and don’t slide off when the taco is lifted. Finish with an optional light drizzle of extra glaze over the top for visual drama. Serve immediately for the optimal experience of warm, crunchy shell meeting cold, creamy filling.
Pro Tips for Flawless Results
Graham cracker grind matters: Process until the texture is fine and uniform like sand. Coarse crumbs won’t adhere evenly and will create textural inconsistencies in the shell.
Shell cooling is critical: Never rush the 5-minute post-bake cooling period. The sugar in the coating sets into a rigid layer only as it cools, and handling the shells while hot will cause them to crack or deform.
Serve immediately after assembly: Once the filling is piped into the shells, moisture begins transferring from the cream into the shell, softening it progressively. For maximum crunch, assemble and serve within 15 to 20 minutes.
Room temperature cream cheese is non-negotiable: Set it out 30–45 minutes before you start. There is no shortcut that adequately replaces this step.
Don’t skip the lemon juice: The acidity isn’t just about flavor — it biochemically interacts with the proteins in the cream cheese to produce that essential, distinctive tang that defines cheesecake as a flavor category.
Conclusion
The Strawberry Cheesecake Taco is more than a clever novelty — it is a genuinely well-engineered dessert that rewards both its creator and its recipient with equal generosity. What makes this recipe so enduringly relevant is its perfect alignment of technical accessibility with dramatic visual and flavor payoff. The inverted muffin tin trick, arguably the most ingenious element of the entire process, turns a piece of equipment found in virtually every kitchen into a professional pastry mold. The no-bake cheesecake filling — stabilized by powdered sugar, deepened by instant pudding mix, and brightened by fresh lemon — produces a result that rivals far more labor-intensive pastry shop creations in both flavor and texture. And the fresh glazed strawberries on top provide not just sweetness but the kind of glossy, jewel-toned visual drama that makes this dessert inherently and effortlessly photogenic. From an adaptability standpoint, this recipe is endlessly versatile: swap the strawberries for fresh blueberries, ripe peaches, or a dark chocolate ganache drizzle and you have an entirely different dessert built on the same technical foundation. The core architecture — crunchy shell, creamy filling, bright topping — is a framework that invites creativity. Master this base recipe and you have unlocked an entire genre of dessert taco possibilities. Share it, photograph it, bring it to every gathering you attend — and enjoy every glorious, crunchy, creamy, berry-kissed bite.
🍝 Comfort Meals & Dinner Favorites
Vegan Ramen •
Quick Vegan Lasagna •
Beef Bourguignon •
Creamy Chicken Meatball Orzo •
Sausage Ragu •
Baked French Onion Chicken
🥗 Healthy & Wholesome
Healthy Oatmeal Apple Banana Cake •
Sugar Free Oat Cakes •
Sugar Free Banana Oat Brownies •
Low Carb Cottage Cheese Ice Cream •
Fluffy Keto Cloud Bread
🍰 Desserts & Sweet Treats
Red Velvet Cookies •
Valentine Heart Cookies •
Mini Chocolate Lava Cakes •
No Bake Oreo Delight •
Mirror Glaze Raspberry Mousse Cake
🍹 Cocktails & Drinks
Classic Whiskey Sour •
Moscow Mule •
Old Fashioned •
Manhattan •
Homemade Piña Colada •
Mango Chilli Margarita
🍲 Soups & Cozy Bowls
New England Clam Chowder •
Manhattan Clam Chowder •
Split Pea Soup •
Creamy Asparagus Soup